As mentioned on my IG Stories, today I’ll be sharing with you guys this gorgeous Glitter Red Lips using Pat McGrath Lust 004 Bloodwine Lip Kit. I actually bought this Bloodwine kit from her website, but as it turns out Sephora also carries them now! So, I also went ahead and bought the Everything kit, and now I have 2 Bloodwine kits. Anyways, watch the video below for the tutorial and a quick review on this lip kit. Read more below for more pictures and info regarding the Pat McGrath Lust 004.
Category: Lips
Ombre Liner & Lips using KVD Lolita + Damned
Happy Tuesday! Today’s tutorial is all about this Ombre Liner and Lips look. It’s more of a creative makeup look, but you can always make it more wearable by wearing just the ombre liner or the ombre lips. I think it’s a pretty cool look to try, don’t you think? Anyways, watch the tutorial below & don’t forget to check out the step-by-step pictorial below!
Colourpop Donut Liquid Lipstick Look
Lately I’ve been into a very bright, bold and matte lip look for Spring, and since recently I purchased Colourpop Donut Liquid Lipstick, I decided that I should to a fun look with this lipstick. I really love how the whole look turned out and I hope you guys enjoyed this tutorial as much as I do.
Bright Raspberry Lips Makeup
Spring is just around the corner, and I couldn’t wait! This bright raspberry lips would be just the perfect look to welcome spring, don’t you think? Pair this bright lips with simple eye makeup, for a wearable look.
Date Night Makeup Tutorial
We are back again with Liz, to bring you this easy simple date night makeup tutorial using Tartelette In Bloom Clay palette. I love the lip color on Liz, I think NYX Coppenhagen can be worn in so many different ways, and if you layer them thinly, you’ll get this gorgeous berry shade which compliments her skin really nicely. Anyways, I hope you guys enjoy watching my videos, please subscribe so you can get notified anytime I post a new video!
Valentine’s Day Makeup using UD Gwen Stefani
I’m starting my Valentine’s Day makeup tutorial early this year with a youtube video tutorial. I’m starting my first Valentine’s day makeup series using Urban Decay x Gwen Stefani palette to create this soft pink eye makeup. I paired the pink eye makeup with 2 different lip colors – a soft peachy lips and a bold red lips.
Day to Night Party Makeup Tutorial
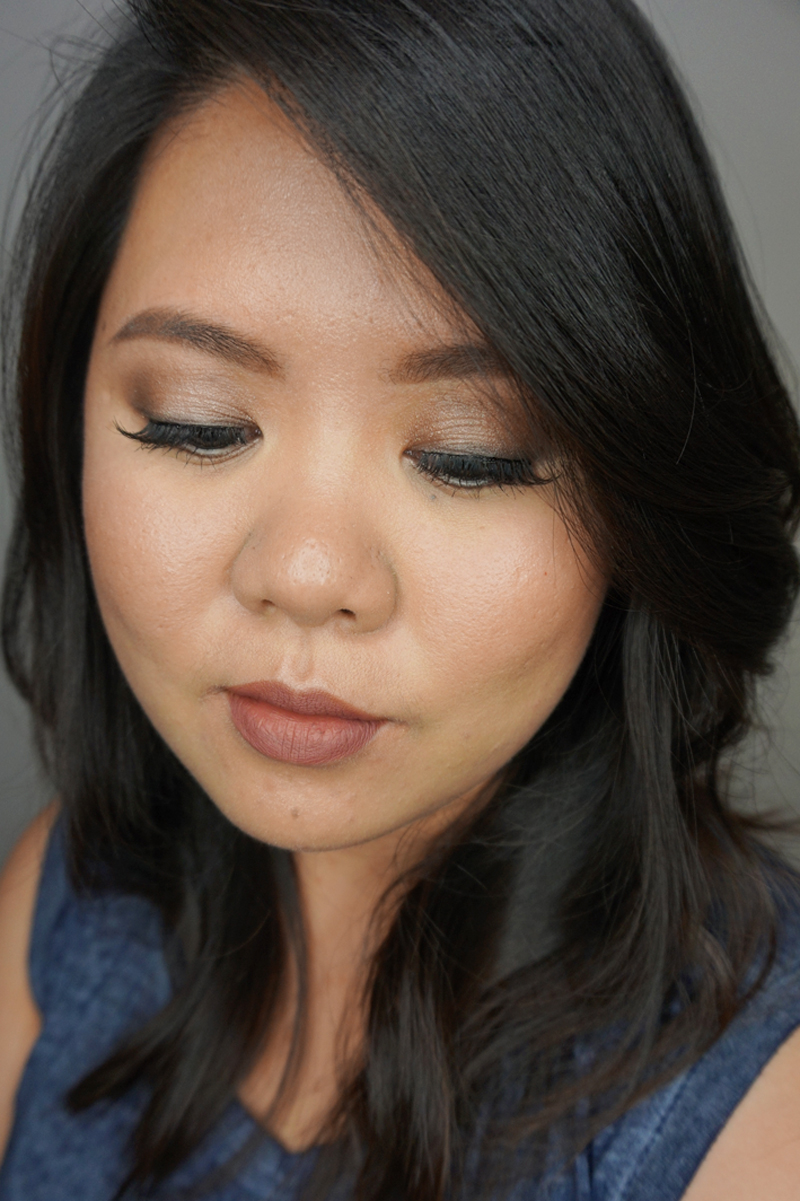
We are almost in mid-December, already?! Anyways, most of you must have a lot of parties and events to attend to, so today’s post is a Day to Night Party Makeup Tutorial! This is one way of changing your day makeup to night makeup quickly, and all you need is a lipstick. You can also add a black eyeliner if you prefer, just like what I did for this post, but if you don’t it’s not a big deal.
For this look, I applied falsies just because my real lashes are not that full. You can skip the falsies altogether, I just do it because it looks better in pictures since my real lashes are not full in volume and not curly.
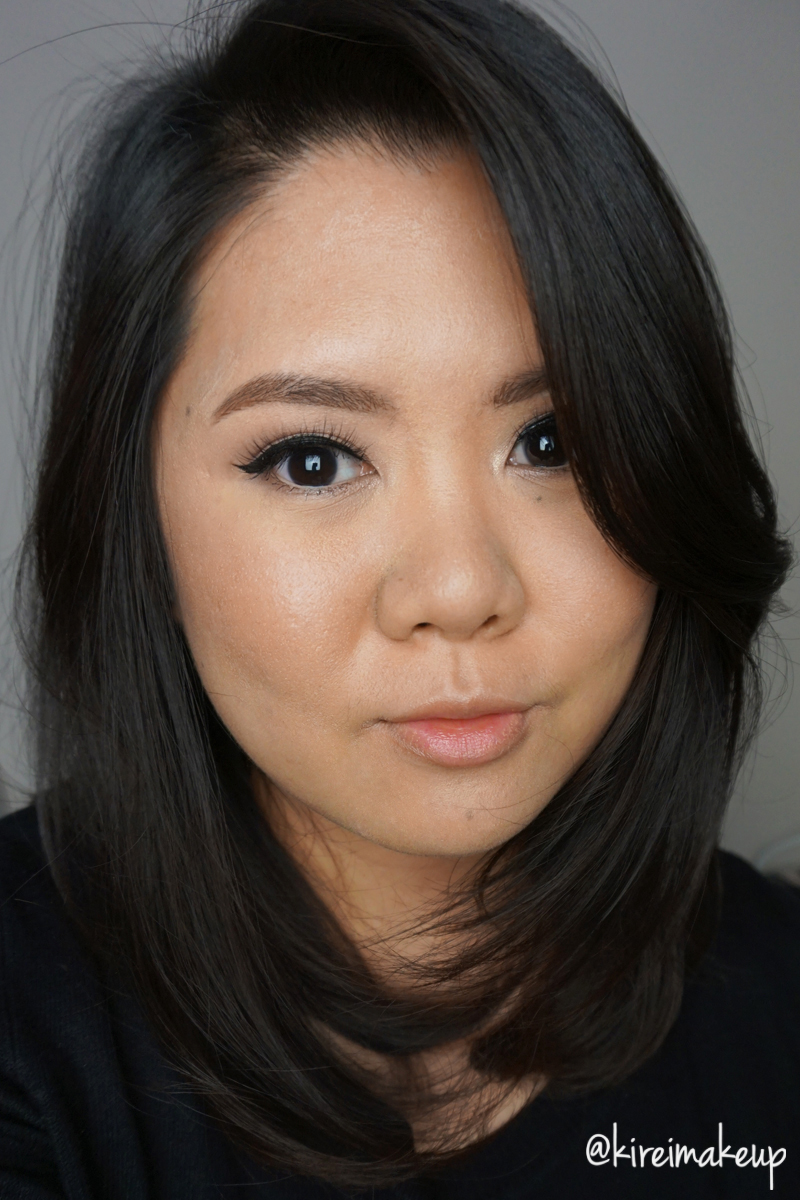
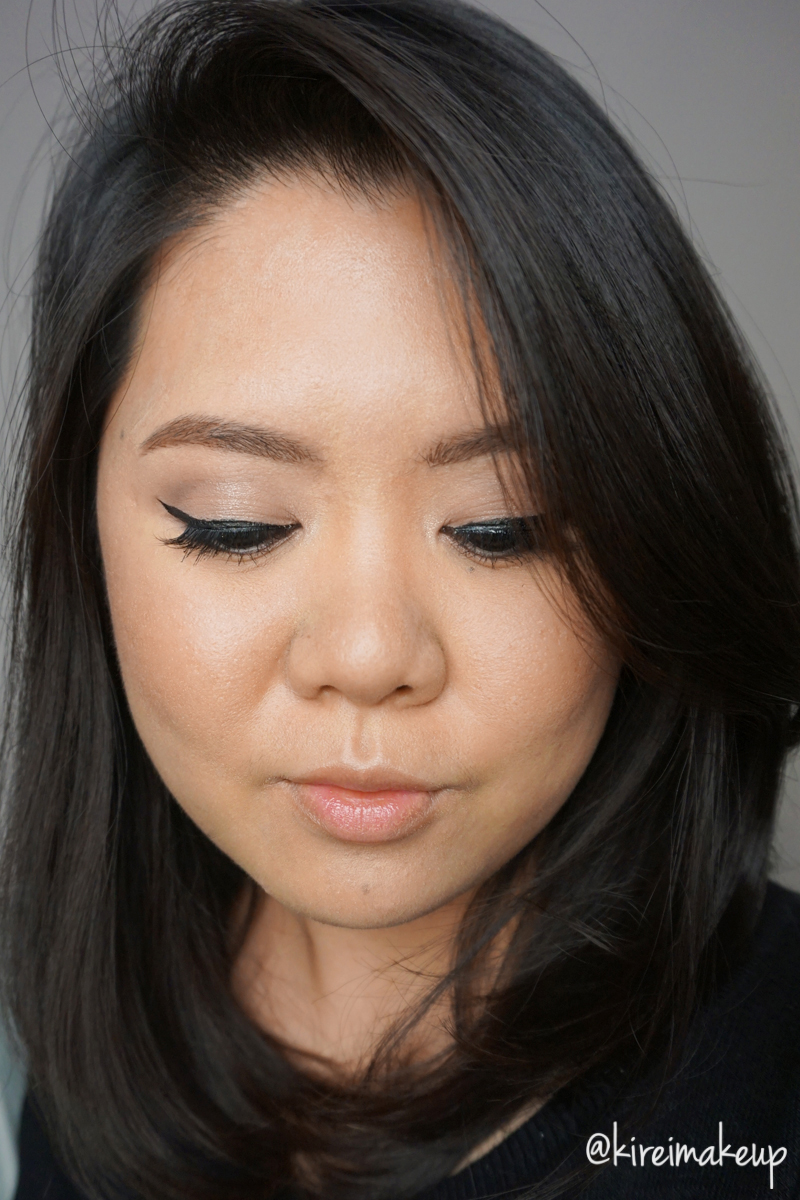
This Day to Night party makeup tutorial is all about creating a strobed-looking skin, nothing too contoured. The eyes are very muted and simple. For the Day look, the eyes are very open and brightened. For the Night look, the focus in on the lips, not too dark but not too bright either.
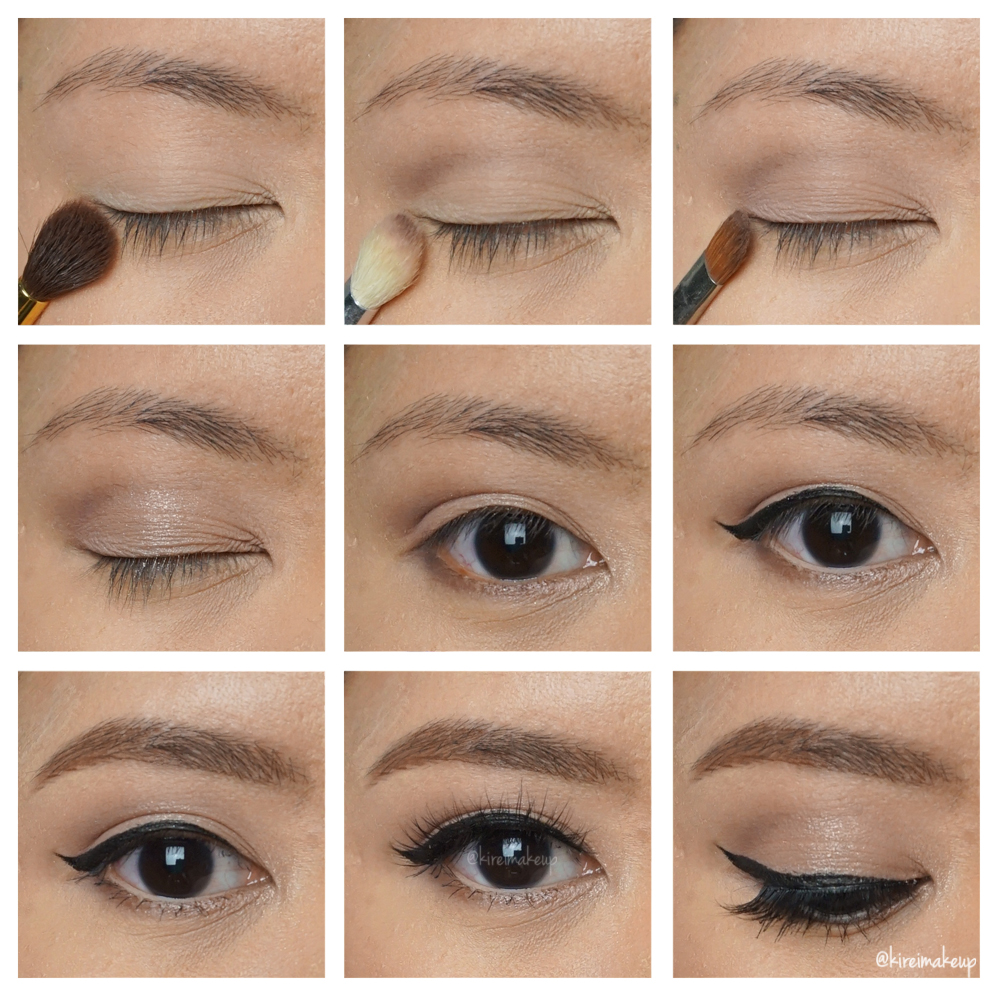
For the eyes and cheeks, I used my new Tarte Light of the Party palette, and can I just say that I’m loving it?! One of the best neutral palette, in my opinion. The colors are very muted and soft, a lot of matte colors too! Absolutely gorgeous. I’ll do the review for this palette soon!
Also, how you liking my luminous/strobed skin? I just bought Becca Backlight Filter primer, and tested it today. Such a gorgeous primer for strobing. I feel like my skin just glow all over! I applied this primer under my eyes, on top of my cheekbones, on the bridge of my nose, & cupid’s bow. I also applied this primer under my NARS foundation so it doesn’t look too dewy.
Products used
Eyes
- Primer – Urban Decay Primer Potion “Original”
- Base – Tarte Light of the Party “Eggnog”
- Crease – Tarte Light of the Party “Mulled Wine”
- Eyelid – Tarte Light of the Party “Rum Pum Plum”
- Center of lid – Tarte Light of the Party “Fizz the Season” (I applied this using my ring finger)
- Inner lower lash line – Tarte Light of the Party “Ring-a-Ling”
- Outer lower lash line – Tarte Light of the Party “Cocoa What Fun”
- Winged liner – Kanebo “Kate Super Sharp eyeliner”
- Waterline – [Day] MAC Chromagraphic eyeliner “NW25/NC30”; [Night] MAC “Smolder” kohl liner
- Mascara – Tarte “Light, Camera and Lashes” mascara
- Brows – Kat Von D Tattoo Brow “Medium Brown”
- Falsies – Esqido Mink Lashes “Oh So Sweet”
Face
- Primer – Becca “Backlight Priming Filter”
- Foundation – NARS Luminous Weightless Foundation “Punjab”
- Concealer – NARS Radiant Creamy concealer “Custard”
- Powder – Laura Mercier “Invisible Loose Powder”
Cheeks – I used Eve Pearl fan brush only for the cheeks, starting with the Bronzer then Blush & lastly the Highlighter.
- Bronzer – Tarte Light of the Party “Social Butterfly”
- Blush – Tarte Light of the Party “Amazed”
- Highlighter – Tarte Light of the Party “Pink Champagne”
Lips
- Day look
- Lipstick – Sephora Collection Oil Infusion Color & Care “Pink Granita”
- Night look
- Lip pencil – MAC “Nightmoth” lip pencil
- Lipstick – MAC “Media” lipstick

Urban Decay Gwen Stefani Tutorial #1
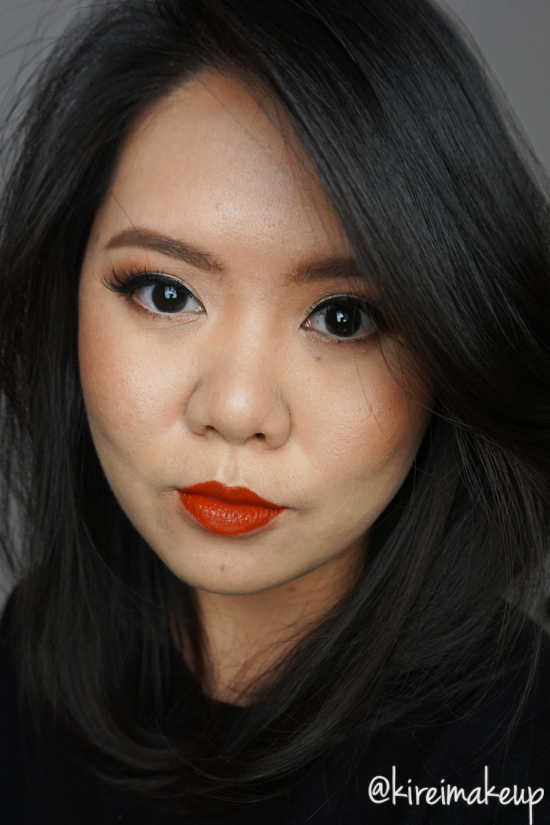
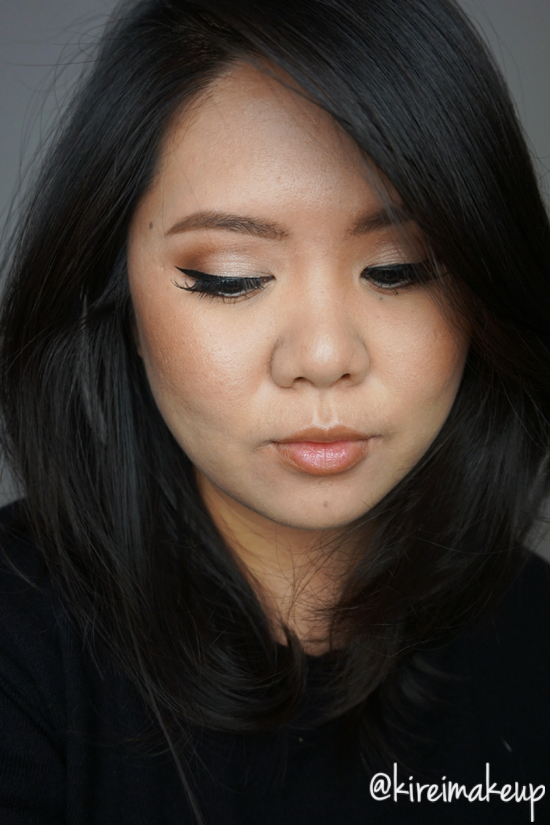
I did promise to post an Urban Decay Gwen Stefani tutorial in my previous post, and here it is! I did this pretty quickly since I was testing several products all at once. It’s very simple and easy to do. I pretty much only used 2 brushes for the eyes – blending and flat eyeshadow brushes, and this is just my regular go-to eye makeup look.
I’ll be posting more Urban Decay Gwen Stefani tutorials, so if you have any requests, feel free to leave a comment below! As you know, Gwen Stefani is no stranger to bold makeup look, so for this tutorial, I’ve decided to pair the eyes with red lips. Gwen Stefani does wear a lot of red lipstick paired with bold winged liner. I did a winged liner, but not as bold as her since I don’t have the “real estate” (aka enough space) on my eyelids to do so.
Check out my VLOG using this palette!
Have you guys check out my UD x Gwen Stefani swatches and first impression yet?! You should!
Products used
Eyes
- Primer – Urban Decay Primer Potion “Anti Aging”
- Base – Urban Decay Gwen Stefani “Skimp”
- Transition –Urban Decay Gwen Stefani Stefani “Anaheim”
- Crease – Urban Decay Gwen Stefani “Zone”
- Outer V/Lower Lash line – Urban Decay Gwen Stefani “Punk”
- Eyelid – Urban Decay Gwen Stefani “Blonde”
- Waterline – MAC Chromagraphic eyeliner NC30
- Winged liner – Kanebo Kate Super Sharp eyeliner
- Mascara – NARS “Audicious” mascara
- Falsies – Ardell “Demi Wispies”
- Brows – Anastasia Brow Pomade “Medium Brown”
Face
- Base – Bobbi Brown “Vitamin Enriched Face Base”
- Foundation – Shu Uemura Skin:Fit foundation
- Concealer – NARS Radiant Creamy Concealer “Custard”
- Setting powder – Laura Mercier “Invisible Loose Powder”
- Nose contour – Make Up Store “Smog” Micro Eyeshadow
Cheeks
- Blush – Eve Pearl “Bronzing Trio”
Lips
- Lip pencil – MAC “Brick” lip pencil
- Lipstick – MAC “Russian Red” lipstick
Kat Von D Mi Vida Loca Remix Tutorial #2
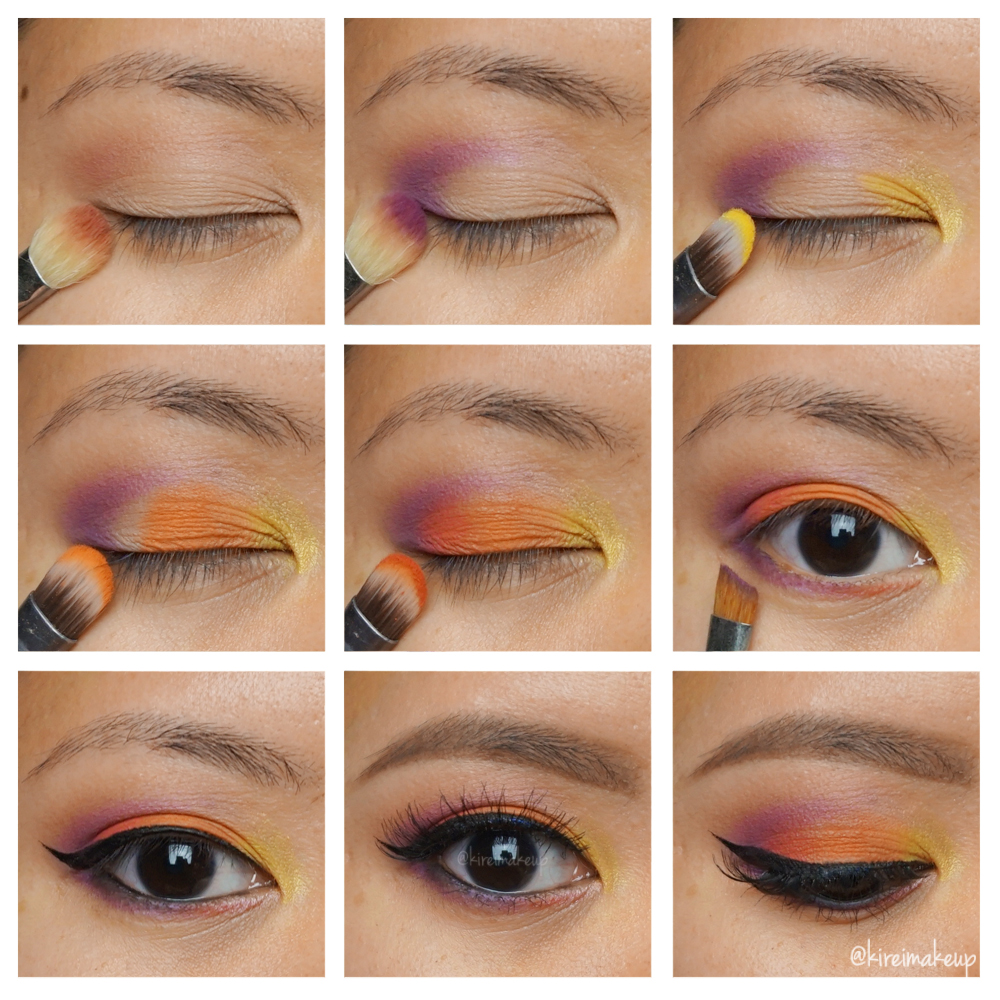
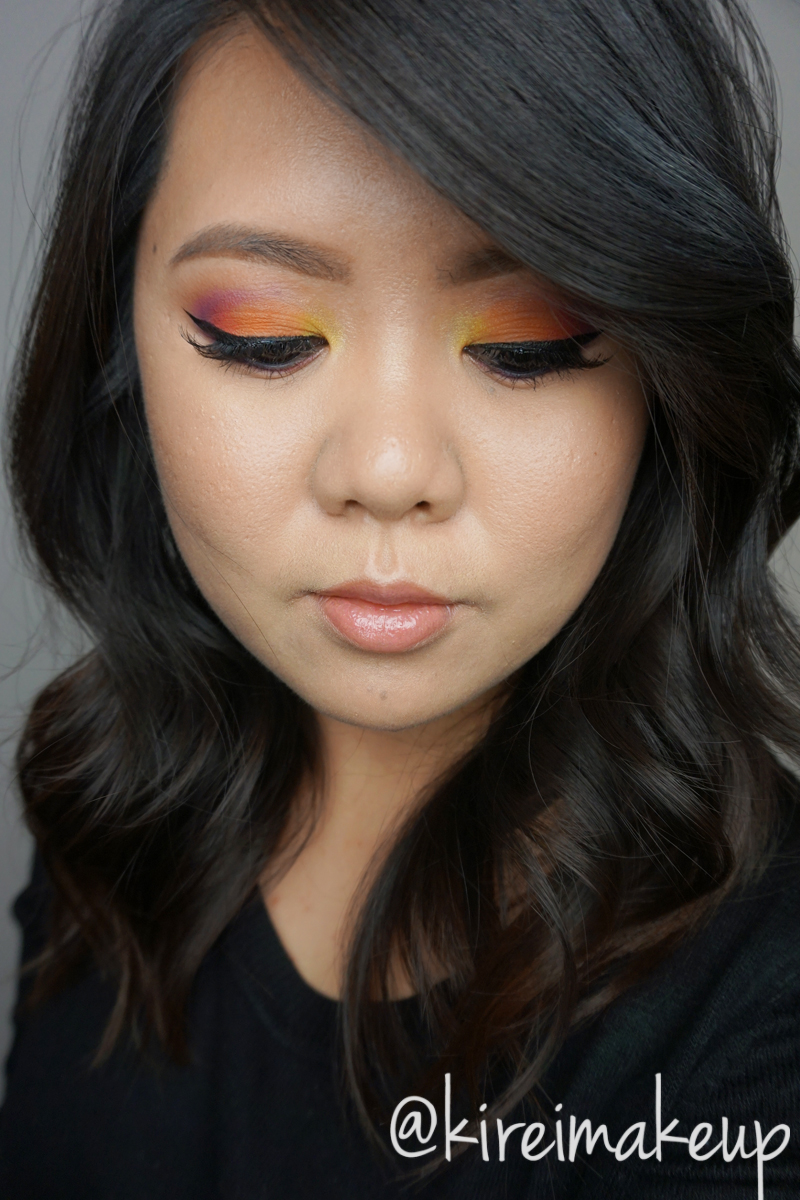
Last week, I did KVD Mi Vida Loca Remix swatches, as well as a tutorial using the greens and blues. This time, I decided to do another Kat Von D Mi Vida Loca Remix tutorial using the warmer shades! Have you guys grab this palette yet? If you haven’t take a look at my swatches’ post! I can assure you, you’ll love this palette! The colors are amazing, and I can’t rave enough about it. If you are a not a fan of colors, take a look at KVD Shade + Light eye palette, perhaps something more neutrals will suit your needs.
Since the eyes are very colorful, I have to pull the eye look together with black eyeliner. I don’t use white or beige on the waterline since it can look too clown-ish, in my opinion. I really like the contrast between the black and the colors, it makes it more wearable. It’s a very festive look, perhaps would be great for Carnivals!
Products used
Eyes
- Primer – Urban Decay Primer Potion “Anti Aging”
- Transition – KVD Mi Vida Loca Remix “Swoon”
- Outer V/Crease – KVD Mi Vida Loca Remix “Anthem”
- Inner corner – KVD Mi Vida Loca Remix “Fran” + “Legend”
- Center lid – KVD Mi Vida Loca Remix “Analogue”
- Outer third – KVD Mi Vida Loca Remix “Destroyer”
- Outer half of lower lash line – KVD Mi Vida Loca Remix “Anthem”
- Inner half of lower lash line – KVD Mi Vida Loca Remix “Destroyer”
- Waterline – L’oreal Voluminous Smoldering eyeliner
- Winged liner – Kat Von D Tattoo Liner “Trooper’
- Brows – Anastasia Brow Wiz “Medium Brown” + Kat Von D Brow Tattoo “Medium”
- Falsies – Ardell “Demi Wispies”
 Face
Face
- Primer – Kat Von D “Lock-it Featherweight” primer
- Foundation – Kat Von D “Lock-it Tattoo Foundation”
- Concealer – NARS Radiant Creamy Concealer “Custard”
- Setting powder – CoverFX setting powder
Cheeks
- Contour – Becca “Lowlight”
- Blush – Smashbox Halo Powder Blush “Passion”
- Highlight – The Balm “Mary-Lou Manizer”
Lips
- Lip color – L’oreal Color Riche Extraordinaire “Blushing Harmony”
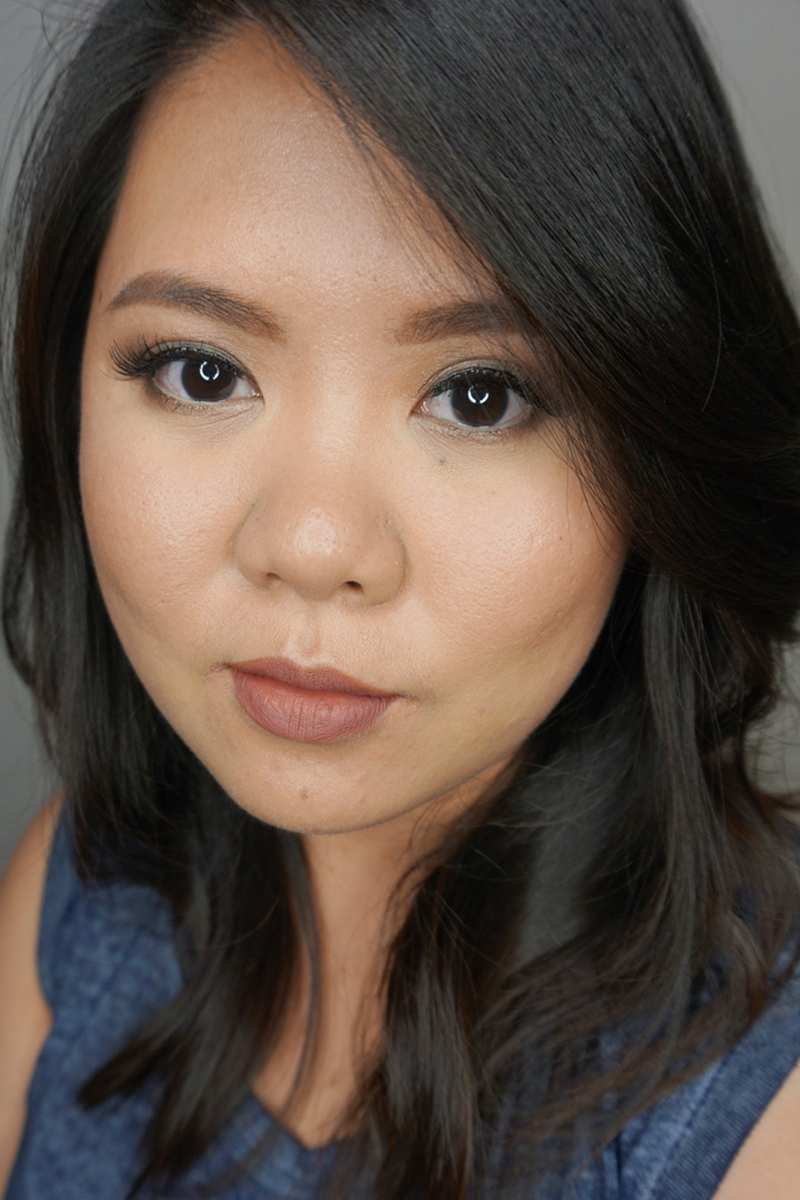
UD Naked Smoky & KVD Lolita
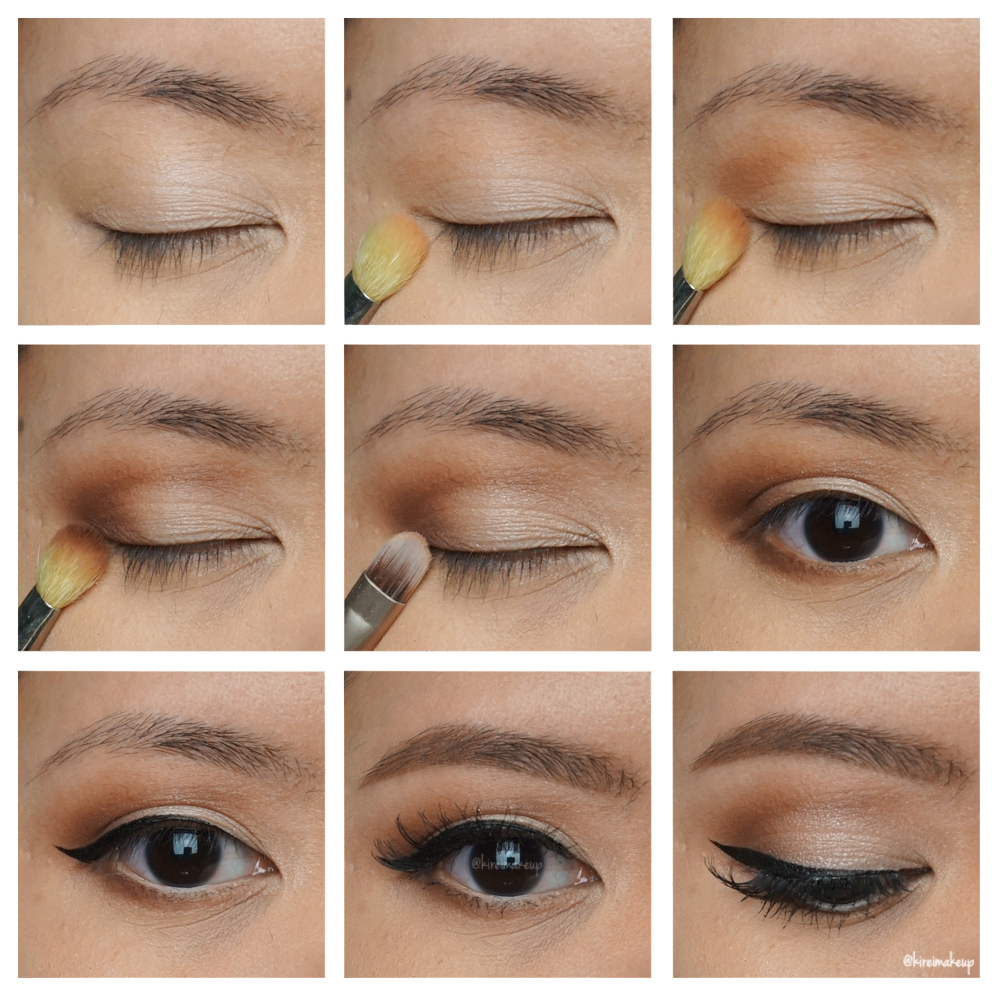
Today, I’m creating a light daytime look using UD Naked Smoky, and I’m pairing it with my new KVD Lolita liquid lipstick. The eyes are very light and simple, and obviously you can skip the false lashes altogether if you’re going to wear it as a daytime makeup.
The lips are quite different than what I’m usually used to. I usually like to pair a peachy or corally lips with this kind of eye look. However, I stepped out of my comfort zone, and decided to pair this with KVD Lolita liquid lipstick, which is a mauve color. I have had mauve lipstick before, but this KVD Lolita is slightly darker than what I’m used to. I didn’t mind it, I think it’s still a very pretty color. Just a word of warning, this liquid lipstick will dry to a darker shade than what you see on the tube.
For other looks using UD Naked Smoky palette please check out my other posts – “Iconic UD Smoky“, “MAC D for Danger“, “Grey“, and lastly my review on this palette “UD Naked Smoky Review“.
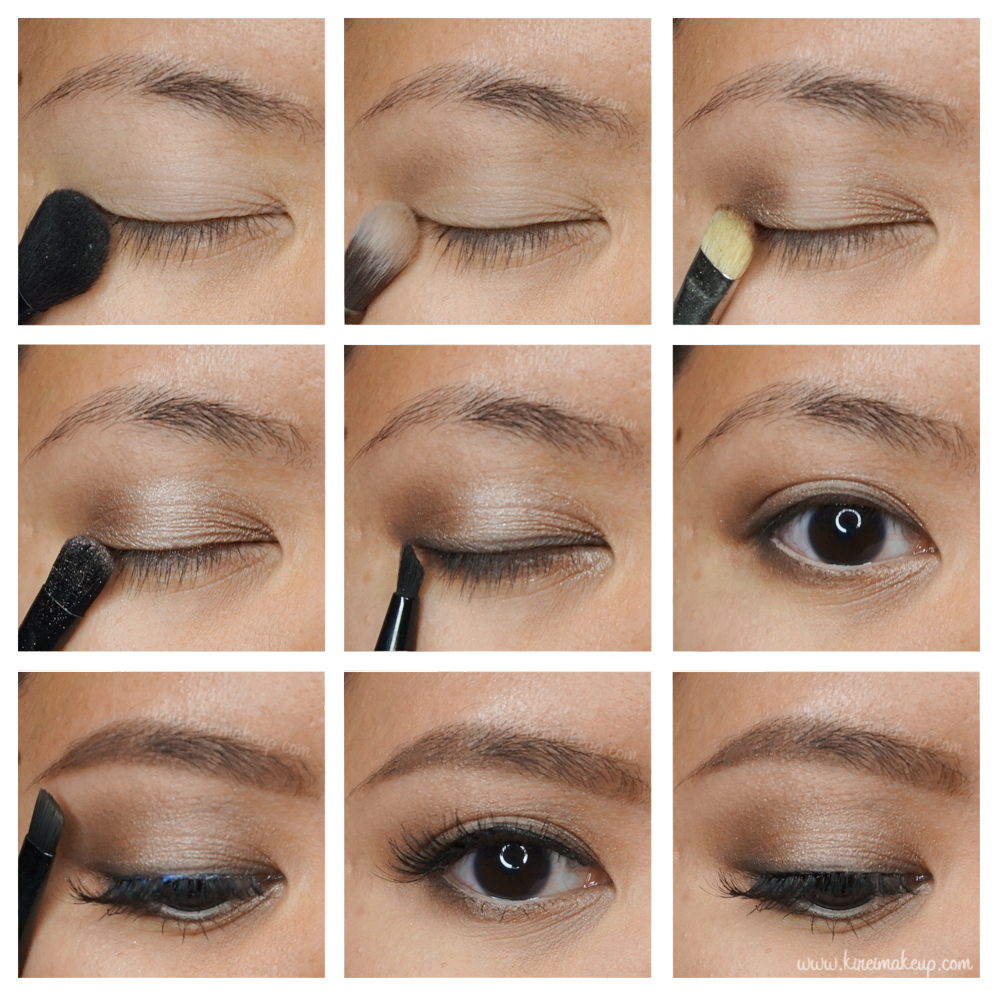
Again, I’m featuring Tweezerman Brush IQ brushes that were sent to me by Preen.me as part of their PreenMeVIP program. The brushes used in this tutorial are: “Blender“, “Shader“, “Line Glider“, and “Brow” brushes. Not in picture: Tweezerman ProMaster lash curler, used to curl the false lashes and my lashes.
Products used
Eyes
- Primer – UD Primer Potion “Original”
- Base – UD Naked Smoky “Combust”
- Crease/lower lash line – UD Naked Smoky “Whiskey”
- Inner/Outer third – UD Naked Smoky “Radar”
- Center of lid – UD Naked Smoky “High”
- Upper lash liner – UD Naked Smoky “Blackmarket”
- Waterline – MAC Chromagraphic pencil liner “NC30”
- Brows – Anastasia Beverly Hills Brow Pomade “Medium Brown”
- Falsies – Ardell falsies “Demi Wispies”
Face
- Foundation – Diorskin Star foundation “31”
- Concealer – Diorskin Star concealer “3”
- Setting powder – Diorskin Nude Air Healthy Glow Invisible Loose Powder “#30″
Cheeks
- Blush – Smashbox Halo Blush Powder “In Bloom”
- Contour – MAC powder “Blunt”
Lips
- Lipstick – Kat Von D “Lolita” liquid lipstick