Winged Eyeliner Tutorial

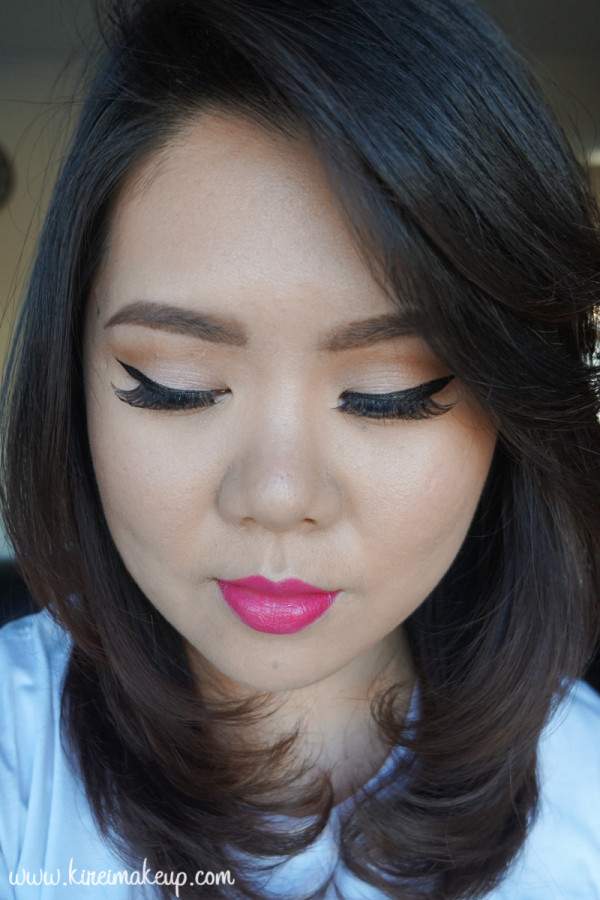
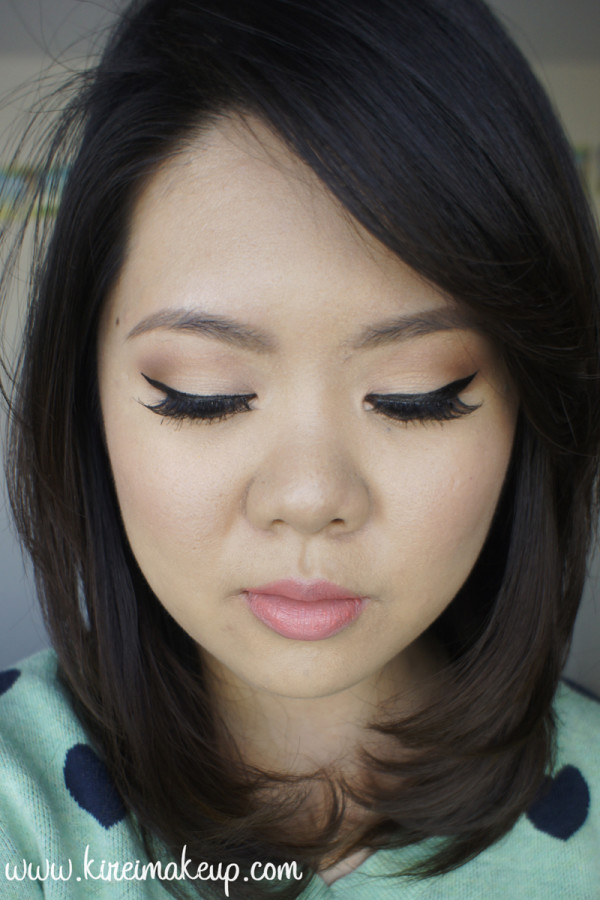
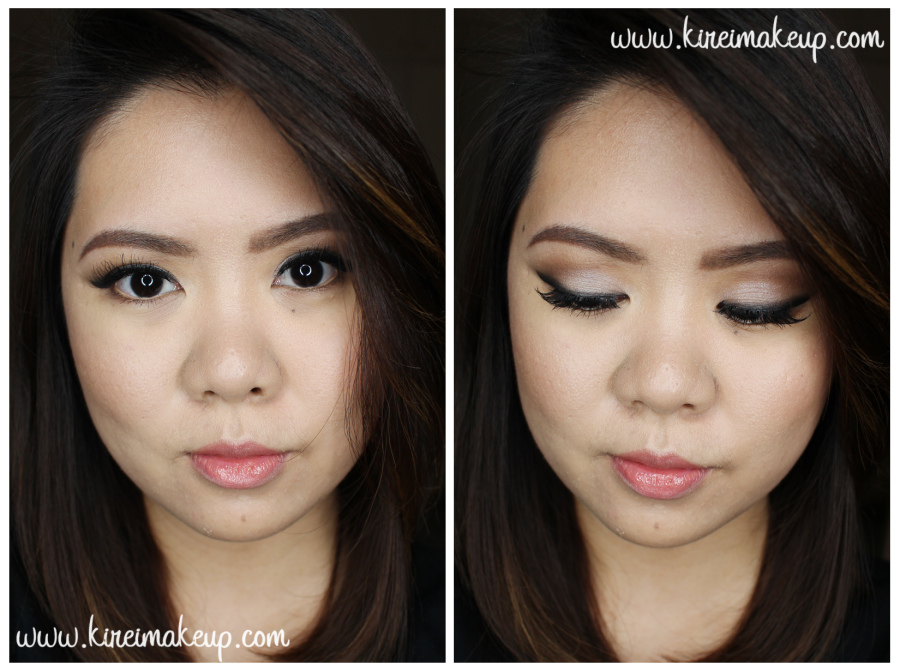
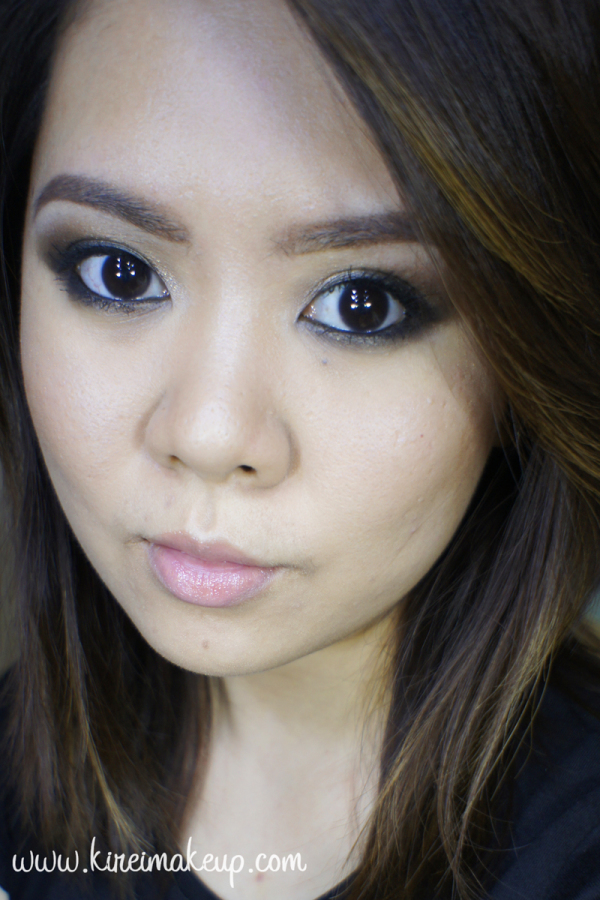
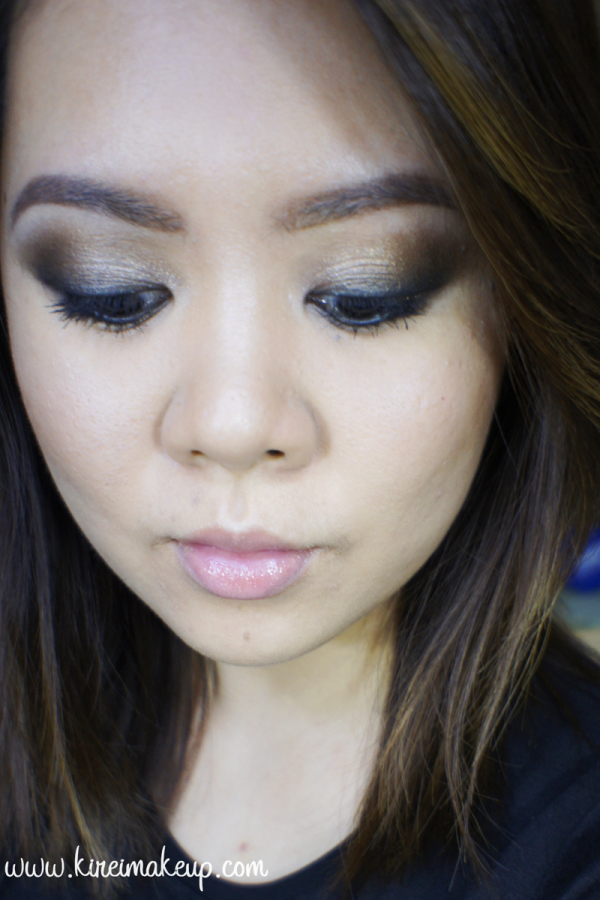
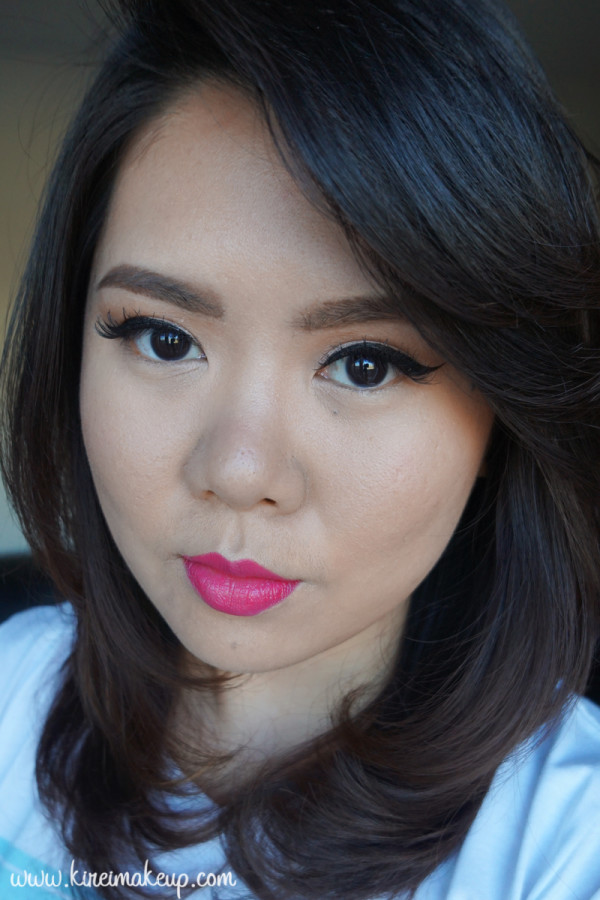
Hello everyone! I’m back with a new tutorial! Since the weather is nice and warm, I wanted to create an everyday Spring Makeup look, and give the new MAC Miley Cyrus Viva Glam lipstick a try. As you know, I’m one to pair very simple eye makeup with bold lips. I usually leave my eyes bare, but once in a while I’ll wear a winged liner. Since, I do get asked to create a winged eyeliner tutorial, I’m going to show you how I do it using a liquid eyeliner.

I’ve done a winged eyeliner tutorial post using gel/cream liner in my other how-to post. Between a liquid and gel/cream liner, at this moment, I prefer a liquid liner. For me, it’s faster, easier and more convenient to use a liquid eyeliner since it comes in a pen-like applicator. There’s no need to have a separate brush, unlike gel/cream liner. However, a liquid eyeliner dries out faster than a cream/gel liner. So, if you do make a mistake, it’s hard to correct it. For beginners, I suggest going with a cream/gel liner. Once you’re comfortable, then advanced to a liquid liner.

The one I’m using for this tutorial is Kat Von D Trooper Tattoo liner. It’s pretty much waterproof, smudge-proof and long lasting. My favorite of all time! Been using it since it was released couple years a go. Absolutely a must-have in your kit!

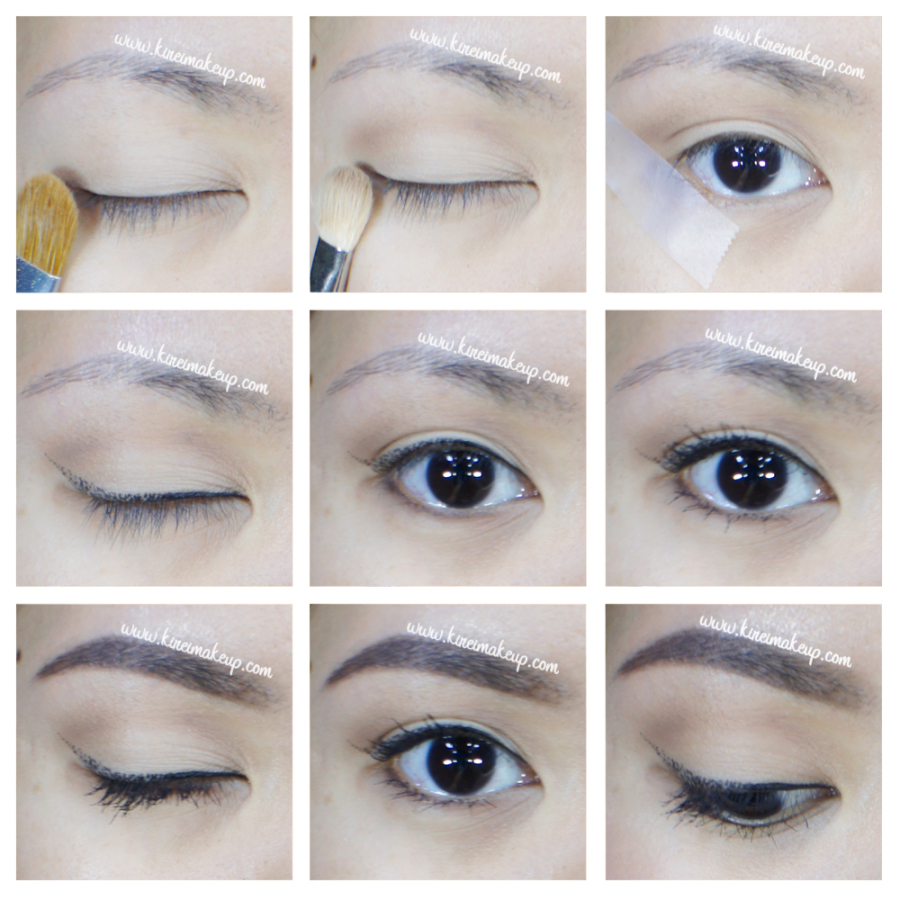
how to create feline flick

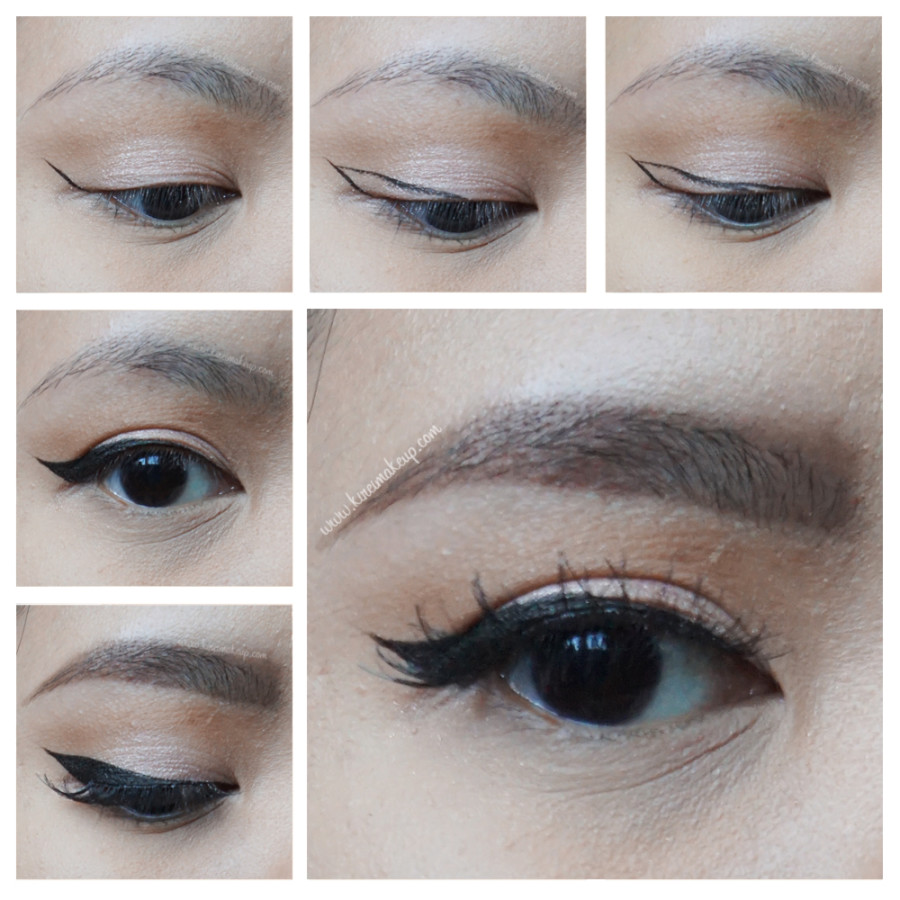
So, I think the pictures are pretty self explanatory. All you have to do is just create the “outline” first, and then fill in the rest. If you aren’t satisfied with the pictures and instructions below, leave comments below or on my Instagram page or Twitter page, and I’ll try my best to answer it. I’ll try to do like more videos in the future once I’m all settled down.

Instructions:

1. Mark where you want your wings to be.

2. Create a diagonal line from the tip of the wing to the center of your lash line.

3. Create a line from the inner corner of your eyelid to the center of the lid.

4. Fill in the “outline”. At this point you can extend your wings, or thicken the line more. I’m satisfied with mine, I like it where the wings are bigger and it gradually tapers towards the inner corner of my eyes.

5. Then, fill in your brows, and add lashes if needed.

mac miley cyrus

Products used

Eyes

  • Primer – Urban Decay Primer Potion “original”
  • Eyelid – Chanel Illusion d’Ombrea “Emerveille”
  • Crease – The Balm Meet Matt(e) Nudes “Matt Rosen”
  • Eyeliner – Kat Von D Tattoo Liner “Trooper”
  • Eyebrows – Anastasia Beverly Hills Dipbrow Pomade “Medium Brown”
  • Falsies – Gwiyomi False lashes #3

Face/Cheeks

  • Foundation – NARS All Day Luminous Weightless foundation “Punjab”
  • Concealer – MAC Pro Longwear concealer “NC25”
  • Highlight – Kat Von D Shade + Light contour palette “Lyric”
  • Contour – Kat Von D Shade + Light contour palette “Sombre”
  • Blush – Smashbox Halo blush powder “In Passion”

Lips

  • Lipstick – MAC Miley Cyrus Viva Glam

mac miley cyrus viva glam


Too Faced Chocolate Bar Tutorial #3

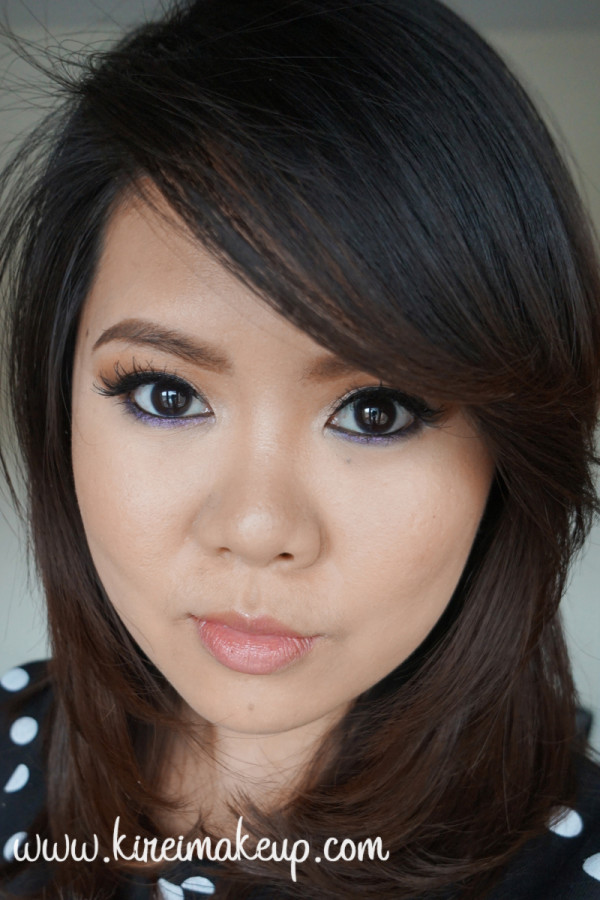
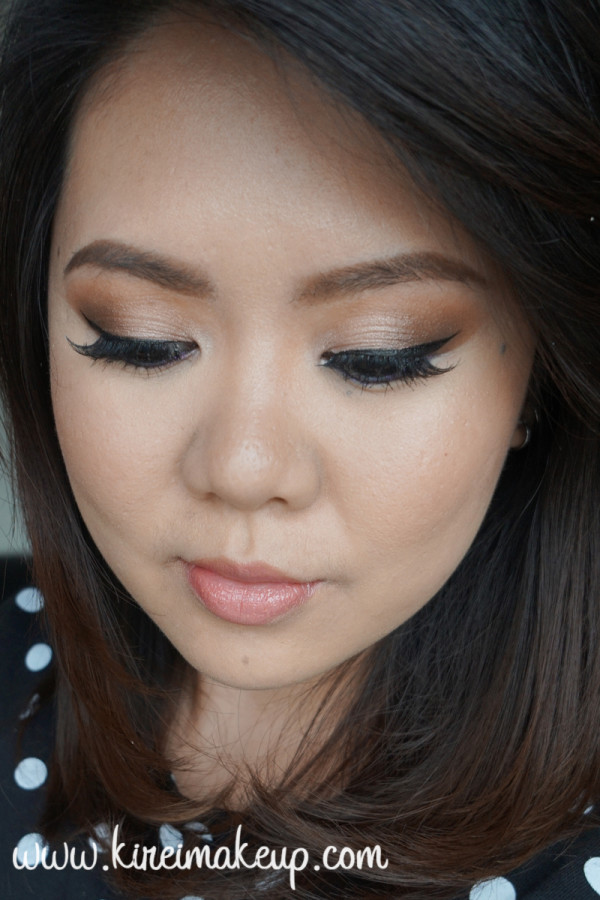
Spring is almost here, and I wanted to do something lighter and with a bit more color. So, for today’s Too Faced Chocolate Bar tutorial, I created a neutral eye makeup with a bit of purple on the bottom lash. This is how I usually wear my makeup if I want a splash of color on my eyes.

I’ve done similar looks on my other tutorials – Kat Von D Monarch tutorial #2 and Cobalt Blue. For other ways to incorporate just a bit of colors into your eye makeup, please check out this other tutorials – Adding Color to eye makeup and a Hint of Mint.

For this look, I specifically wanted to only utilize Too Faced Chocolate Bar palette. I will try to create more looks with this palette, so you can see how versatile this palette is. You can check out my other tutorials using this palette as well – Holiday Makeup #2, Holiday Makeup #3, and 4 bridal makeup looks.

1

I do apologize for the unruly eyebrows. I’m trying to grow them out, but I’ll clean them up before my next tutorial, promise! Anyways, I’d like to mention that the pictures do no justice on how the eyeshadows are in real life. My room was bright when I took the first couple photos, but it get cloudy real fast yesterday. I had to deal with the Sun going in and out, so the last few pictures don’t really show how shiny and awesome the eyeshadows are.

Products used

Eyes

  • Primer – Urban Decay Primer Potion
  • Base – Too Faced Chocolate Bar “White Chocolate
  • Transition – Too Faced Chocolate Bar “Salted Caramel
  • Outer V – Too Faced Chocolate Bar “Triple Fudge
  • Eyelid – Too Faced Chocolate Bar “Marzipan
  • Middle lid – Too Faced Chocolate Bar “Hazelnut
  • Lower lash line – Too Faced Chocolate Bar “Candied Violet
  • Waterline – MAC kohl pencil liner “Smolder”
  • Eyeliner – Kat Von D Tattoo liner “Trooper”
  • EyebrowsAnastasia Beverly Hills Brow Pomade “Medium Brown”
  • False lashes – Gwiyomi false lashes #3

NARS weightless luminous foundation


Face

  • Primer – La Roche Posay Cicaplast Baume B5
  • Foundation – NARS Weightless Luminous Foundation “Punjab”
  • Concealer – MAC Pro Longwear Concealer “NC25”
  • Powder – MUFE HD Pro Finish “118”

Cheeks

  • Contour – MAC Sculpting powder “Sculpt”
  • Cheeks – MAC blush powder “Cubic”
  • Highlight – The Balm Mary-Lou Manizer

* For tutorials on how to do contouring please check out – subtle contouring; cream contouring.

Lips

  • Clinique Chubby Lip Stick “Boutiful Blush”

3


Simple Eyes and Bold Lips Makeup

With the weather getting warmer, and Spring around the corner, I’ve decided to ditch my dark lipsticks yet I couldn’t bring myself to replace the dark lips with something too bright. Not yet. To replace my dark lipsticks, I opt for something that’s in between. With the lips being so strong, I want to keep everything else on the down low. So, enjoy this simple eyes and bold lips makeup!

Oh, I recently bought the Urban Decay Vice 3 palette and used it for the eye makeup on this post. I love how buttery and smooth the eyeshadows are! Have you guys tried the UD Vice 3? What are your thoughts? Let me know by commenting below or over on my social media site (instagram, twitter, facebook)!

natural eye tutorial

Products used

Eyes

  • Primer – Urban Decay Primer Potion
  • Crease – Urban Decay Vice 3 in Downfall
  • Outer V – Urban Decay Vice 3 in Reign
  • Lid – Urban Decay Vice 3 in Last Sin
  • Lower lid – Urban Decay Vice 3 in Reign
  • Eyeliner – Shu Uemura Calligraphy Ink
  • Eyebrows – Anastasia Beverly Hills Brow Pomade in Medium Brown
  • Mascara – Urban Decay Perversion Mascara
  • Falsies – Gwiyomi false lashes #3

everyday red lips tutorial

Face

  • Primer – La Roche Posay Cicaplast Baume B5
  • Foundation – Diorskin Star foundation
  • Concealer – MAC Pro Longwear concealer
  • Powder – Bobbi Brown yellow powder

Cheeks

Lips

  • Liner – MUFE Aqua Lip pencil #11c
  • Lipstick – MUFE Artist Rogue N9


mufe rogue no. 9


Valentine’s Day Soft Makeup

Valentine’s day is just around the corner, and here’s my Valentine’s Day Soft Makeup look! I used my brand new Smashbox Double Exposure Palette for this look, and couple other new products which I just recently bought. Don’t forget to check out my Instagram to see what else I got besides the palette!

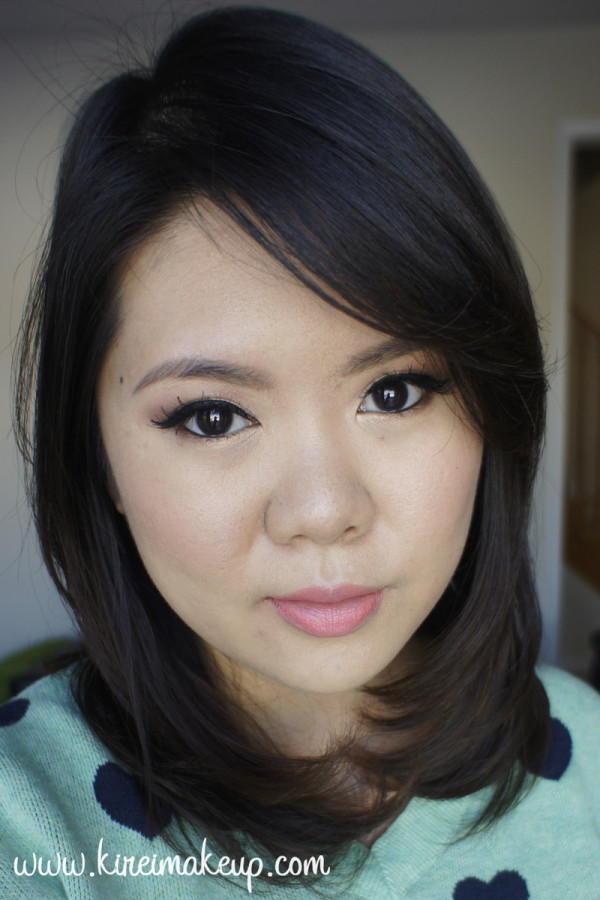
Anyways, for this look, I wanted a soft subtle feminine makeup. The eyes are peachy plum, and defined using black liquid liner. I absolutely love how this turned out! I wore this look out for lunch, and I’m really happy with it. The look isn’t overdone at all, you still look like yourself but slightly better. There’s no bold colors, no overdrawn brows, just a nice pretty simple makeup.

Just FYI, I’m using daylight for my pictures since I don’t have my lights with me. Oh, you guys like my “heart” sweater? I thought I’d wore it for the tutorial since it’s a valentine’s day makeup post.

Check out my other Smashbox Full Exposure palette tutorials, and other Valentine’s day makeup posts!

valentine's day makeupAll products used are listed at the end of the page

How-to:

1. I prepped my eyelids using Urban Decay Primer potion.

2. I applied Fig on my crease using a blending brush (from Smashbox Full Exposure palette).

3. Using the flat eyeshadow brush from the Smashbox Double Exposure palette, I applied Quartz all over my eyelid.

4. I used the angled brush end from the Double Exposure palette, I applied Espresso on the outer V to deepen the crease.

5. I also applied Fig on the lower lash line using the angled brush. I applied Quartz on the inner half of the lower lid.

6. I lined the outer half of my waterline using L’oreal Voluminous Smoldering eyeliner. On my upper lash line, I created a winged liner using Kat Von D Trooper tattoo liner.

7. I curled my lashes, and applied Smashbox Full Exposure mascara on both upper and lower lashes.

8. I applied Gwiyomi False lashes no. 3 to open up my eyes.

9. I filled my brows using Anastasia Brow Wiz in Taupe.

10. On my face, I applied Becca Shimmering Perfector in Moonstone, then I applied Kat Von D Lock-It Tattoo foundation.

11. On my cheeks, I applied NARS Mata Hari blush.

12. I lined and filled my lips using MUFE Aqua lip pencil #18c.

smashbox double exposure palette tutorial

Products used

Eyes

  • Smashbox Double Exposure Palette (crease/lower lash line: Fig, lid/inner corner: Quartz, outer V: Espresso)
  • L’oreal Voluminous Smoldering eyeliner (waterliner)
  • Kat Von D Trooper tattoo liner (winged liner)
  • Smashbox Full Exposure mascara (upper and lower lashes)
  • Gwiyomi False lashes #3
  • Anastasia Beverly Hills Brow Wiz in Taupe

Face

  • Becca Shimmering Skin Perfector in Moonstone (base)
  • Kat Von D Lock-It Tattoo Foundation (foundation)

Cheeks

  • NARS Matahari

Lips

  • Make Up For Ever aqua lip pencil #18C

smashbox double exposure tutorial


Soft Romantic Makeup (Revisited)

I’ve done a lot of UD Naked 3 makeup tutorials, and though most of them are smoky eyes, I do have a few non-smoky eyes tutorials. I was looking back on those tutorials, and I’ve decided to revisit this Soft Romantic Makeup post. I actually liked how I did my makeup in that post, but I felt that I wanted to redo it, and added more intensity to the shadows. Which one do you prefer? This tutorial or the original one? Let me know on the comments below!

I’d also like to mention that I’ve changed the way I filled my brows for this tutorial – it’s thicker, and more natural looking. I think I prefer this brow, even though it might look “less polished” than the “carved out” brows (aka concealer on top and bottom of my brows), I do like how it looks more organic. What do you guys think?

I apologize if the photos are slightly too warm, I didn’t realize my camera’s white balance setting was on the “warming filter” option. I tried to neutralize it using photoshop, but this is all I can do for now (besides trying to neutralize the yellow shade, I did not do anything else – no airbrushing whatsoever). I’ll be more careful next time.

*Check out my other UD NAKED 3 TUTORIALS*

soft smokey eyes tutorial

How-to:

1. I applied MAC Perky paint pot all over my (mobile) eyelid using my ring finger.

2. Using a small blending brush, I applied UD Naked 3 Darkside on the outer V.

3. Using the blending brush that came with the palette, I applied Nooner on the crease. I used this shade to blend out the edge of Darkside.

4. I applied Trick on the eyelid, using the flat eyeshadow brush that came with the palette.

5. Using a small shader brush, I applied Burnout on the inner corner of the lower lid, and Darkside on the outer half.

6. I, very lightly, applied a teeeensy bit of Blackheart right on the roots of the lower lashes (just the outer half).

7. I lined my waterline using MAC Chromagraphic eyeliner in NW25/NC30. Along the upper lash line, I created a winged liner using L’oreal 24H Lacquer Liner and an angled eyeliner brush.

8. I filled my brows using Anastasia Brow Wiz in Taupe and Brunette.

9. Curled my lashes, and applied Gwiyomi False lashes no. 3.

ud naked 3 soft smoky tutorial

10. I applied Benefit Porefessional primer all over my face.

11. While letting the primer set, I applied Bobbi Brown Peach Corrector underneath my eyes (my dark circles are getting prominent lately!)

11. Then, I applied MUFE HD Foundation in 120 using Real Technique Expert Face brush.

12. I applied MAC Pro Longwear Concealer under my eyes, as well as on the bridge of my nose (just between the brows).

13. I also applied L’oreal Visible Lift blush in Rose Gold on my cheeks.

14. I set my face using NARS Setting Powder.

15. On my lips, I applied MAC Please Me lipstick and a few dabs of clear gloss.


Products used

Eyes – MAC Perky paint pot; Urban Decay Naked 3 palette (eyelid: Trick, outer V/lower lashline: Darkside, inner corner of lower lid: Burnout; roots of lashes: Blackheart); MAC Chromagraphic liner NW25/NC30; L’oreal 24H Lacquer Liner in Blackest Black; Anastasia Beverly Hills Brow Wiz in Taupe and Brunette; Gwiyomi False lashes no. 3

Face – Benefit Porefessional primer; MUFE HD Foundation in 120; Bobbi Brown Peach Corrector; MAC Pro Longwear concealer; NARS Setting Powder.

Cheeks – L’oreal Visible Lift Blush in Rose Gold.

Lips – MAC Please Me lipstick; L’occitane clear lip balm.

My Travel Makeup Essentials

HAPPY NEW YEAR! Hello, everyone! I am back! I wish you all a great year ahead of you and may 2015 fulfill all your wishes! Anyways, I’m glad to be back blogging, it’s been a while, but the holiday was awesome! I was quite confused as to which post do I want to publish as my first post of 2015, wasn’t sure if you guys want to see another tutorial, or review and what not. Then, I remembered, I wanted to share with you my travel makeup essentials, since I did just came back from traveling and I do quite travel a lot.

I have to be honest, I am quite lazy when it comes to doing my own makeup, especially when I travel, and I do travel a lot. I try to keep my makeup bag small, and basic. I don’t bother wearing makeup at all when I travel, heck, I barely wear any on a daily basis unless I’ve important meetings/events to attend.

travel makeup essentials

As you can see in the picture above, there’s my makeup bag! I usually do carry this bag with me when I travel, or another makeup pouch, but this year I’ve been using this one. The bag is just the perfect size for me when I travel. It’s not too big, as you can see, it is as wide as my palm. That’s all I need, or even less.

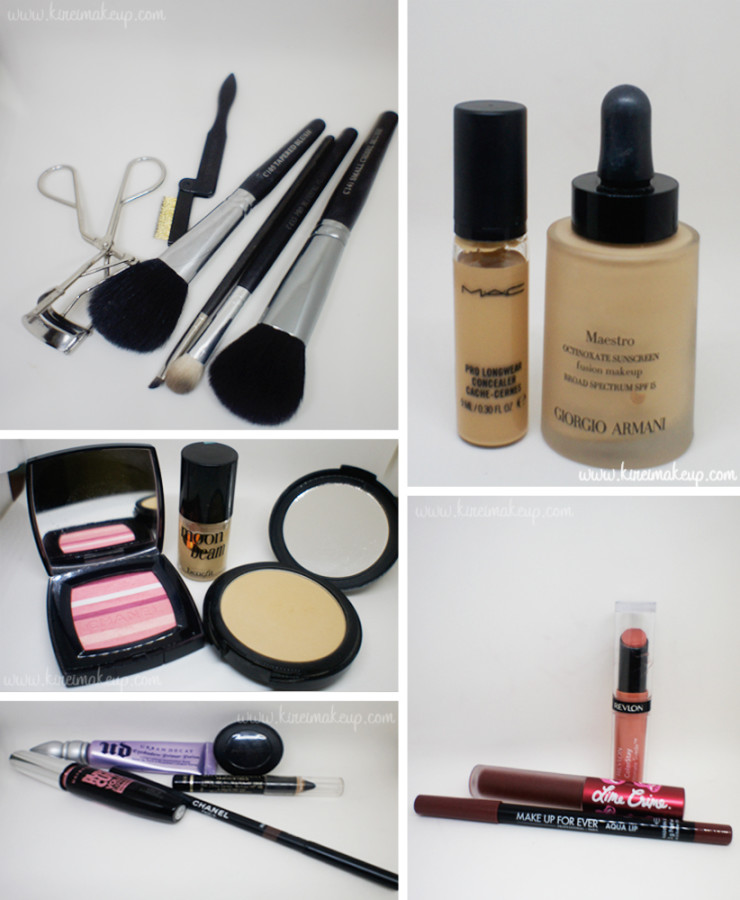
Below, you can find all the makeup I bring with me when I travel. Let me list it for you:

  • Tools – (R-L) Blush brush, blending brush, angled eyeliner brush, powder brush, eyelash comb, and eyelash curler.
  • Base – Giorgio Armani Maestro Foundation, and MAC Pro Longwear Concealer.
  • Cheeks – Chanel Soft Glow Blush (Blush de Horizon), Benefit Moon Beam, and Make Up For Ever Pro Finish powder.
  • Eyes – Urban Decay Primer Potion, MAC Carbon eyeshadow, L’oreal Voluminous Smoldering eyeliner pencil, Chanel Brow Pencil, and Maybelline Volume Express Turbo Boost mascara.
  • Lips – Revlon Colorstay Ultimate Suede lipstick in Socialite, Make Up For Ever Aqua Lip pencil in 11C, and Lime Crime Velvetine lipstick in Wicked.

If you noticed, I don’t have colored eyeshadows/palettes, that’s because I don’t use them. Sometimes I carry my Chanel eyeshadow quad or UD Naked Basic, it will still fit in the bag.

For the brows and lipsticks, I usually change what I bring. For brows, I alternate between Anastasia Brow Wiz, Shu Uemura Hard Formula brow pencil, or my Chanel brow pencil. For the lipsticks, I do bring several shades with me when I travel – most of the time I bring my YSL glossy stain #27, MAC Russian Red, and MAC Diva. However, last month, I recently purchased the MUFE #11c lip pencil, and Lime Crime Wicked, so I carried those when I traveled to Taiwan this Holiday season.
travel makeup essentials

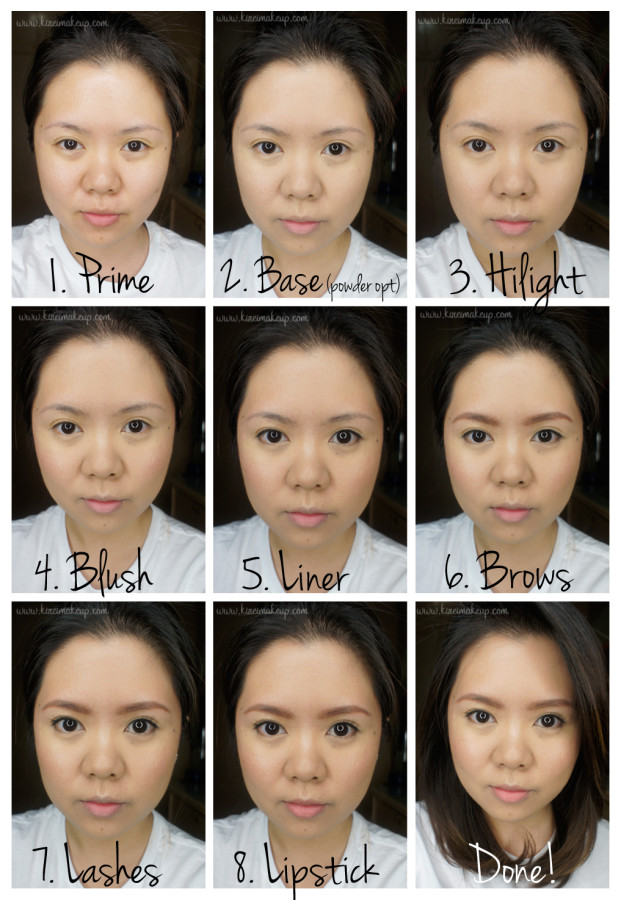
How-to:

1. I prepped my skin by applying a good amount of moisturizer. I do 2 layers of moisturizer, let that sit and soak into my skin. At this point, you can also apply primer to your skin if you’d like. I usually apply MUFE HD Elixir, but I don’t usually bring it when I travel, so I just moisturize.

2. At this moment, I either apply my powder foundation or the liquid foundation. For this tutorial, I applied my Giorgio Armani Maestro Foundation using my fingertips – from the center of my face blending it to the outer edge.

  • The great thing about this foundation is that it’s a serum-type of foundation. Very liquid-y, and what’s even great about it is the fact that it dries out powder. This foundation is perfect for those with oily skin.
  • I also lightly apply concealer on my imperfections – under eyes, blemishes, redness etc if needed. I don’t usually bring concealer, but I had huge zit on the left cheek (right if you’re looking on your screen), which now has dried out.
  • You can lightly powder your face at this step if you don’t have any more “cream” products to be applied to your face.

3. I applied highlighter (yes, I know, I spelt “hilight”…”highlight” was too long to fit into the box) on some parts of my face – bridge of nose, under my eyebrows, cheekbones, and cupid’s bow.

4. Using my blush brush, I applied Chanel Soft Glow blush on my cheeks.

5. I lined my upper lash line, as close to the roots of my lashes as possible. This helps to make the lashes appear fuller.

  • Using an angled eyeliner brush and MAC Carbon, I set the eyeliner along the upper lash line.
  • Using whatever was left on the brush, I ran the liner lightly on the outer half of my lower lash line.

6. I filled my brows using my brow pencil.

  • The Chanel brow pencil does have a reddish undertone, but I’ve already bought it at an airport, and had no way of returning it so I decided to just use it till it’s done. However, as you can see on the final photo, my hair does have some warm brown colors, so it turned out ok.
  • I recommend going for a more taupey shade like the Anastasia Brow Wiz in Taupe or Brunette if you are Brunette.

7. I curled my lashes and applied mascara.

8. Lastly, I applied my peachy nude lipstick and we are done!
makeup for traveling

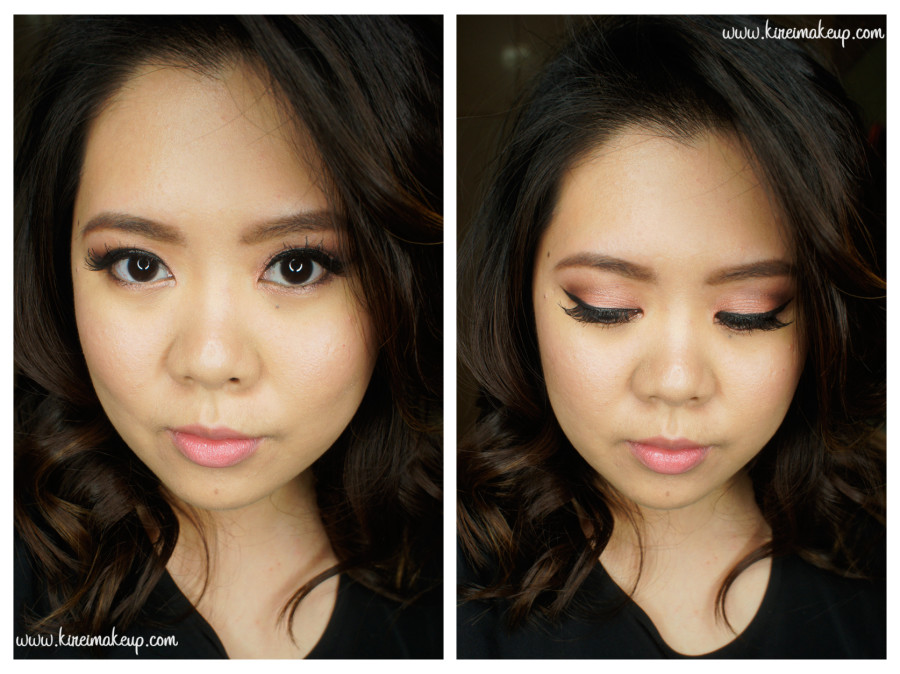
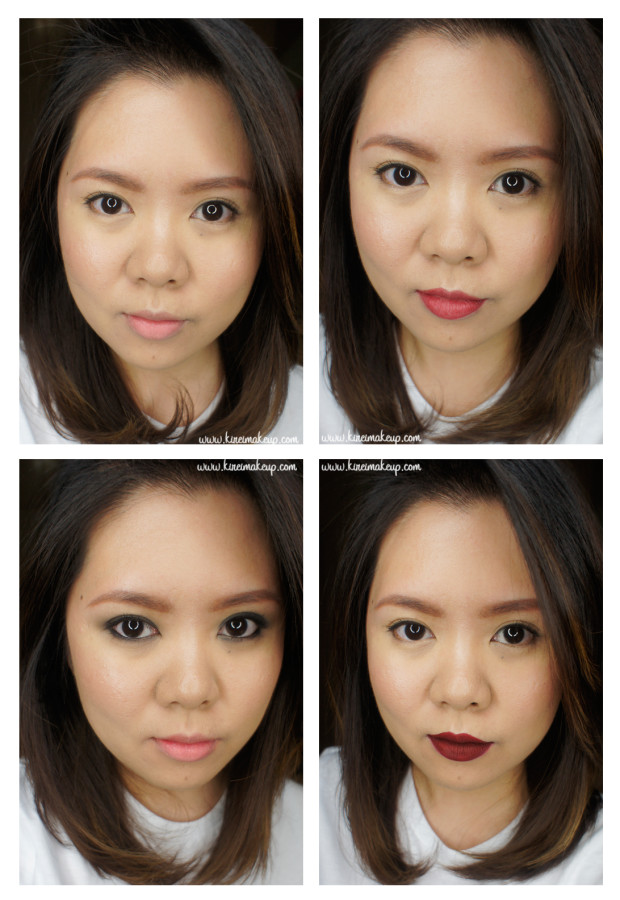
Let me just show you, with whatever I have in that bag, I can create 4 different looks! Actually I can create more, but I decided to just show you what I normally do.

Top left – no-makeup makeup…or as I’d called it “barely there” makeup.

Top right – Added MUFE aqua lip pencil #11c if I have to go for a brunch meeting (yes, somtimes traveling = work)

Bottom left – smoky eyes using eyeliner pencil (all over the lid, blended using fingertips) and MUFE pro finish powder (applied all over the lid on top of the pencil) using blending brush. I’d wear this for a night out if I don’t feel like doing bold lips.

Bottom right – added Lime Crime Velvetines Wicked. This is the look I’d wear for a dinner/night out if I don’t feel like doing smoky eyes.
travel makeup essentials

Anyhow, I hope this was helpful! I think you don’t have to carry a ton of makeup products and brushes when you travel. Find the right products that work for you!
Simple Everyday Makeup

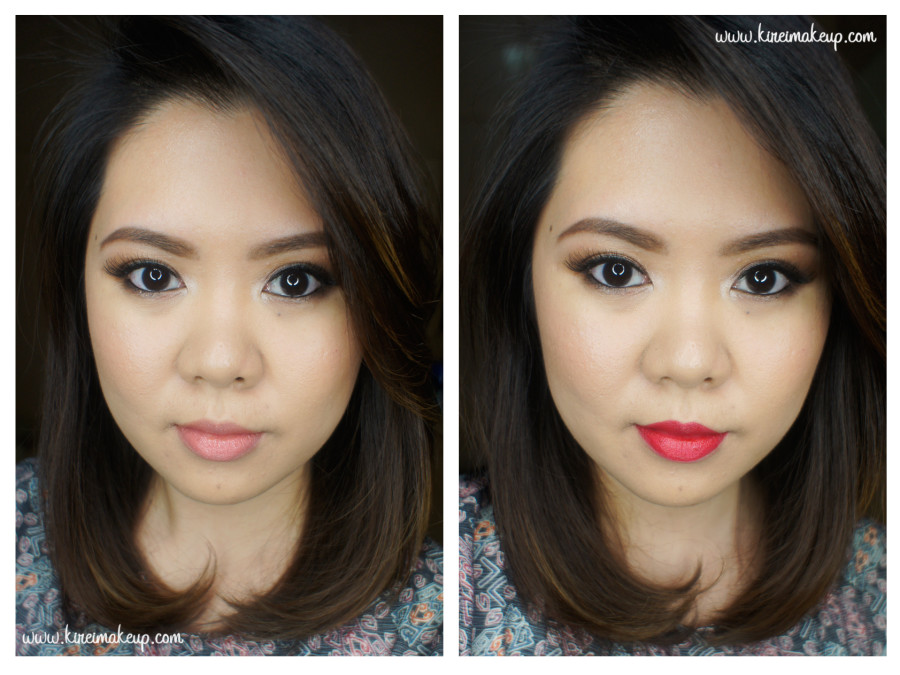
How is everyone’s Monday going? The Holiday is approaching real soon, eh?! I wanted to share with you guys this super easy and simple everyday makeup tutorial which can be worn by everyone, especially those who don’t usually wear much makeup. I did 2 version – one with a simple peachy lips, and another with red lips.

I think this look is great for those who prefer a simple no-fuss makeup. Nothing too dark, nothing too bright, but with a bit of colors. This is also a look for those who prefer earthy brown tones over black. I probably would wear this for a brunch (with peachy lips), or even a dinner party (with red lips).

Eyeshadows used in this tutorial are from the Smashbox Full Exposure Palette.

*You can find other tutorials using this palette right HERE!*

smashbox full exposure makeup tutorial

How-to:

1. I applied MAC Groundwork paint pot on my eyelids using my ring finger.

2. Using a fluffy blending brush, I applied Smashbox Full Exposure palette in M2 above my crease.

3. Using Smashbox bullet crease brush, I applied Smashbox Full Exposure palette in M1 on the outer half of my eyelid.

4. Using a flat eyeshadow brush, I applied S1 on the inner half of the eyelid, blending it towards the outer half.

5. I applied S4 on the inner corner of my eyes using Real Technique shading brush (skip this step if you have wide-set eyes).

6. I lined my waterline and tightline using L’oreal Voluminous Smoldering eyeliner.

7. I also applied M7 along my upper lash line using an angled eyeliner brush. I applied this along the outer half of my lower lash line as well.

8. I curled my lashes and applied Maybelline Express Turbo Boost mascara on my lashes.

9. I filled my brows using Anastasia Beverly Hills Brow Duo Powder.

10. I also applied Mata Nona no. 15 falsies.

nyx monte carlo tutorial

11. On my face, I applied MAC Pro Long-Wear foundation using Real Technique Expert Face brush.

12. Under my eyes and on my blemishes, I applied MAC Pro Long-Wear concealer. I set my face using CoverFX Translucent powder.

13. On my cheeks, I applied Chanel Blush de Horizon.

14a. (left) For the peachy lips, I filled my lips using MAC Spice lip liner. Then I applied YSL Glossy Stain in Peche Cerra-Colla (27).

14b. (right) I removed the previous lip color, and then applied NYX Monte Carlo on my lips.


Products used

Eyes – MAC Groundwork paintpot; Smashbox Full Exposure Palette (crease – M2, outer lid – M1, lid – S1, inner corner – S4, liner – M7); L’oreal Voluminous Smoldering eyeliner; Maybelline Expres Turbo Volume mascara; Anastasia Beverly Hills duo brow powder; Mata Nona falsies no. 15.

Face – MAC Pro Long-Wear foundation NC30; MAC Pro Long-Wear concealer NC25; CoverFX translucent powder.

Cheeks – Chanel Blush de Horizon.

Lips – MAC Spice Lip pencil; YSL Glossy Stain no. 27; NYX Monte Carlo

Smokey Winged Eyeliner

I’ve been wearing trying out a new look last week, and this smokey winged eyeliner look seems to have gotten quite a lot of compliments. I followed quite a few beauty gurus on Instagram and Youtube, and Samantha from Batalash posted a smokey eyeliner video. I loved how it ended up, and I re-created this look. Her technique is slightly different than mine, but the result is not bad I think. I’ve re-done this look when I had to attend the GlamGlow event, and I absolutely love it.

Anyhow, for the rest of the eye makeup, it’s pretty basic nothing fancy. I do not wear this falsies to the GlamGlow event, I actually wore a smaller one. However, for this tutorial I did wear wispy lashes because I wanted to accentuate the wings. Nevertheless, you can opt to wear lashes or not, it’s totally up to you.

You can also pair this look with a simple soft peachy lips like mine or you can pair it with a bold lip color – red, maroon, orange, pink, purple, black etc.

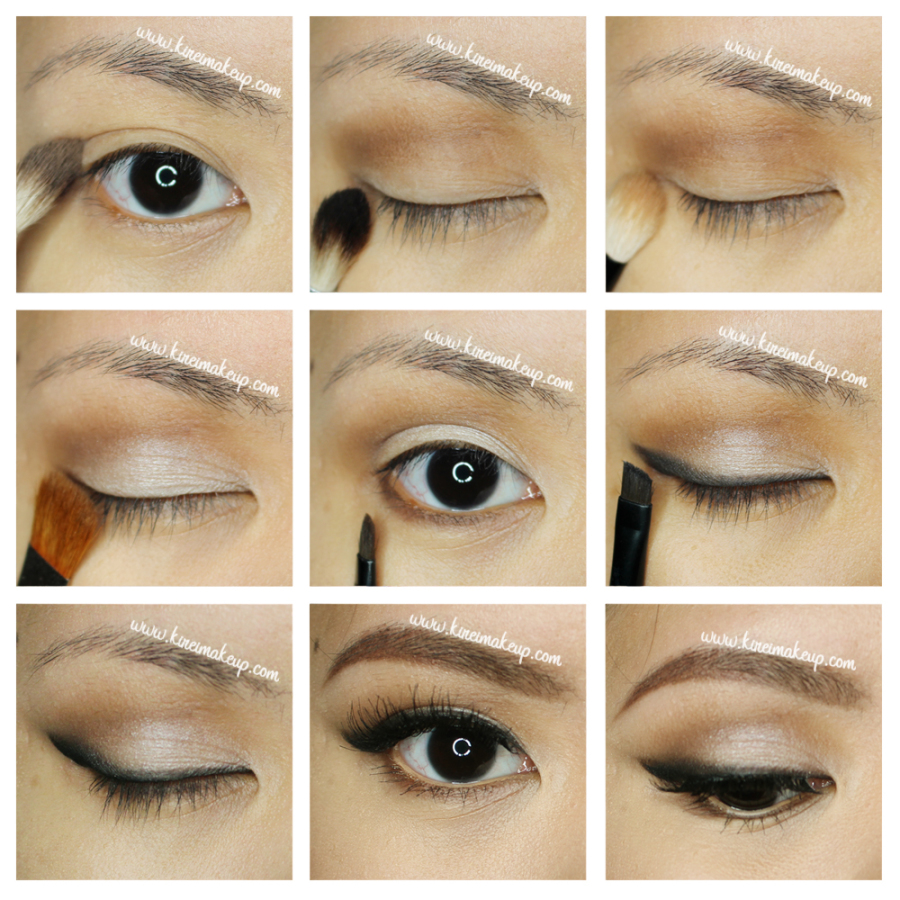
I would like to mention that someone on instagram commented on how she wanted to know how I apply my eyeshadow to my crease. This is how I do it (first photo on top left corner) –

  • When I want to apply my crease color, I looked directly on the mirror and marked where I want the shadow to be.
    • By doing so, I can make sure the eyeshadow color can be seen when my eyes are open, since I’ve quite a hooded lid.
  • Then, I tilted my head back slightly so it looked like I was looking down at the mirror and apply my crease color.

smokey winged liner

List of products used are at the bottom of the page. All eyeshadows used are from Urban Decay Naked Basic palette unless stated otherwise.

My eyelids are prepped with Urban Decay Primer Potion.

How-to:

1. I applied a mix of Urban Decay Faint and Naked 2 on the crease using a crease brush

2. Using a fluffy blending brush, I blended the edge of the crease to avoid harsh line.

3. Using a flat eyeshadow brush, I applied Urban Decay Venus on my eyelid.

4. I lined my lower lash line using Urban Decay Faint using an angled eyebrow brush.

5. Using the same angled eyebrow brush, I applied Urban Decay Crave eyeshadow on the upper lash line creating a winged eyeliner. I focused most of the eyeshadow near the roots of my lashes.

6. I used a pencil brush to smudge the line slightly.

7. Using Kat Von D Trooper eyeliner, I lined just the bottom part of the eyeliner – very close to the roots of the lashes, and the bottom part of the “wing”.

8. I used the same brush and eyeshadow as step 5, and run it through the winged eyeliner again.

9. I filled my brows with Anastasia Beverly Hills Brow Wiz in Taupe and Brunette.

10. I applied Gwiyomi no. 3 false lashes.

11. I applied MAC Chromagraphic eyeliner pencil in NC30.

smokey winged eyeliner

12. For my face, I applied Shu Uemura Oleopact foundation using the sponge that comes with it.

11. I lightly dust my face using MUFE Pro Finish powder in 118.

12. I applied Benefit Hervana on my cheeks.

13. On my lips, I filled it in using L’oreal Color Riche lipliner in Rose, then applied YSL Glossy Stain in Peche Cerra-Colla (27)


Products used

Eyes – Urban Decay Primer Potion (original); Urban Decay Naked Basics (crease: Faint/Naked2, lid: Venus, liner: Crave); Kat Von D Trooper eyeliner; Anastasia Beverly Hills Brow Wiz in Taupe/Brunette; Gwiyomi false lashes no. 3

Face – Shu Uemura Oleopact foundation; MUFE Pro Finish (118)

Cheeks – Benefit Hervana

Lips – L’oreal Color Riche lipliner in Rose; YSL Glossy Stain in Peche Cerra-Colla (27)

Grunge Smokey Eye Tutorial

Ah, yes, the grunge smokey eye look. This has been my go-to makeup for any night-out or parties since it’s so easy and simple. I could go as dark and intense as I want, and I could even go messier if I need to. Smoldering, sexy and effortless! You can achieve this look in less than 10 minutes, seriously!

For this look, you can use black eyeshadow all around, but I like some warmth on my smoky eyes, so I prefer adding non-black shadow. The technique I showed you in the photo below would be great for those who have troubles creating crease to create smoky eyes.

The key to this look is to use an eyeliner that is soft, and doesn’t set easily. You don’t have to be precise for this look, and I suggest skipping the falsies altogether if you want it to look a bit more grunged or rocker chic! No falsies, falsies = glam! Well, of course you can use falsies, just in my opinion once you use falsies it’s no longer grunge and messy. It becomes very glam.

*Don’t forget to check out my other Smoky Eyes tutorial!*

Kat Von D monarch palette tutorial

Eyelids are prepped using Urban Decay Primer Potion original.

How-to:

1. Using L’oreal Voluminous Smoldering eyeliner, I lined my upper lash line. Don’t worry about it being imperfect.

2. I dotted the same eyeliner on the outer part of my eyelid.

3. Using a pencil brush, I lightly smudged the eyeliner before it has the chance to set.

4. I applied Kat Von D Disintegration eyeshadow (from Kat Von D Monarch palette) all over my eyelid all the way up to my crease using a blending brush.

5. I sprayed water on my flat eyeshadow brush, and applied loose pigment from Gosh Tan Mineral Colour pigment on the inner half of my eyelid.

6. Using a smudging brush, I applied Kat Von D Deadhead eyeshadow (from Monarch palette) along my upper lash line, winging it slightly on the outer part.

7. I used the same eyeshadow and brush as no. 6 on the lower lid. I also lined my waterline and tightline using L’oreal Voluminous Smoldering eyeliner.

8. I curled my lashes and applied several coats of MUFE Aqua Smoky Lash mascara on both upper and lower lashes.

9. I filled my brows using Anastasia Brow Wiz in Brunette.

10. I lightly applied Entomology from Kat Von D Monarch palette just above the crease to blend out the eyeshadow a bit more.

grungy smoky eyes

11. On my face, I applied Diorstar foundation using Cover FX cream foundation brush.

12. Under my eyes, I applied MUFE HD concealer.

13. I set my face by dusting Cover FX translucent powder lightly with a large powder brush.

14. I also applied a Smashbox contour powder under my cheekbones and on my temples, and very lightly on the sides of my nose.

15. I applied Benefit Hervana on my cheeks, and The Balm Mary Lou highlighter on top of my cheeks, on the bridge of my nose and on my cupid’s bow.

16. On my lips, I applied a little bit of foundation (from whatever was left on my foundation brush). Then, I added YSL Glossy Stain in Peche Cerra-Colla (27) for that nude peachy lips.

easy grunge smoky eyes

 Products used

Eyes – Urban Decay Primer Potion (original); Kat Von D Monarch palette (Disintegration, Deadhead, Entomology); Gosh Mineral Colour Pigment (Tan); L’oreal Voluminous Smoldering Eyeliner; Make Up For Ever Aqua Smoky Lash; Anastasia Beverly Hills Brow Wiz (Brunette).

Face – Diorskin Star foundation; Make Up For Ever HD Concealer; CoverFX Translucent powder.

Cheeks – Smashbox contour powder; Mary Lou Manizer highlighter; Benefit Hervana blush.

Lips – YSL Glossy Stain in Peche Cerra-Colla (27).

L’oreal Colour Riche Moist Matte in Lincoln Rose

I was watching Kat Von D video tutorial on Sephora’s youtube channel, and I absolutely love how she created the ombre dotted eyeliner, similar to pointilism. I think it’s a pretty cool way to get creative with your eyeliner while keeping it simple. You can pair this dotted eyeliner with a rich-colored lips, like the L‘oreal Colour Riche Moist Matte in Lincoln Rose to brighten up your look.

As promised on my L’oreal Colour Riche Moist Matte swatches, I wanted to show you guys how the lipsticks look on my skin. This time I played around with Lincoln Rose, but I’ll try to work on the other shade next time. I’m quite surprise at how bright the lipstick shade is on my lips. I did not line my lips at all for this tutorial since I want to see how the real color is against my skintone. I think if you have a medium or dark complexion, this would work really well on you. I personally find this shade to be a little bit overpowering.

The shade itself is a very interesting red. It does have quite a warm undertone to it. I think it’s a very pretty shade for summer, or for us in the Tropics where everyday is pretty much summer. Very warm, bright, and tropical. I applies very smoothly on the lips. Although it is a “matte” line, it doesn’t dry out your lips like some other brands “matte” lipsticks are. It is still creamy, while the finish is matte. Overall, I think the L’oreal Colour Riche Matte line is worth a try. I definitely am going to look for another one or two the next time I go to the mall!

how-to dotted winged liner

How-to:

1. I applied a nude eyeshadow on my eyelid, all the way to the brow bone using a flat eyeshadow brush. For this look, I used Entomology from Kat Von D Monarch palette.

2. On the crease, I applied Vanish from Kat Von D monarch palette, using a clean fluffy blending brush.

3. I placed a tape on where I want my “wings” to be as my eyeliner. You can skip this step if you have steady hand.

4. Using Kat Von D Trooper tattoo ink eyeliner, I started drawing a solid line from the inner corner to the middle of my lash line.

5. Then, using the tip of the eyeliner, I started drawing dots from the middle to the end-tip of the eyeliner. I placed more dots on the middle, and it gets more spaced out as it approaches the end of the wing.

6. I ran Vanish slightly on the lower lash line using an angled eyeliner brush.

7. I curled my lashes and applied MUFE Aqua Smoky Lash mascara on both upper and lower lashes.

8. On my brows, I filled it in using Anastasia Brow Wiz in Medium Ash.

L'oreal Colour Riche Matte Rose Bud

9. On my face, I applied Giorgio Armani Maestro foundation.

10. I applied Smashbox Halo blush in In Bloom.

11. On my lips, I applied L’oreal Colour Riche Matte in Lincoln Rose.