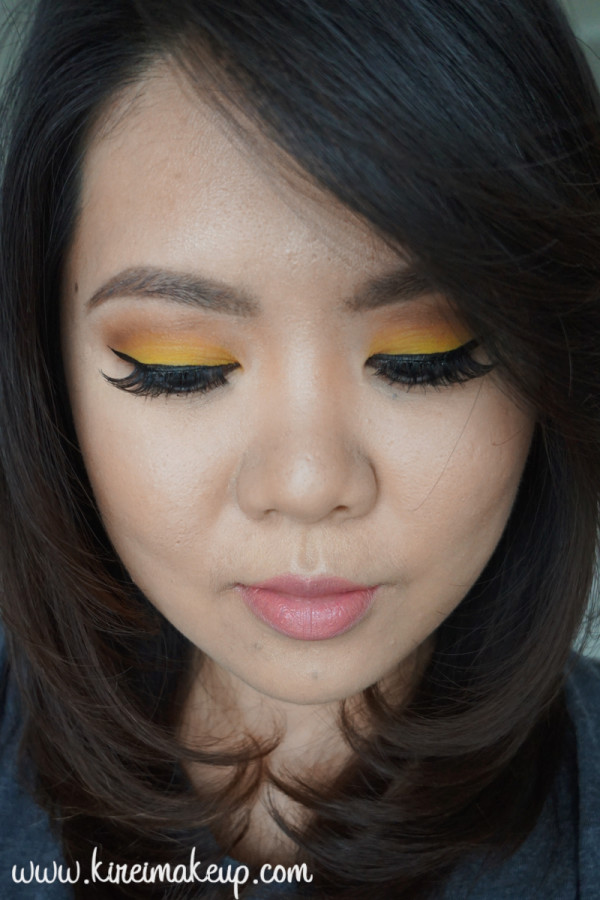
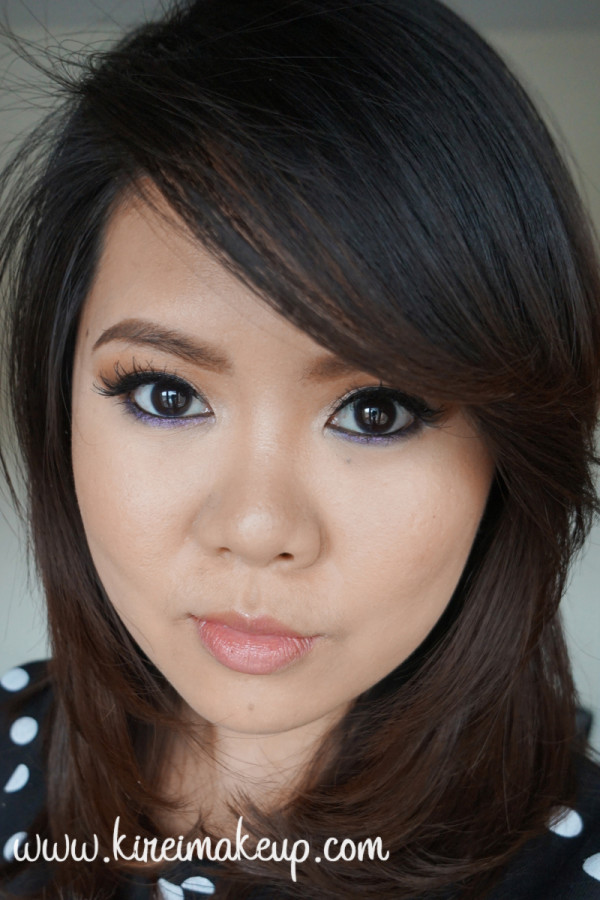
Sleek Makeup Candy Palette

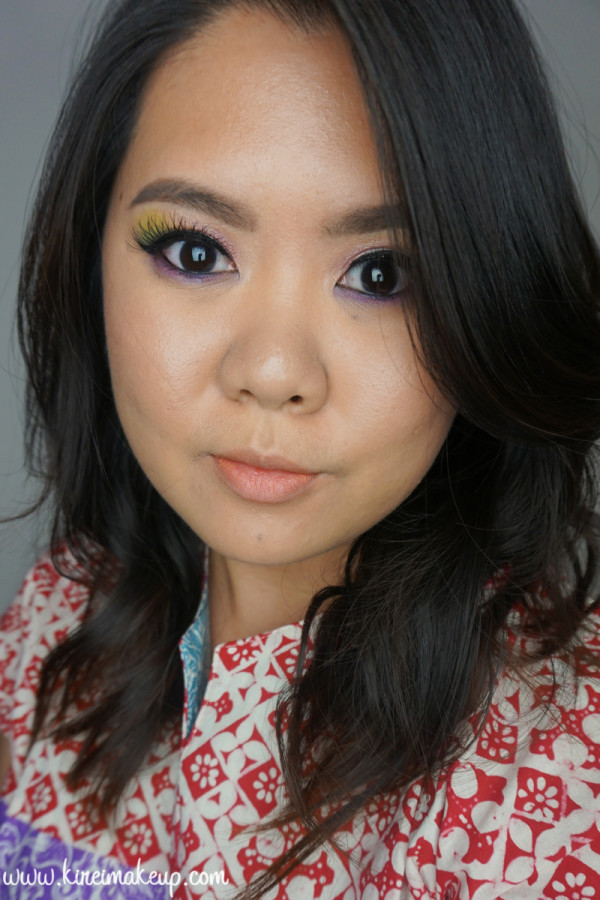
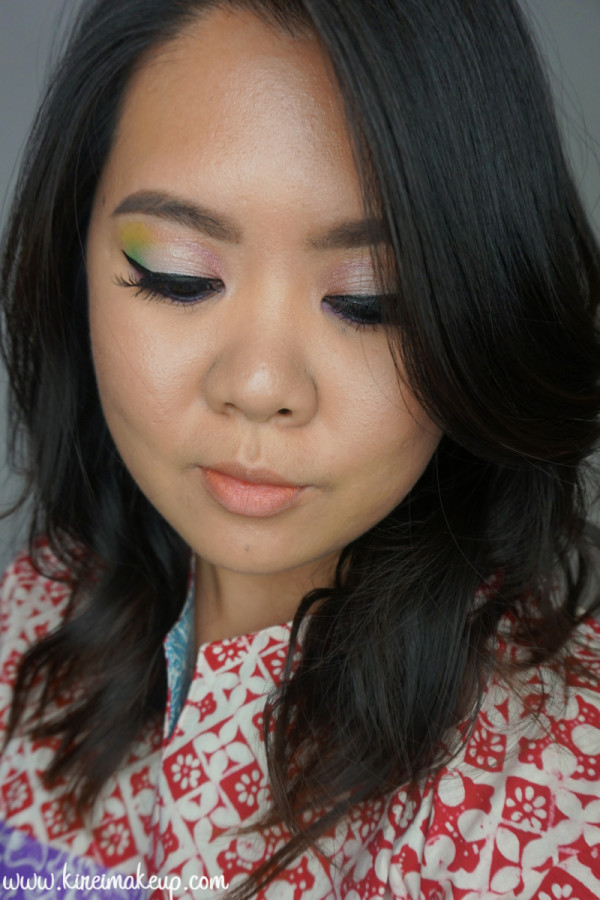
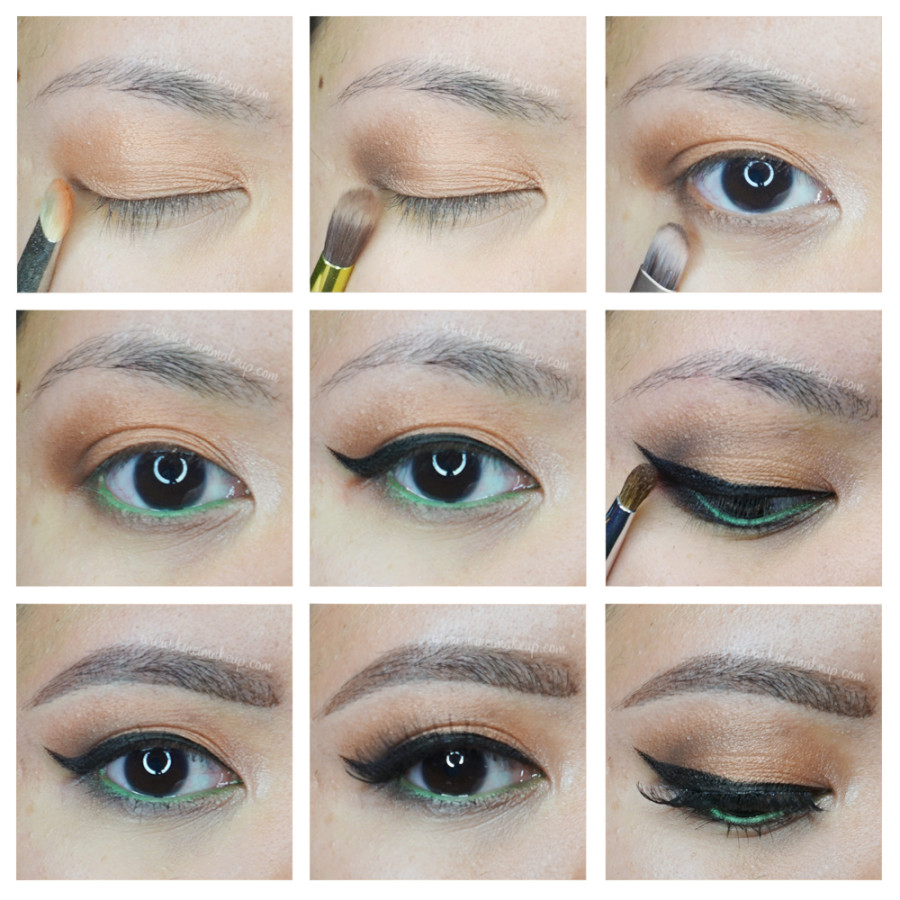
My Sleek Makeup Candy Palette is back in my hands again! I accidentally left it back in Jakarta last year, and my brother brought it back to Canada for me! Woohooo!!! So happy to have this Sleek Makeup Candy palette back to create many colorful looks.

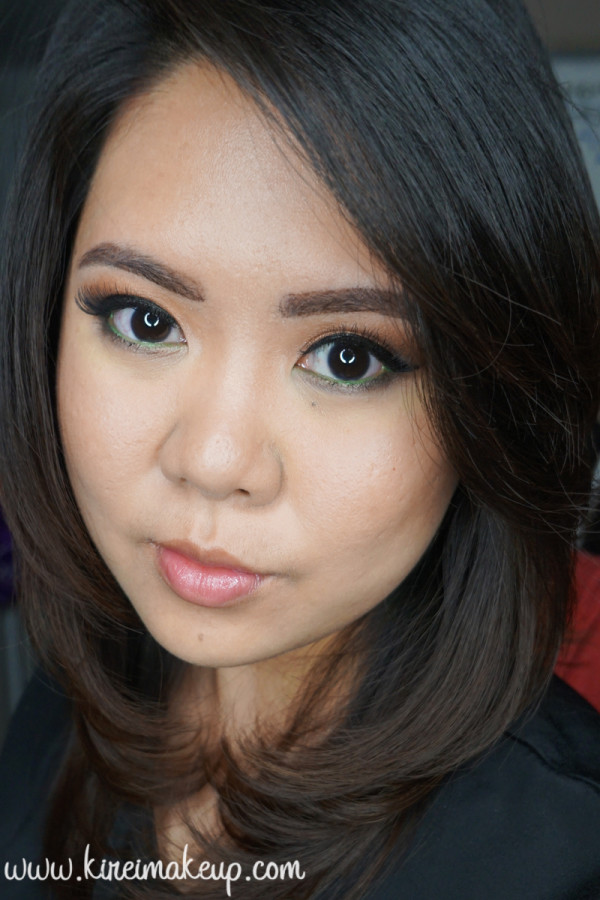
So the inspiration behind this colorful look is actually a “Batik” top (worn in pictures below) I received yesterday from Sofia via my brother. My friend, Sofia from @Sophie_Tobelly, is an amazing fashion designer, and she actually created this top and sold it in her store. A big THANK YOU and shout out to Sofia!!! You guys should really check her out on Instagram (IG)! She also sent down a clutch she created, I posted it on my IG account so please do check it out and follow me on IG!

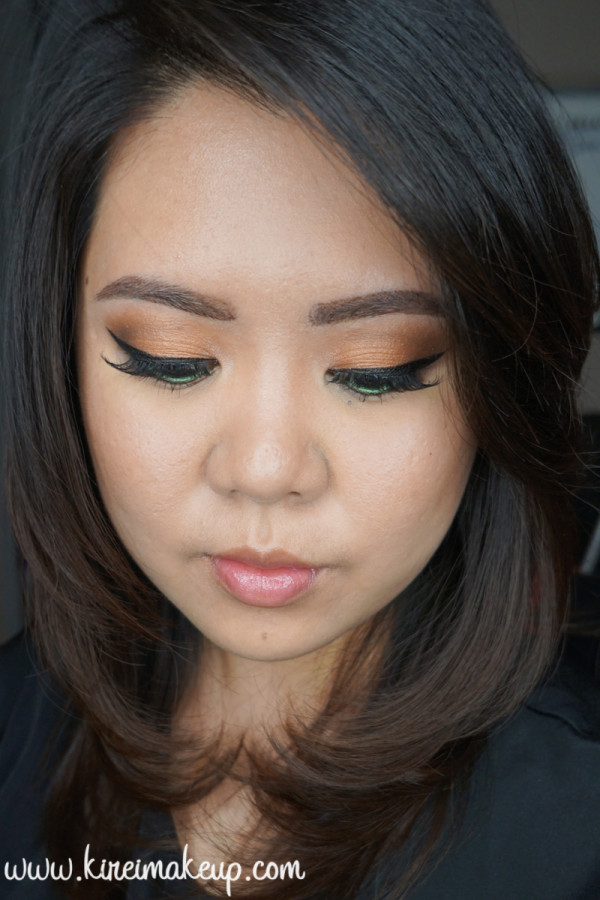
The top has several different colors like red, purple, white, and blue. I was going to use the blue from the palette, but it ended up being too chalky, so I changed it to green instead. I do love the end result, it almost has a watercolor feel to it. Should you decide to replicate this look, please do tag me on IG or add #kireimakeup.

*For other Sleek Makeup Candy Palette tutorials, please check out Psychedelic and Very Purple*

sleek makeup candy palette tutorial

Products used

Eyes

  • Primer – Urban Decay Primer Potion “Original”
  • Base – MAC Mineralized Skinfinish “Medium Plus”
  • Transition – Sleek Makeup Candy Palette “Pear Drop”
  • Outer V – Sleek Makeup Candy Palette “Mint Cream”
  • Inner V – Sleek Makeup Candy Palette “Bon Bon”
  • Center lid – Sleek Makeup Candy Palette “Cream Soda”
  • Lower lid – Sleek Makeup Candy Palette “Parma Violet”
  • Waterline – MAC “Smolder” kohl pencil
  • Winged liner – Kanebo “Kate Super Sharp Eyeliner”
  • Brows – Anastasia Beverly Hills Brow Pomade “Taupe” + “Medium Brown”
  • Mascara – Lancome “Hypnose”
  • Lashes – Ardell falsies “120s”

sleek makeup candy palette look

Face

  • Primer – Bobbi Brown “Vitamin Enriched Face Base”
  • Foundation – Diorskin Star Foundation “031”
  • Concealer – Diorskin Star Concealer “03”
  • Setting powder – Diorskin Nude Air Healthy Glow Invisible Loose Powder “#30″

Cheeks

  • Blush – Benefit “Hervana”

Lips

  • Lipstick – Revlon ColorStay Ultimate Suede Lipstick “Flashing Lights”
sleek makeup candy palette tutorial


UD Vice 3 – Joker Inspired Look

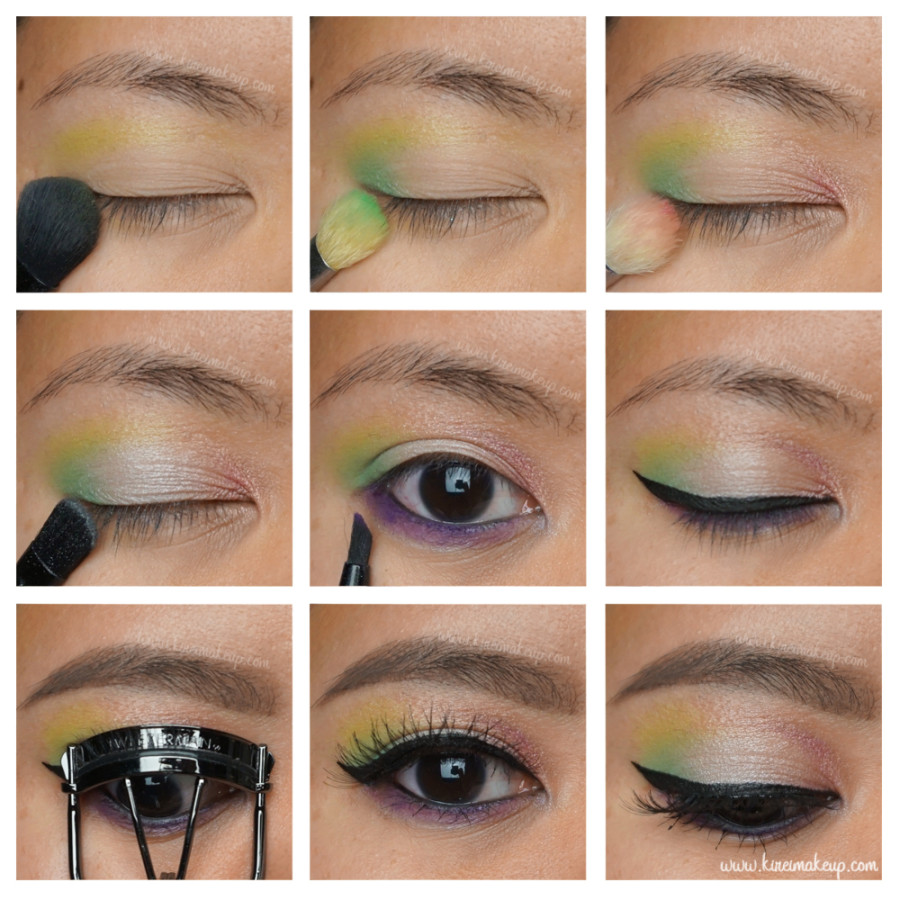
I’ve been realizing that lately most of my tutorials used neutral, earthy colors. Today, I decided to use some colors, so I pulled out my UD Vice 3 palette, and here we are! For some reason, I thought of “Joker”, probably because I’ve been bombarded with Suicide Squad news on my fb feeds. So, I combined purple and green to make a wearable Joker inspired look.

Again, I’m featuring Tweezerman tools today. I just want to point out the Tweezerman ProMaster eyelash curler that I used for this look is pretty great for those who have almond/deep-set eyes, or those with monolids. For more info regarding this curler, please check out my Instagram, I posted a picture and some info over there. I also posted a video on Instagram on how I used ABH brow pomade and Tweezerman Brow brush to fill my brows.

urban decay vice 3 makeup tutorialTweezerman tools featured on this tutorial – “blender” brush, “shader” brush, “liner glider” brush, “brow” brush, “ProMaster” eyelash curler.


Products list

Eyes

  • Primer – Urban Decay Primer Potion “Original”
  • Base – UD Vice 3 “Undone”
  • Transition – UD Vice 3 “Downfall”
  • Outer eyelid – UD Vice 3 “Vanity”
  • Inner eyelid – UD Vice 3 “Dragon”
  • Lower lash line – UD Vice 3 “Reign”
  • Crease – UD Vice 3 “Revolver”
  • Waterline – L’oreal Voluminous Smoldering eyeliner
  • Winged liner – Kanebo Kate Super Sharp liner
  • Brows – Anastasia Beverly Hills Brow Pomade “Medium Brown”
  • Mascara – Cover Girl “Lash Blast”
  • Falsies – Ardell “Demi Wispies” falsies

urban decay vice 3 makeup

Face

  • Primer – La Roche Posay “Cicaplast Baume B5”
  • Foundation – Diorskin Star Foundation “31”
  • Concealer – NARS Radiant Creamy concealer “Custard”
  • Setting powder – CoverFX setting powder “Light”

Cheeks

  • Contour – MAC powder “Blunt”
  • Blush – NARS blush powder “Mata Hari”

Lips

  • Lip crayon – Sonia Kashuk Velvety Matte Crayon in “Pink Nude”.

urban decay vice 3 makeup

Disclaimer: The Tweezerman products featured on this post were sent to me by Preen.me as part of their PreenMeVIP program.

The Balm Balmsai Makeup Tutorial

I bought this Balmsai palette back when I was in Jakarta, but I didn’t get a chance to play with it because I thought the palette was too pretty, and I don’t have the heart to touch it! However, all good things must come to an end, and I finally decided it’s time I used this palette. This The Balm Balmsai makeup tutorial is a really fun and summery look. I think a touch of color along the lash line really perk up this whole look. Feel free to omit the falsies, I used it just to make my eyelashes look longer, and open up my eyes a bit more.

Most of the products used for this tutorial are all by The Balm, mostly of the eyes and cheeks. Even though I know The Balm Indonesia’s brand manager, I am in not paid, nor sponsored to do this post.

I actually had a full face picture for this tutorial, but I realized the foundation I was using was too light for my face, and created a white cast, so I decided to remove the portrait. I didn’t realized I’ve gotten darker since I had to work on an outdoor shoot for the past couple days.

the balm balmsai tutorial

Products used

Eyes

  • Primer – Urban Decay Primer Potion “Original”
  • Base – The Balm Meet Matt(e) Nude “Matt Maloy”
  • Transition – The Balm Meet Matt(e) Nude “Matt Singh”
  • Crease – The Balm Balmsai “Woodie”
  • Lid and Inner Corner – The Balm Balmsai “High Tide”
  • Upper and Lower Lashline – The Balm Balmsai “Big Kahuna”
  • Waterline – L’oreal Paris Voluminous Smoldering eyeliner
  • Brows – The Balm Balmsai “Score”+ “Dig It” + “Woodie”
  • Falsies – Ardell “Demi Wispies”


Mint Summer Makeup

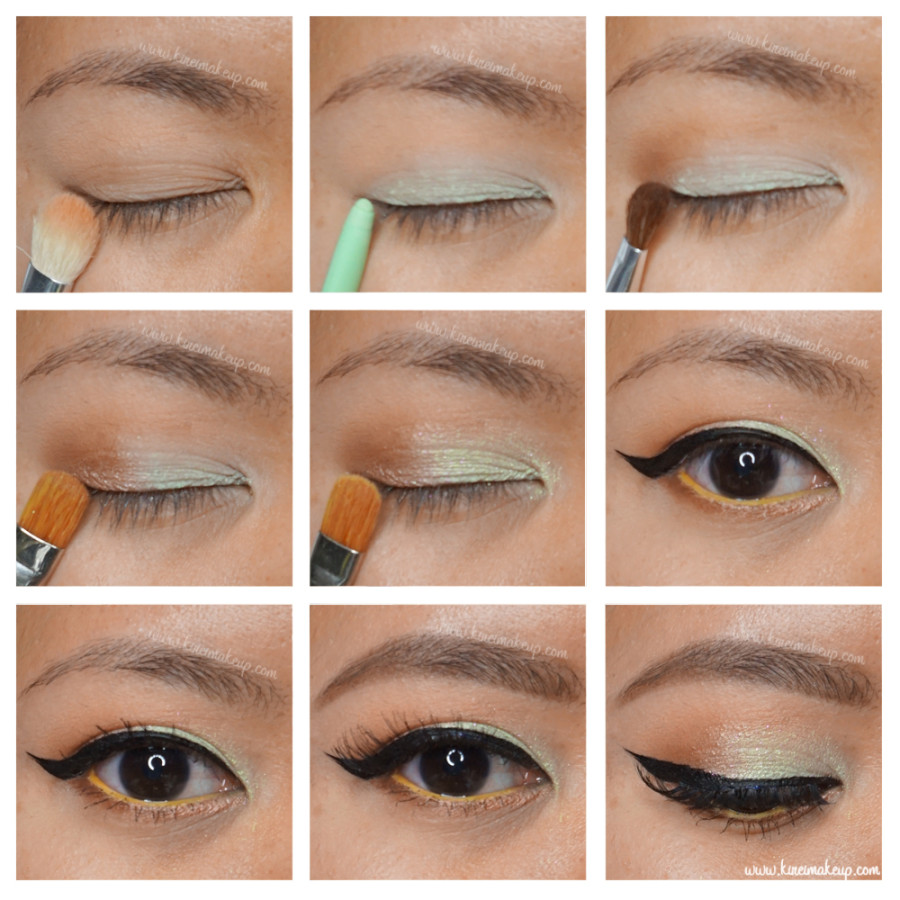
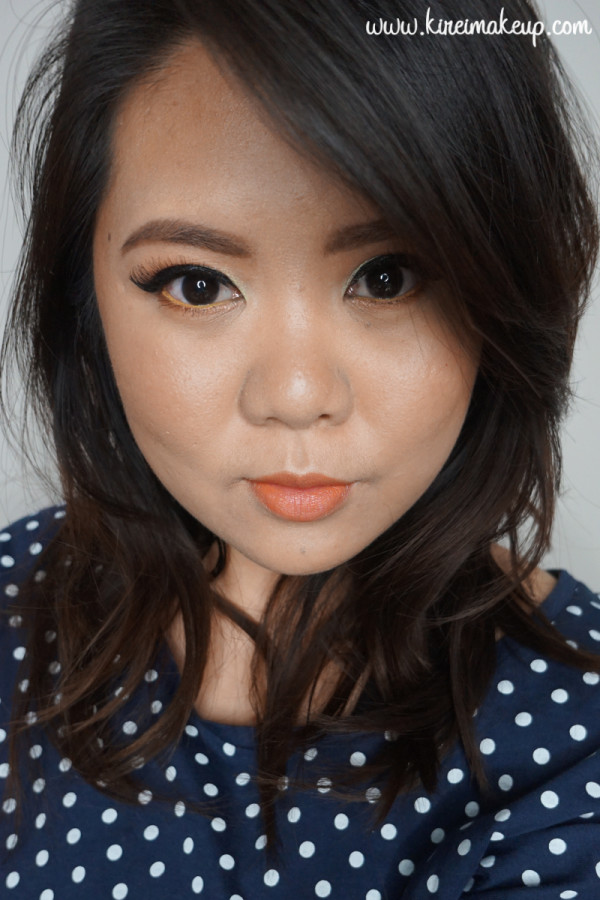
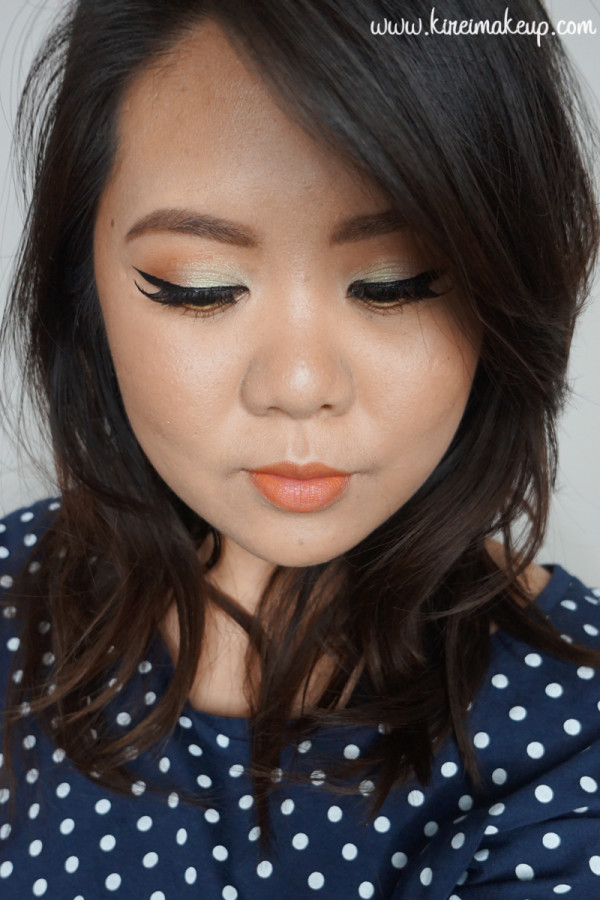
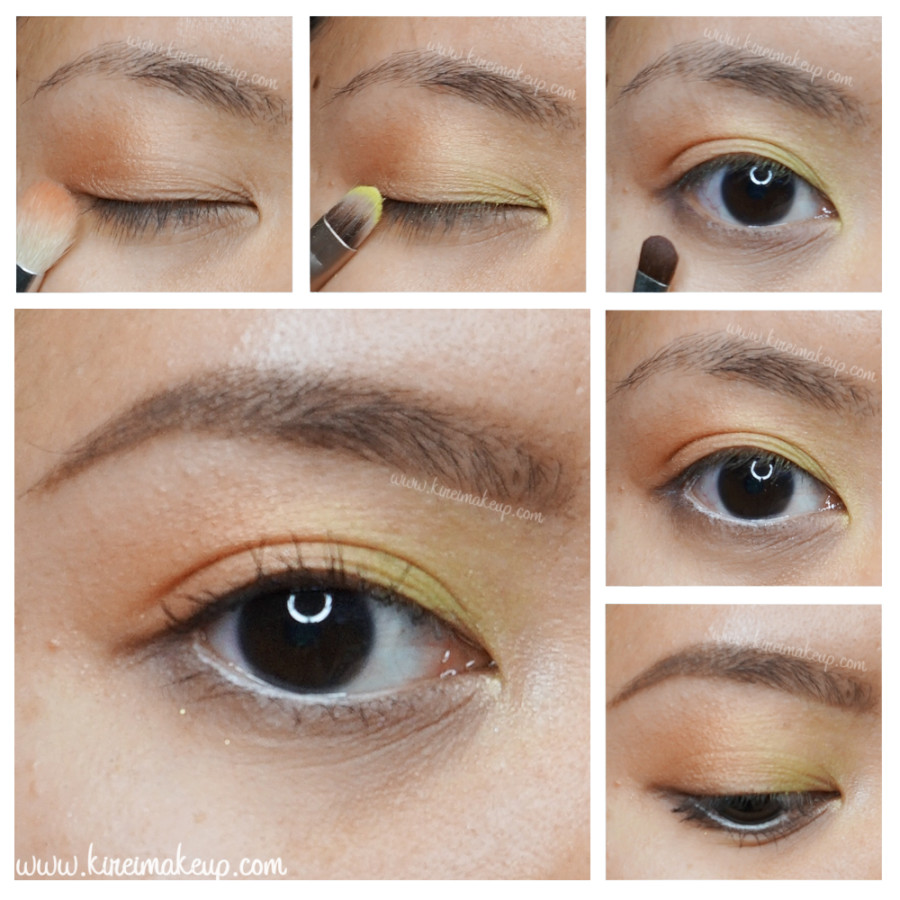
What is summer without a bit of mint, eh? Today’s Mint Summer Makeup look is easy, wearable, and a lot of fun! I think I could have done it without the yellow on my waterline. You could replace the yellow with beige or white if you prefer.

I decided to use coral on the lips, just to tie the whole look together since I’ve very warm brown on the eyes. However, the coral lipstick looks very orange in my picture. It doesn’t look that orange in real life, it is slightly more peach. This coral lipstick I wore for this look is exactly the same one as the one Emma Stone wore for the 2015 Oscar Award.

Summer Makeup

Products used

Eyes

  • Primer – Urban Decay Primer Potion “Original”
  • Transition – Makeup Geek Cosmetics “Peach Smoothie”
  • Crease/lower lashline – Makeup Geek Cosmetics “Cocoa Bear”
  • Outer half (upper lid) – Makeup Geek foiled eyeshadow “Grandstand”
  • Mint base – Stila Cosmetics Smudge Stick Waterproof Eye Liner “Mint Julep”
  • Eyelid – Make Up For Ever Diamond e/s “D316 Crystalline Pinky Green”
  • Waterline – MAC Chromagraphic eyeliner NC15; MUFE no. 71
  • Winged liner – Shu Uemura Calligraphy Ink eyeliner
  • Mascara – Cover Girl Lash Blast mascara “Very Black”
  • Brows – Stila All Day Waterproof brow color in Medium; Anastasia Brow Wiz in Taupe
  • Lashes – Gwiyomi Boutique no. 3 falsies


Mint Summer Makeup

Face

  • Primer – Kat Von D Featherweight primer
  • Foundation – CoverFX cream foundation G40
  • Concealer – NARS Radiant creamy concealer “Custard”
  • Setting powder – CoverFX setting powder “Light”

Cheeks

  • Bronzer – MAC Mineralized Skin Finish “Medium Deep”
  • Blush – MAC blush powder “Apricot”

Lips

  • Lipstick – Revlon HD lipstick “Tulip”

Summer Makeup

MAC Beautiful Iris

I recently fell in love with MAC Beautiful Iris eyeshadow, and had used it in my previous tutorial. Anyways, I just think this eyeshadow is so pretty for Spring/Summer makeup, especially for those who are not afraid of colors. If you’re on the conservative side, please take a look at Neutral Eyes with a Pop of Color on how to add a bit of color to your makeup wardrobe.

Anyhow, I decided to pair this purple eyeshadow with very soft warm brown colors, this way the makeup stays pretty soft and not too much. I used my Kat Von D Shade + Light eye contour palette for the rest of the eyes. I will try to do a review on that palette soon update: Review is up! I have so much review to do, not enough time. I’m still busy with the move, so I haven’t settle down yet. It’s kind of hard for me to do tutorials and getting back into my posting routine with all the stuff lying everywhere. *sigh*

purple eye makeup

Products used

Eyes

  • Primer – Urban Decay Primer Potion “Original”
  • Base – Kat Von D Shade + Light eye contour palette “Laetus”
  • Transition – Kat Von D Shade + Light eye contour palette “Ludwin”
  • Outer V/Crease/lower lashline – Kat Von D Shade + Light eye contour palette “Sytry”
  • Eyelid – MAC eyeshadow “Beautiful Iris”
  • Winged liner – Kanebo Kate Super Sharp eyeliner
  • Waterline – MAC Chromagraphic eyeliner “NC15”; Kat Von D Shade + Light eye contour palette “Liberatus”
  • Mascara – Lancome “Hypnose”
  • Eyebrows – Anastasia Brow Wiz “Taupe”; L’oreal Brow stylist
  • Falsies – Gwiyomi Boutique no. 3

mac beautiful iris

Face

  • Primer – Becca “Ever Matte Poreless Priming Perfector”
  • Foundation – L’oreal Infallible Pro-Matte Foundation “104 – Golden Beige”
  • Concealer – NARS Radian Creamy concealer “Custard”
  • Setting powder – CoverFX translucent powder

Cheeks

  • Contour – Kat Von D Shade + Light Contour Palette “Shadowplay”
  • Highlight – Kat Von D Shade + Light Contour Palette “Lyric”
  • Blush – NARS blush “Mata Hari”

Lips

  • Lipstick – Revlon Colorstay Ultimate Suede “Flashing Lights”
  • Lip gloss – Make Up For Ever Artist Plexi-Gloss “202 (sweet pink)”

mac beautiful iris

Colorful Summer Makeup

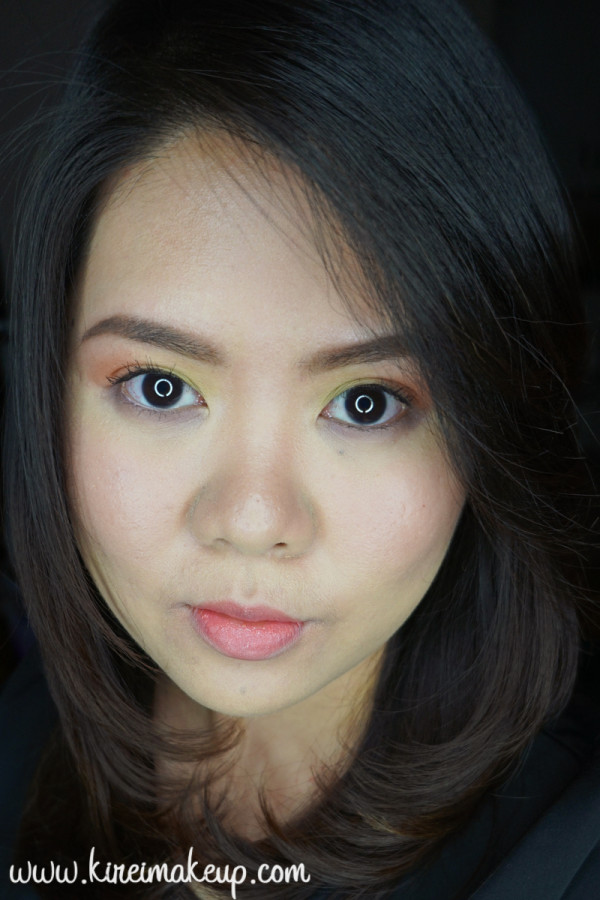
I love bright colorful makeup for summer, but I also love soft colorful shadows. I think this colorful summer makeup tutorial is not too bright, it almost has a watercolor feeling to it, don’t you think? It’s soft, but at the same time it’s colorful. Just a wash of green, orange and purple. Nothing bright, nothing out there, a soft colorful wash just the way I like it! Very wearable, but not outrageous.

Anyways, for the step-by-step tutorial I think I stood too far away from my ring light, and the purple on my lower lash line didn’t show up much. However, on the full face portrait, I stood closer to the light, so the color showed up better.

soft colorful summer makeup

Products used

Eyes

  • Primer – Urban Decay Primer Potion “Original”
  • Inner half (upper lid) – Sisley Phyto-Ombre eyeshadow “Anis 5”
  • Outer half (upper lid) – Sisley Phyto-Ombre eyeshadow “Mango 20”
  • Lower lash line – purple shade from NARS duo eyeshadow “Charade”
  • Waterline – Urban Decay Vice 3 “Bobby Dazzle”
  • Mascara – Cover Girl Lash Blast “very black”
  • Brows – Anastasia Brow Wiz “Taupe” and “Brunette”

Face/Cheeks

*How to Highlight/Contour using Powder*

Lips

  • Lipstick – YSL Rouge Pur Couture “52”
  • Lipgloss – YSL Glossy Stain “27”


colorful summer makeup look

Summer Makeup – Mint Eyeliner

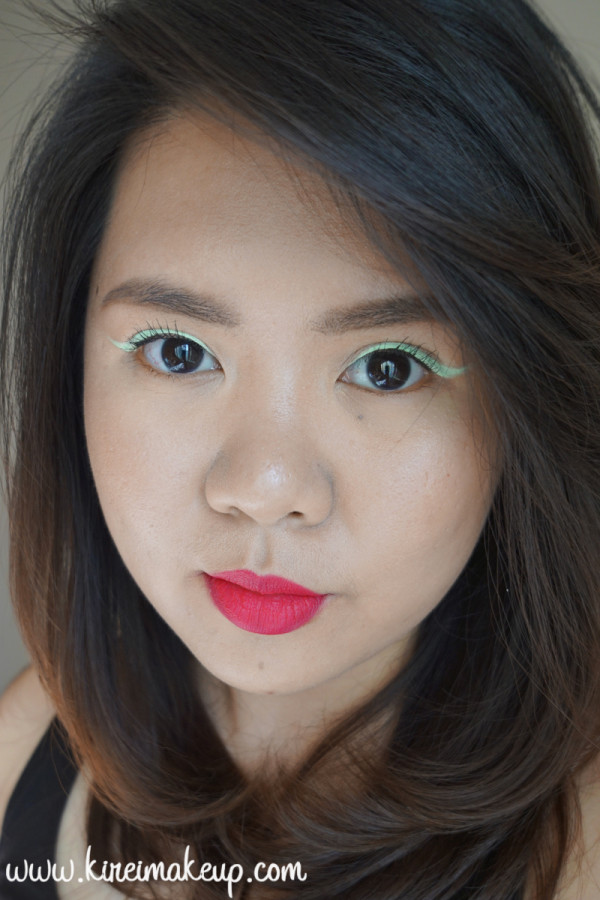
As the weather is getting warmer, I wanted a lighter, and more colorful Summer makeup. I think I still haven’t had enough of mint makeup. I know the reign of mint color is over, but I couldn’t stay away from it! There’s just something about this color that’s so refreshing. So I decided to create a mint eyeliner look.

You can change the mint liner to any color you want, I think turquoise and yellow would be a great alternative for something bright. I chose to use Stila Smudge stick liner since it gives me the color pay-off I was looking for. I did tried their mint liquid liner, but it wasn’t good at all. I also set the eyeliner using a light green eyeshadow to prevent smudging – this is not necessary unless you have oily lids, just to be safe. Setting the eyeliner with powder will make it smudge-proof especially in warmer weather.

I paired this mint eyeliner with a pink lips, but you don’t have to pair it with this lips. I would pair this with a peachy lips for an alternative. I just paired it with pink lips just because I wanted to use my new lipstick. I kept everything else very simple. No falsies with this look since I don’t want it to look too glam.

mint eyeliner

Products used

Eyes

  • Primer – Urban Decay Primer Potion “original”
  • Base – Makeup Geek Cosmetics “Shimma Shimma”
  • Eyeliner – Stila Cosmetics Smudge Stick Waterproof Eye Liner “Mint Julep”
  • Eyeshadow – Make Up For Ever Diamond e/s “D316 Crystalline Pinky Green”
  • Mascara – Cover Girl Lash Blast mascara “Very Black”
  • Brows – Anastasia Brow Wiz in “Taupe” and “Brunette”

Face/Cheeks

  • Foundation – Chanel CC Cream “32”
  • Under Eye – Bobbi Brown Tinted Eye Brightener “Light to Medium Peach”
  • Highlight – The Balm “Mary-Lou Manizer”
  • Blush – MAC powder blush “Cubic”

Lips

  • Lipstick – Shu Uemura Rouge Unlimited  My Dear Matte “Allure Fuchsia”

mint liner

Urban Decay Vice 3 Tutorial for Spring Look

Have you guys find out the pro tips given by Ludovic Engrand (Shu Uemura MUA) on my Instagram yet? If not, don’t forget to check it out! Anyways, for today’s Urban Decay Vice 3 tutorial, I wanted to create a spring look using just this one palette. I realized that I haven’t used this palette much, and I don’t know why I don’t use it as much since the eyeshadows are so buttery and creamy! This look is for someone who isn’t afraid of colors!

Of course, you can skip the orange-gold eyeshadow on my eyelid for something more neutral if you feel that this look is too colorful. I’ve done other tutorials using just a pop of color and neutrals in my other posts. So, check those out – Too Faced Chocolate Bar #3Kat Von D Monarch tutorial #2 and Cobalt Blue, Adding Color to eye makeup and a Hint of Mint.

I’ve also recently purchased a Stila brow pen (All Day Waterproof Brow Color), and I used it for the first time in this look. What do you guys think? I personally find this slightly harder to use at first. I’ve used it twice now, and I’m starting to really like the end result this product gives! I’ll try to do a review soon.

UD Vice 3 tutorial

Products used

Eyes

  • Primer – Urban Decay Primer Potion “original”
  • Eyelid – Urban Decay Vice 3 “Lucky
  • Outer corner – Urban Decay Vice 3 “Reign
  • Inner corner (tear duct) – Urban Decay Vice 3 “Last Sin
  • Lower lash line & Crease – Urban Decay Vice 3 “Defy
  • Waterline – Urban Decay Vice 3 “Dragon
  • Eyeliner – Kat Von D Tattoo Liner “Trooper”
  • Brows – Stila All Day Waterproof Brow Color “Dark”
  • Mascara – Cover Girl Lash Blast
  • Falsies – Gwiyomi boutique #3 lashes

UD Vice 3 look

Face/Cheeks

  • Primer – Kat Von D foundation primer
  • Foundation – MUFE HD Foundation #120
  • Concealer – MAC Pro Longwear concealer “NC25”
  • Setting powder – CoverFX translucent setting powder
  • Contour – MAC “Sculpt” powder
  • Blush – MAC “Cubic” blush

Lips

  • L’oreal Extraordinaire Color Riche “Blushing Harmony”

UD Vice 3 tutorial

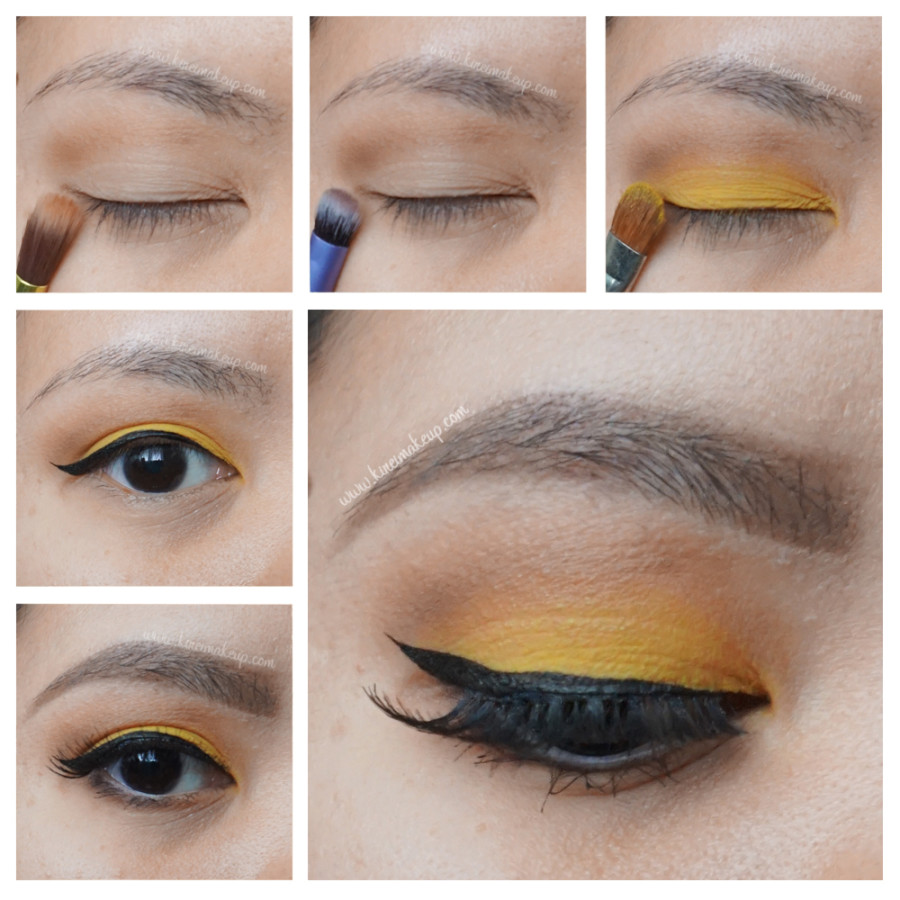
Yellow Eye Makeup Tutorial

Spring is almost here, may be? I was expecting a bright sunny week, but it’s Canada! What did I see outside couple days a go? SNOW! It was snowing, and cloudy. To cheer myself up, I decided to create this yellow eye makeup tutorial. I wanted something bright, but wearable at the same time. I also wanted to try a few new products and technique, so today’s tutorial is a bit more full on – cream + powder contour: checked, shimmer highlight: checked!

If you guys want to know more about this new technique I learnt, go over to youtube and look for Gossmakeupartist’s Buffing Technique video (if Wayne is looking at this HIIIIII!!!). Anyways, he had a video prior talking how he came about this technique, and since I’m curious, I decided to give it a try. What do you guys think? I think my skin looks pretty amazing, despite the fact that I put on quite a bit of contour and highlight products. I like how it still looks like my skin is showing through underneath, doesn’t look heavy and cakey at all.

Anyways, all products used listed below! Absolutely love how this tutorial turned out. Super simple, easy and very wearable.

1note: On my waterline, I used Matt Maloy eyeshadow because I left my white pencil liner in Jakarta. Anyways, since it’s a pressed eyeshadow, all I did was pressing it on my waterline with a small angled eyeliner brush. You can apply white eyeliner instead, if you’re not used to applying powder eyeshadow on the waterline.

Products used

Eyes

  • Primer – Urban Decay Primer Potion (original).
  • Transition – The Balm Meet Matt(e) Nude in “Matt Rosen”.
  • Crease – The Balm Meet Matt(e) Nude in “Matt Wood”.
  • Lid – MUFE eyeshadow #71.
  • Lower lash line – The Balm Meet Matt(e) Nude in “Matt Wood”.
  • Waterline – The Balm Meet Matt(e) Nude in “Matt Maloy”.
  • Eyeliner – Shu Uemura Calligraphy Ink eyeliner.
  • Mascara – Clinique High Impact mascara.
  • Falsies – Gwiyomi #3.
  • Eyebrows – Anastasia Brow Wiz in “Taupe” and “Brunette”.

3

Face/Cheeks

  • Foundation – Kat Von D Lock-it Tattoo foundation.
  • Concealer – MAC Pro Longwear concealer NC25.
  • Cream Contour – CoverFX cream foundation N110.
  • Loose powder – Shiseido Translucent Loose Powder.
  • Powder Contour – Kat Von D Shade + Light Contour Palette in “Shadowplay”.
  • Powder Highlight – Kat Von D Shade + Light Contour Palette in “Lyric”.
  • Shimmer Highlight – The Balm Mary-Lou Manizer.
  • Powder Blush – Smashbox “In Passion” Halo Blush.
  • Setting powder (to buff) – MUFE Pro Finish #118.

*Cream Contour and Highlight tutorial; Powder Contour and Highlight tutorial*

Lips

  • Lipstick – Sonia Kashuk Velvety Matte Crayon in “Pink Nude”.
  • Lipgloss – L’oreal Colour Riche Extraordinaire in “Dancing Rose” (just a dab in the center of the lips).

4


Too Faced Chocolate Bar Tutorial #3

Spring is almost here, and I wanted to do something lighter and with a bit more color. So, for today’s Too Faced Chocolate Bar tutorial, I created a neutral eye makeup with a bit of purple on the bottom lash. This is how I usually wear my makeup if I want a splash of color on my eyes.

I’ve done similar looks on my other tutorials – Kat Von D Monarch tutorial #2 and Cobalt Blue. For other ways to incorporate just a bit of colors into your eye makeup, please check out this other tutorials – Adding Color to eye makeup and a Hint of Mint.

For this look, I specifically wanted to only utilize Too Faced Chocolate Bar palette. I will try to create more looks with this palette, so you can see how versatile this palette is. You can check out my other tutorials using this palette as well – Holiday Makeup #2, Holiday Makeup #3, and 4 bridal makeup looks.

1

I do apologize for the unruly eyebrows. I’m trying to grow them out, but I’ll clean them up before my next tutorial, promise! Anyways, I’d like to mention that the pictures do no justice on how the eyeshadows are in real life. My room was bright when I took the first couple photos, but it get cloudy real fast yesterday. I had to deal with the Sun going in and out, so the last few pictures don’t really show how shiny and awesome the eyeshadows are.

Products used

Eyes

  • Primer – Urban Decay Primer Potion
  • Base – Too Faced Chocolate Bar “White Chocolate
  • Transition – Too Faced Chocolate Bar “Salted Caramel
  • Outer V – Too Faced Chocolate Bar “Triple Fudge
  • Eyelid – Too Faced Chocolate Bar “Marzipan
  • Middle lid – Too Faced Chocolate Bar “Hazelnut
  • Lower lash line – Too Faced Chocolate Bar “Candied Violet
  • Waterline – MAC kohl pencil liner “Smolder”
  • Eyeliner – Kat Von D Tattoo liner “Trooper”
  • EyebrowsAnastasia Beverly Hills Brow Pomade “Medium Brown”
  • False lashes – Gwiyomi false lashes #3

NARS weightless luminous foundation


Face

  • Primer – La Roche Posay Cicaplast Baume B5
  • Foundation – NARS Weightless Luminous Foundation “Punjab”
  • Concealer – MAC Pro Longwear Concealer “NC25”
  • Powder – MUFE HD Pro Finish “118”

Cheeks

  • Contour – MAC Sculpting powder “Sculpt”
  • Cheeks – MAC blush powder “Cubic”
  • Highlight – The Balm Mary-Lou Manizer

* For tutorials on how to do contouring please check out – subtle contouring; cream contouring.

Lips

  • Clinique Chubby Lip Stick “Boutiful Blush”

3