Inspired by one of the pictures on my Pinterest board, I decided to re-create this flower liner look using my NYX Vivid Brights liner. This was definitely fun to do, and I can see myself wearing this out for music festivals! I think the hair also makes the whole look complete (keep watching until the end for a short tutorial on how I create the texture waves).
Category: Colourful Look
Colourful Eye Makeup
Thus begins my season of everything bright and colourful! Today’s colourful eye makeup is probably not everyone’s cup’s of tea, but I am loving it! Fun and colourful eye makeup for the festival and carnival seasons. I think you’ll be seeing more and more colourful makeup for the next couple weeks.
Bright Raspberry Lips Makeup
Spring is just around the corner, and I couldn’t wait! This bright raspberry lips would be just the perfect look to welcome spring, don’t you think? Pair this bright lips with simple eye makeup, for a wearable look.
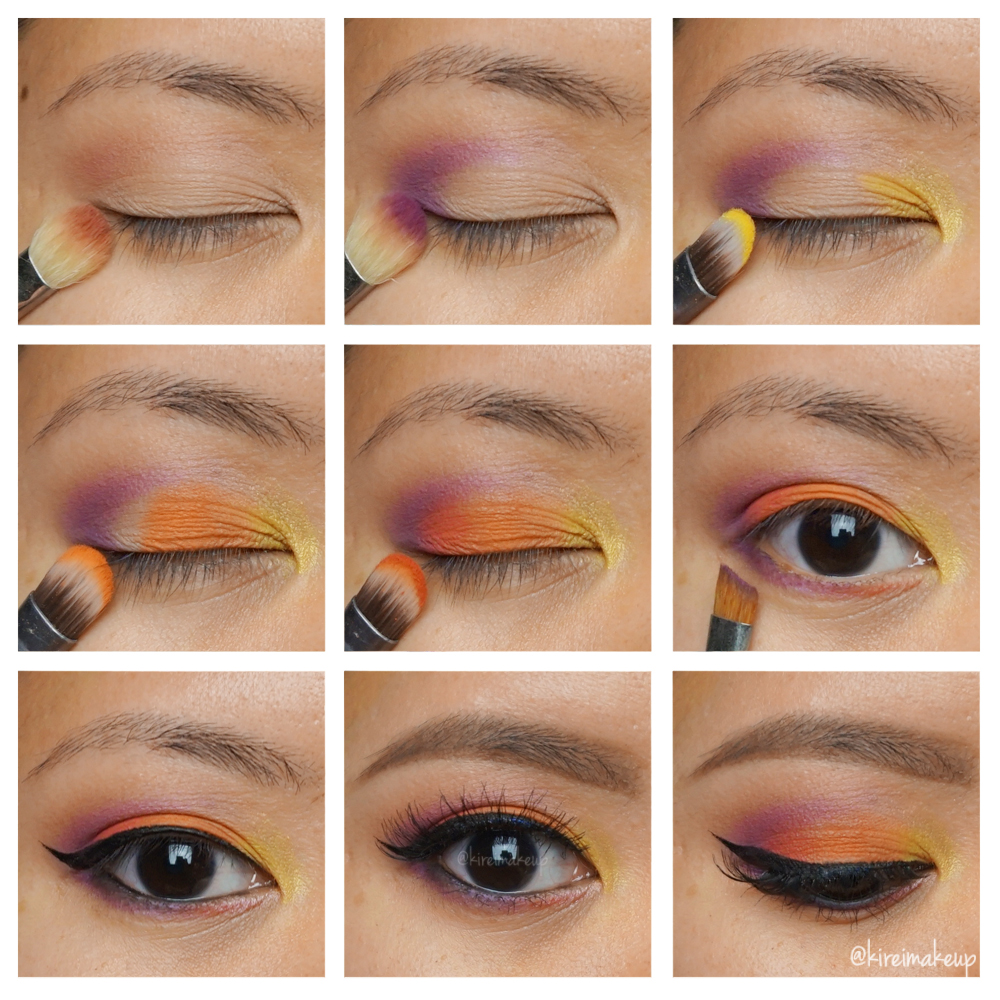
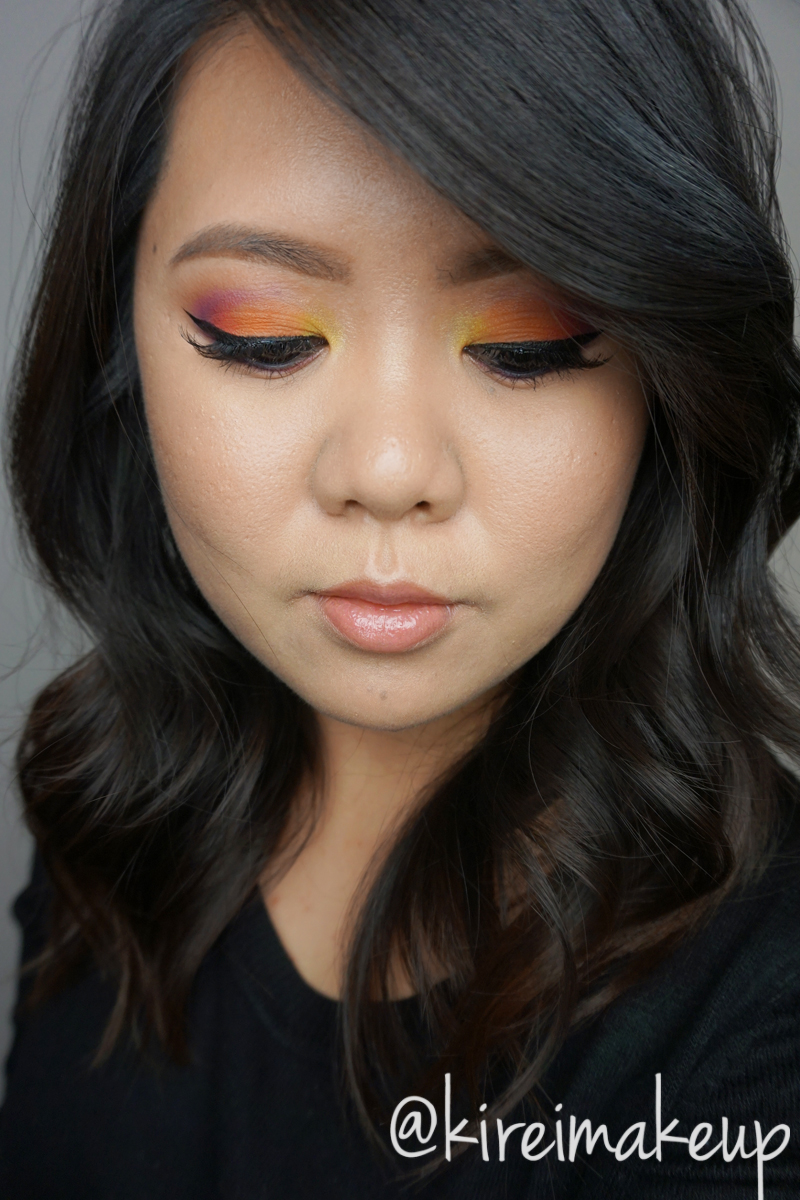
Orange Makeup Look | KVD Mi Vida Loca Remix
I wanted to create a bright colored makeup, so I decided to pick up my Kat Von D Mi Vida Loca Remix palette and create this wonderful orange and yellow combo on my eyes. I love this combination of orange and yellow, it makes me feel so summery and bright and sunny!
Shu Uemura Pastel Fantasy Makeup Tutorial #1
The newest Shu Uemura Pastel Fantasy Collection for Spring/Summer 2016 is to die for! These pastel colors are so pretty!!!! To be honest I thought when I bought the products I was going to end up with chalky eyeshadows, but nooope I was totally wrong. Anyways, I hope you guys will enjoy this Shu Uemura Pastel Fantasy makeup tutorial, and if you haven’t please do subscribe to my Youtube Channel! I upload 2 videos every week for you guys! If you have any request just leave me a comment.
Urban Decay Urban Spectrum Makeup Tutorial
The Sun is out this week, and I’m feeling all bright and cheerful so I decided to create a teal eye makeup look. This Urban Decay Urban Spectrum makeup tutorial is going to be refreshing and bright! I love how it turned out! The teal eyeshadow I used is called Deep End (from the UD Spectrum palette), and it’s such a vibrant color. I’d definitely rock this color in the Spring/Summer time. So pretty!
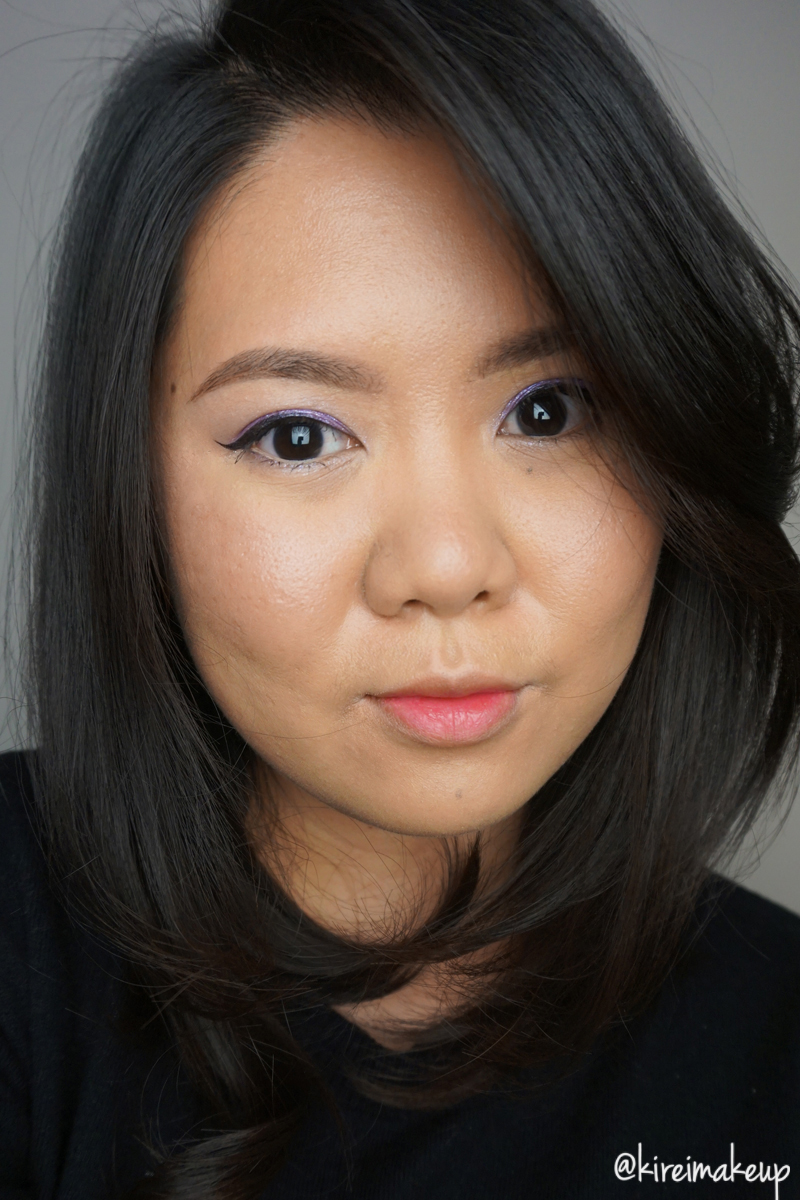
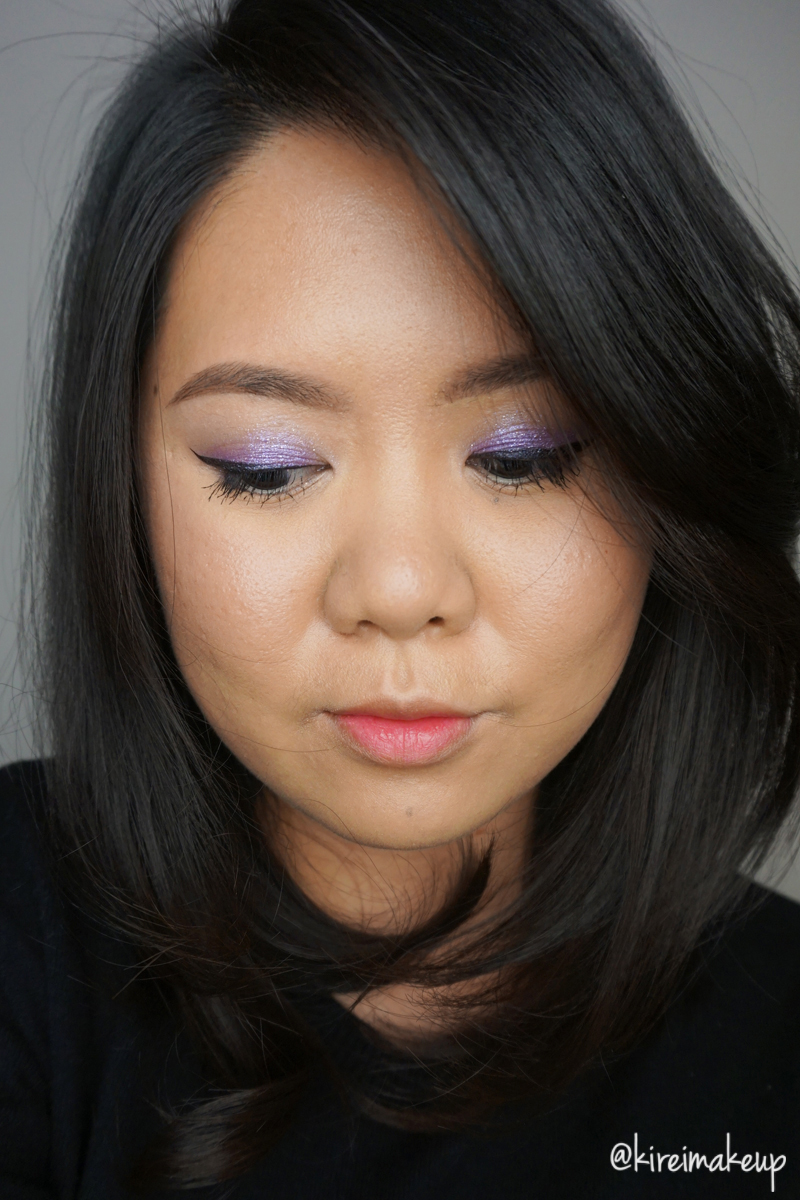
Lavender Glitter Party Makeup THEFACESHOP Canada
I can’t believe it’s almost December! Are you guys ready for the Holiday season? If you are ready to attend parties and eat great food, then you should be prepared with great makeup looks! For this post, I want to share with this Lavender Glitter party makeup. One tip I want to share is that I applied it dry first as a base, then dipped my brush in water and re-apply the eyeshadow wet to get more shine from the glitters!
Just beginning of this week, I received a PR package from THEFACESHOP Canada. I was thrilled when I saw all the products they sent me, thus why I created this look! AThis year, break out of your earthy tones, and neutrals. Come join me in this world of sparkles and pastels. You have to give this look a try! It’s not too out there, but at the same time it has just enough color to make you stand out from the rest.
What is your favorite Holiday look? Let me know in the comment below!

This post is very much inspired by the Korean makeup trends (K-Pop makeup) – luminous dewy skin, simple eyes, and gradient lip (or ombre). This look is very simple, and in a lot of way very cute and girly. The Koreans, they don’t really wear much contouring on the face or eyes. They focus mostly on a very youthful-looking skin which looks very dewy, and Popsicle lips. I skipped the falsies because most of the Korean actresses and singers don’t wear them. It’s not a big part of their makeup ritual, unlike the Japanese who are huge fans of falsies.
The reason why I used 2 blushes for this tutorial is because the blush from THEFACESHOP Canada is a bit too light for my skin. Since it does not show up on my skin, I used my Chanel blush, and then used the one from THEFACESHOP Canada on top of the Chanel one to soften the color, and highlight my cheeks.
I’ll be posting a review of THEFACESHOP Canada products I used on this tutorial next week! So, don’t forget to subscribe so you can get my latest post in your inbox (subscribe button is located on the top right side bar).
Products used
Eyes
- Primer – Urban Decay Primer Potion “Original”
- Lid/lower lash line – THEFACESHOP Canada “Lavender Glitter”
- Winged liner – THEFACESHOP Canada Color Proof eyeliner “Purple Violet”
- Waterline – MAC Chromagraphic eyeliner NC30
- Eyebrows – Anastasia Brow Pomade “Medium Brown”
- Mascara – THEFACESHOP Canada “Freshian Big Mascara (01 Curling)”
Face
- Foundation – Shu Uemura Lightbulb foundation
- Concealer – NARS Radiant Creamy concealer “Custard”
- Powder – Laura Mercier Invisible loose powder
Cheeks
- Blush – THEFACESHOP “Candy Violet” single blush; Chanel Blush de Horizon
Lips
- Lip stain – THEFACESHOP Ink Lipquid “Pink Scarf Rose”
UD Vice 4 Tutorial #1
I finally have the chance to play with my UD Vice 4 palette! This UD Vice 4 tutorial is fun, and has a little bit of color. It’s a really fun look to wear especially for a party. Of course you can skip the black winged liner, and go for just a simple line along the upper lash line.
For the rest of the face, keep it simple and light. No over-contouring, no carved brows, and definitely nice soft natural lips. By keeping the rest of the face simple, you can keep the whole look youthful. Take it easy on the contouring and brows if you want to look younger. Thicker brows & rounder cheeks can make you look younger than chiseled cheekbones & overdrawn brows.
Anyways, one thing to note is that I applied “Flame” on my eyelid dry, and then I wet my brush and re-apply the same shade on the center of the lid. As you can see from the picture below, when I applied “Flame” dry it has a shimmer, but when I applied it wet it looks more shiny.
Products used
Eyes
- Primer – UD Primer Potion “Anti-Aging”
- Base – UD Vice 4 “Framed”
- Transition – UD Vice 4 “Bitter”
- Outer V/crease – UD Vice 4 “Delete”
- Eyelid – UD Vice 4 “Flame”
- Lower lash line – UD Vice 4 “Delete” (outer) + “Arctic” (inner)
- Winged liner – Kanebo “Kate Super Sharp” eyeliner
- Waterline/tightline – MAC kohl eyeliner “Smolder”
- Mascara – NARS “Audicious” mascara
- Lashes – Ardell falsies “Demi Wispies”
Face
- Primer – The Body Shop Drops of Youth “Wonderblur”
- Foundation – CoverFX cream foundation “G40”
- Concealer – NARS Radiant Creamy Concealer “Custard”
- Setting powder – CoverFX setting powder
Cheeks
- Blush – Hourglass Ambient Lighting Blush “Vibrant Poppy”
- Highlighter – Becca x Jaclyn Hill “Champagne Pop” highlighter
Lips
- Lip pencil – UD lip pencil “Naked2”
- Lipstick – Sonia Kashuk lipstick “Nude Pink”
- Lip gloss – L’oreal Color Riche Extraordinaire “Blushing Harmony”
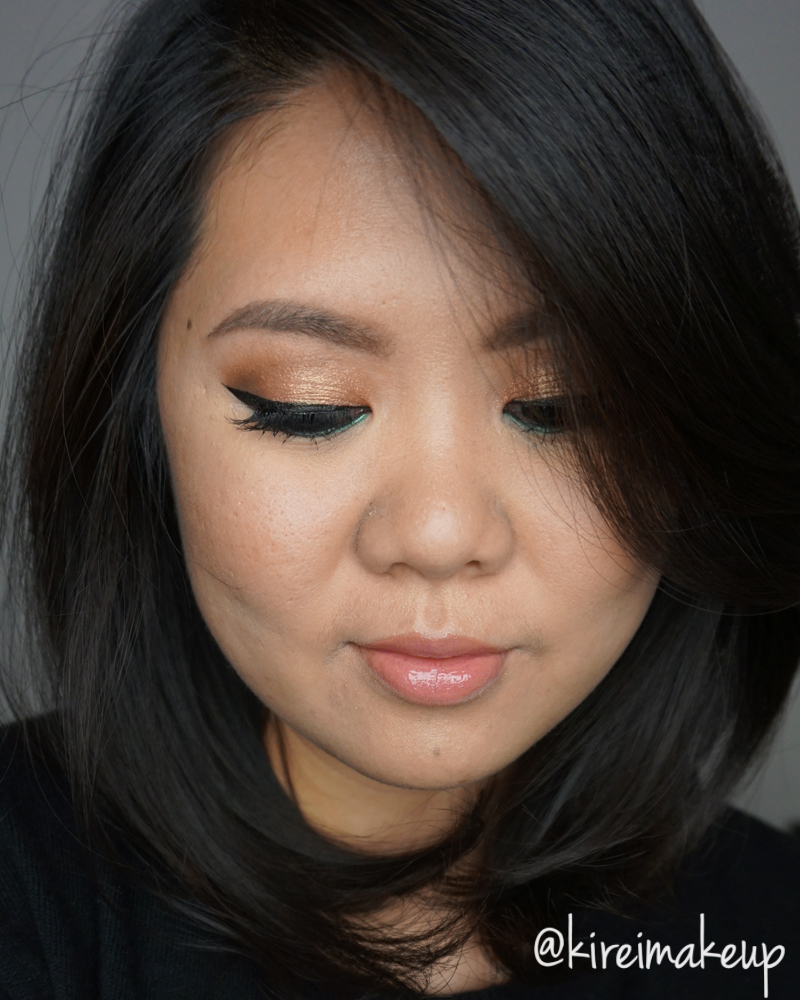
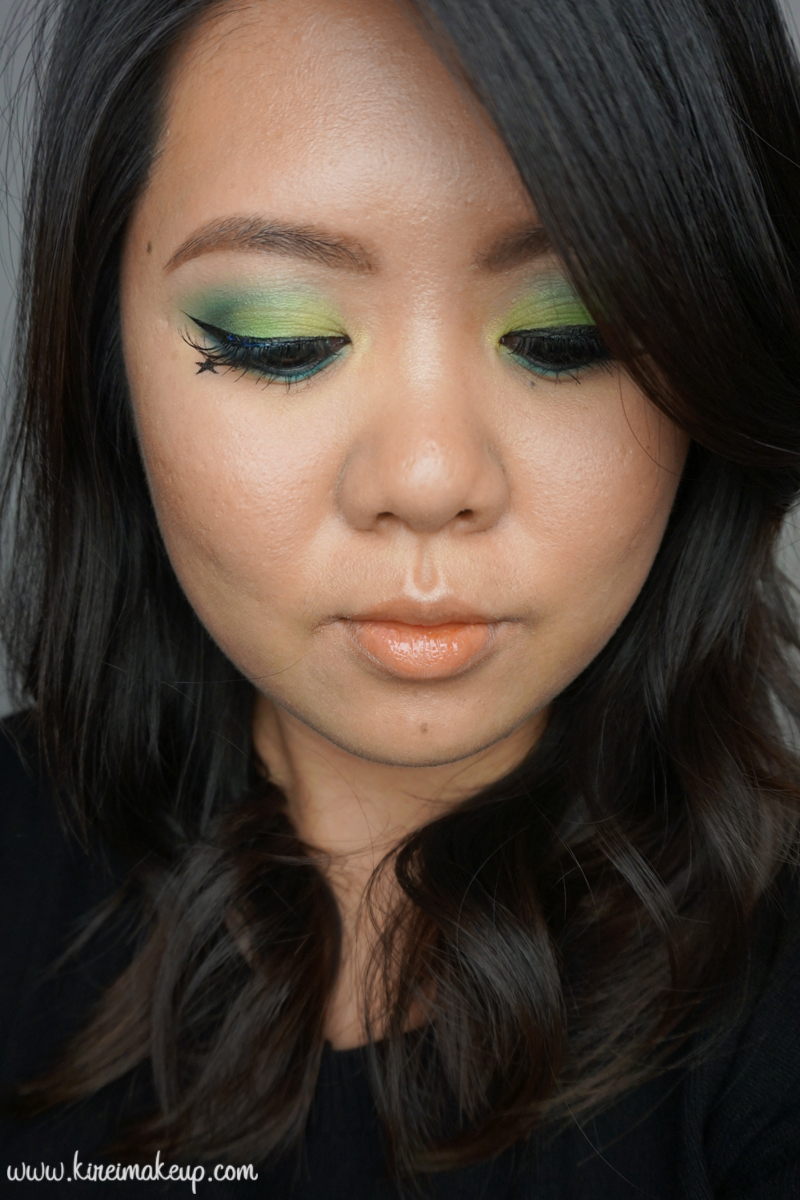
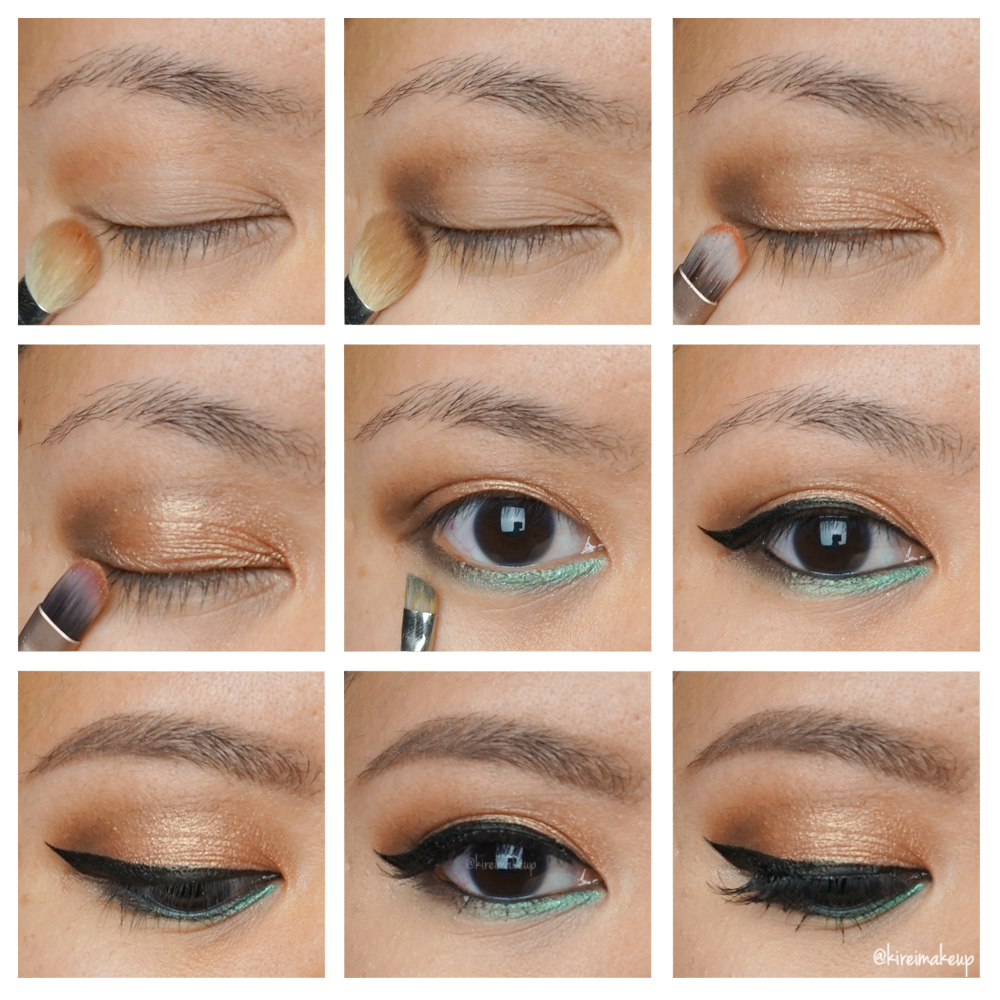
Kat Von D Mi Vida Loca Remix Tutorial #2
Last week, I did KVD Mi Vida Loca Remix swatches, as well as a tutorial using the greens and blues. This time, I decided to do another Kat Von D Mi Vida Loca Remix tutorial using the warmer shades! Have you guys grab this palette yet? If you haven’t take a look at my swatches’ post! I can assure you, you’ll love this palette! The colors are amazing, and I can’t rave enough about it. If you are a not a fan of colors, take a look at KVD Shade + Light eye palette, perhaps something more neutrals will suit your needs.
Since the eyes are very colorful, I have to pull the eye look together with black eyeliner. I don’t use white or beige on the waterline since it can look too clown-ish, in my opinion. I really like the contrast between the black and the colors, it makes it more wearable. It’s a very festive look, perhaps would be great for Carnivals!
Products used
Eyes
- Primer – Urban Decay Primer Potion “Anti Aging”
- Transition – KVD Mi Vida Loca Remix “Swoon”
- Outer V/Crease – KVD Mi Vida Loca Remix “Anthem”
- Inner corner – KVD Mi Vida Loca Remix “Fran” + “Legend”
- Center lid – KVD Mi Vida Loca Remix “Analogue”
- Outer third – KVD Mi Vida Loca Remix “Destroyer”
- Outer half of lower lash line – KVD Mi Vida Loca Remix “Anthem”
- Inner half of lower lash line – KVD Mi Vida Loca Remix “Destroyer”
- Waterline – L’oreal Voluminous Smoldering eyeliner
- Winged liner – Kat Von D Tattoo Liner “Trooper’
- Brows – Anastasia Brow Wiz “Medium Brown” + Kat Von D Brow Tattoo “Medium”
- Falsies – Ardell “Demi Wispies”
 Face
Face
- Primer – Kat Von D “Lock-it Featherweight” primer
- Foundation – Kat Von D “Lock-it Tattoo Foundation”
- Concealer – NARS Radiant Creamy Concealer “Custard”
- Setting powder – CoverFX setting powder
Cheeks
- Contour – Becca “Lowlight”
- Blush – Smashbox Halo Powder Blush “Passion”
- Highlight – The Balm “Mary-Lou Manizer”
Lips
- Lip color – L’oreal Color Riche Extraordinaire “Blushing Harmony”
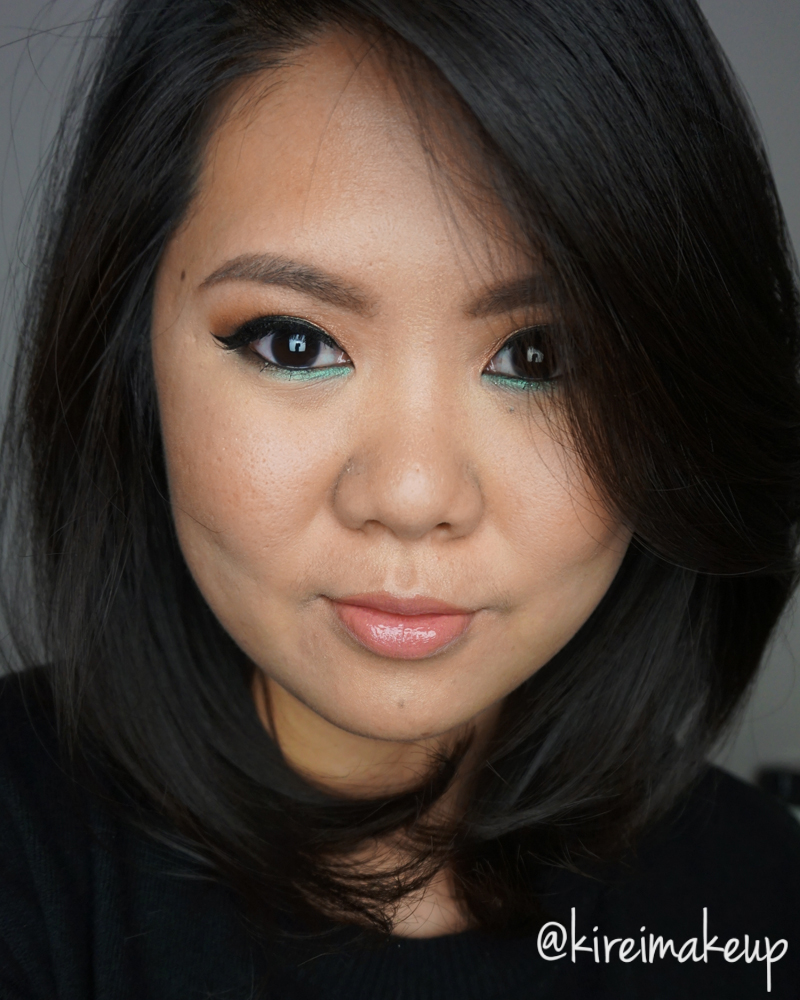
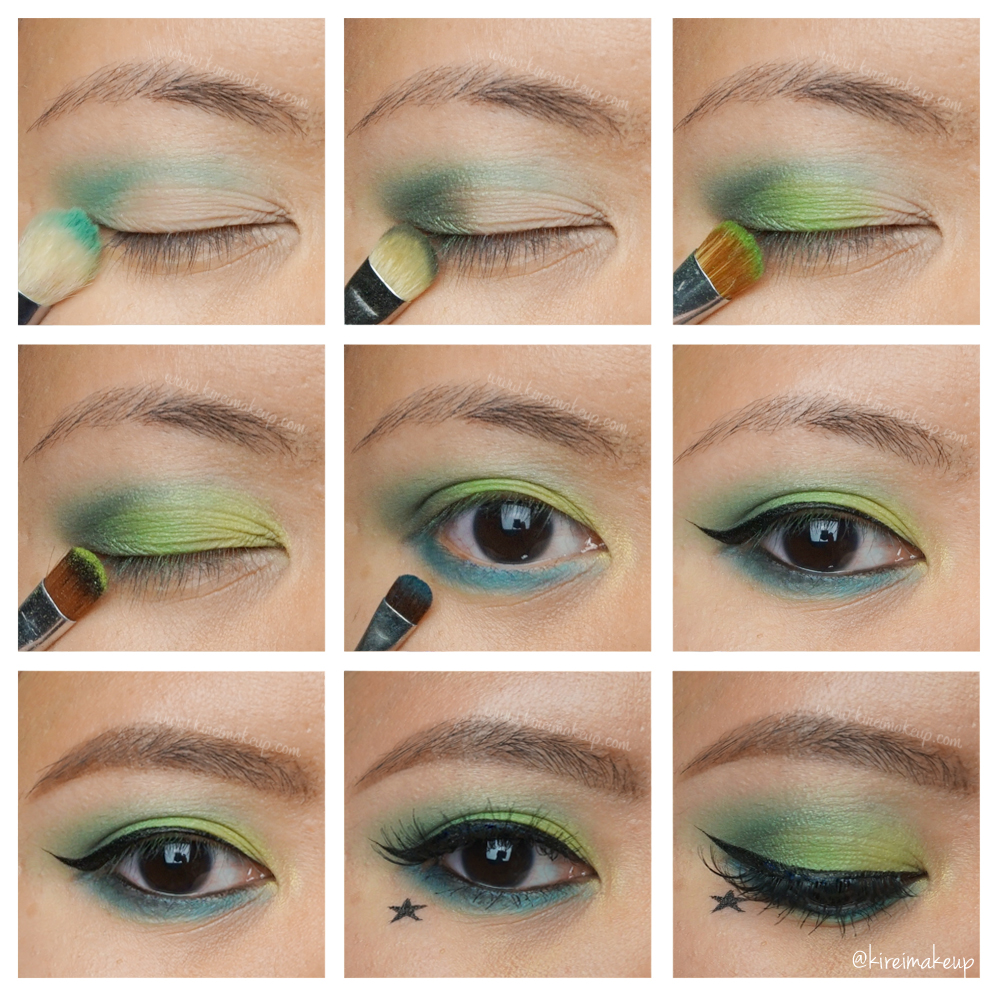
KVD Mi Vida Loca Remix Tutorial #1
As mentioned in my previous post, I do have a KVD Mi Vida Loca Remix tutorial! I used mostly the greens and blues from that palette for this look. If you are interested in seeing swatches and my thoughts on it, please check out my Kat Von D Mi Vida Loca Remix palette swatches. I am loving this palette, I think I’ll try to do more looks with this palette in the future.
I do have 2 other posts lining up to be published, but since this palette was highly anticipated, I’ve decided to publish this look first. I’m going to try to publish the other 2 posts next week, so don’t forget to subscribe to my blog (subscription box is on the right side bar) so you can get an update as soon as I publish it! I’ll try to get back into regular blogging – 3x/week again.
Products used
Eyes
- Primer – Urban Decay Primer Potion “Original”
- Base – KVD Mi Vida Loca Remix “Moulder”
- Crease – KVD Mi Vida Loca Remix “Hyperballad”
- Outer V – KVD Mi Vida Loca Remix “Lemy”
- Middle lid – KVD Mi Vida Loca Remix “Misfit”
- Inner corner – KVD Mi Vida Loca Remix “Vinly”
- Lower lid – KVD Mi Vida Loca Remix “Synth” (inner half); KVD Mi Vida Loca Remix “Dark Wave” (outer half)
- Lower lash line – KVD Mi Vida Loca Remix “Black Metal”
- Winged liner & Star – Kat Von D Tattoo Liner “Trooper”
- Waterline – L’oreal Voluminous Smoldering eyeliner
- Brows – Anastasia Beverly Hills Brow Wiz “Taupe”; Kat Von D Tattoo Brow “Medium Brown”
- Mascara – Lancome “Hypnose Drama”
- Lashes – Ardell “Demi Wispies”

Face
- Primer – Bobbi Brown “Vitamin Enriched Face Base”
- Foundation – MAC Waterweight foundation “NC30”
- Concealer – MAC Studio Finish concealer “NC30”
- Setting powder – CoverFX translucent setting powder
Cheeks
- Contour – Kat Von D Shade + Light contour palette
- Blush – Smashbox Halo Blush powder “In Bloom”
- Highlight – Becca Shimmering Perfector “Champagne Pop”
Lips
- Gloss – YSL Glossy Stain in Pêche Cerra-Cola