MAC D for Danger

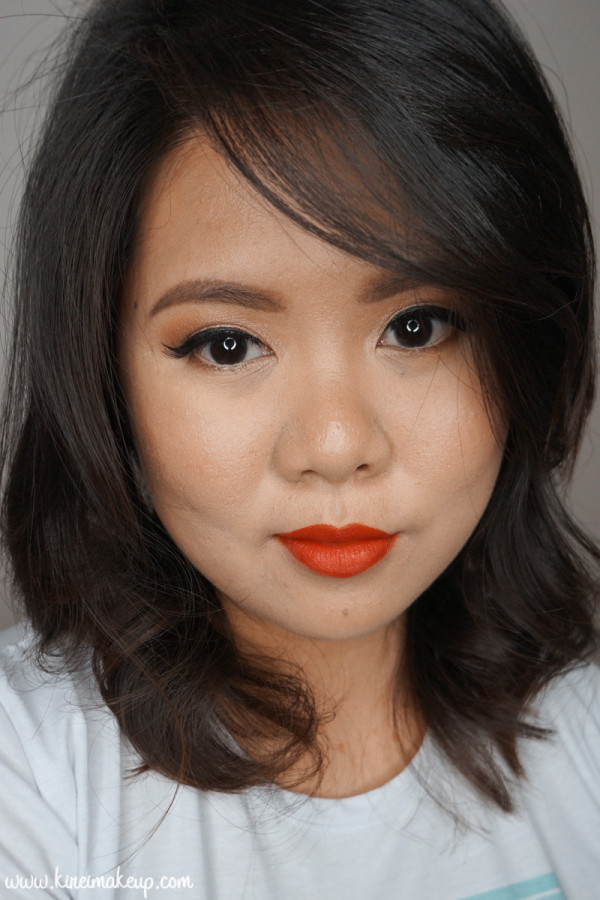
I have a new favorite lip color! MAC D for Danger lipstick is a gorgeous berry shade with a matte finish. I love it! I have been looking for a berry lip color for a while now, but usually it’s too purple, so I’m very excited when I found this shade. D for Danger is a permanent lipstick shade at MAC. I recently found it when I was browsing their Retro Matte collection.

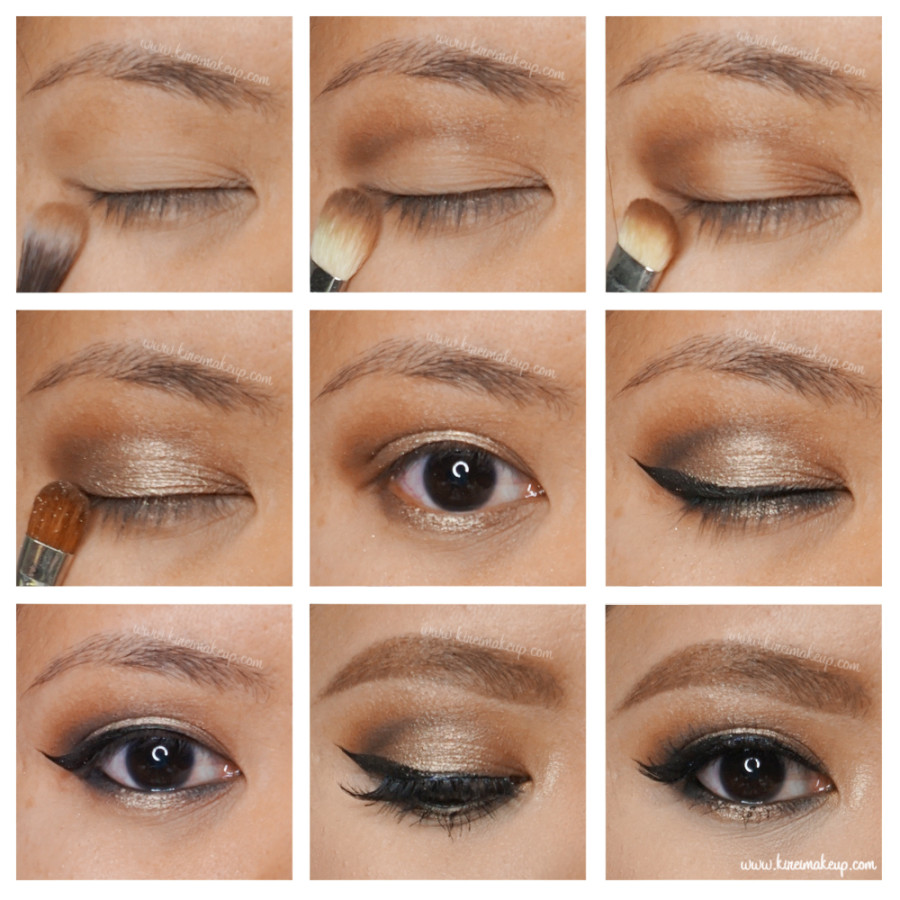
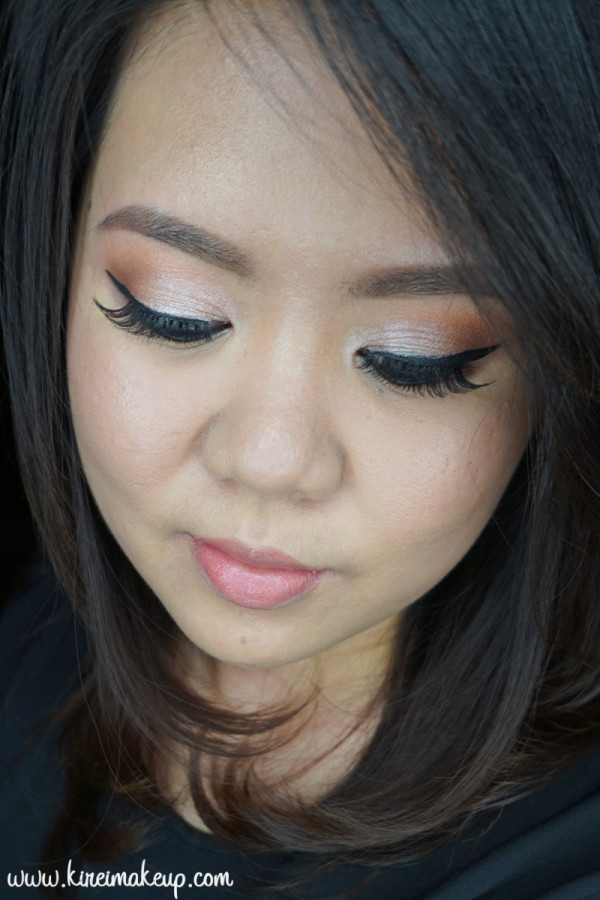
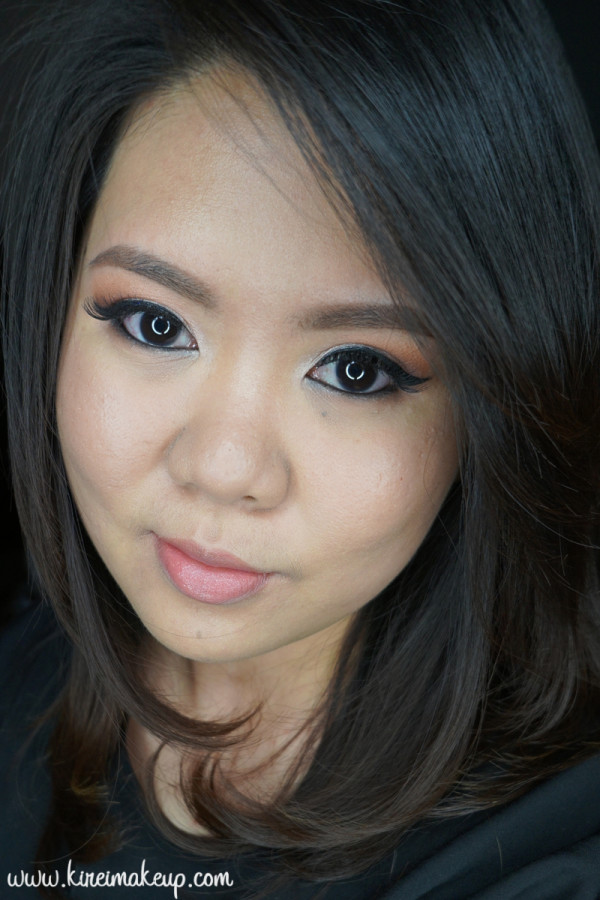
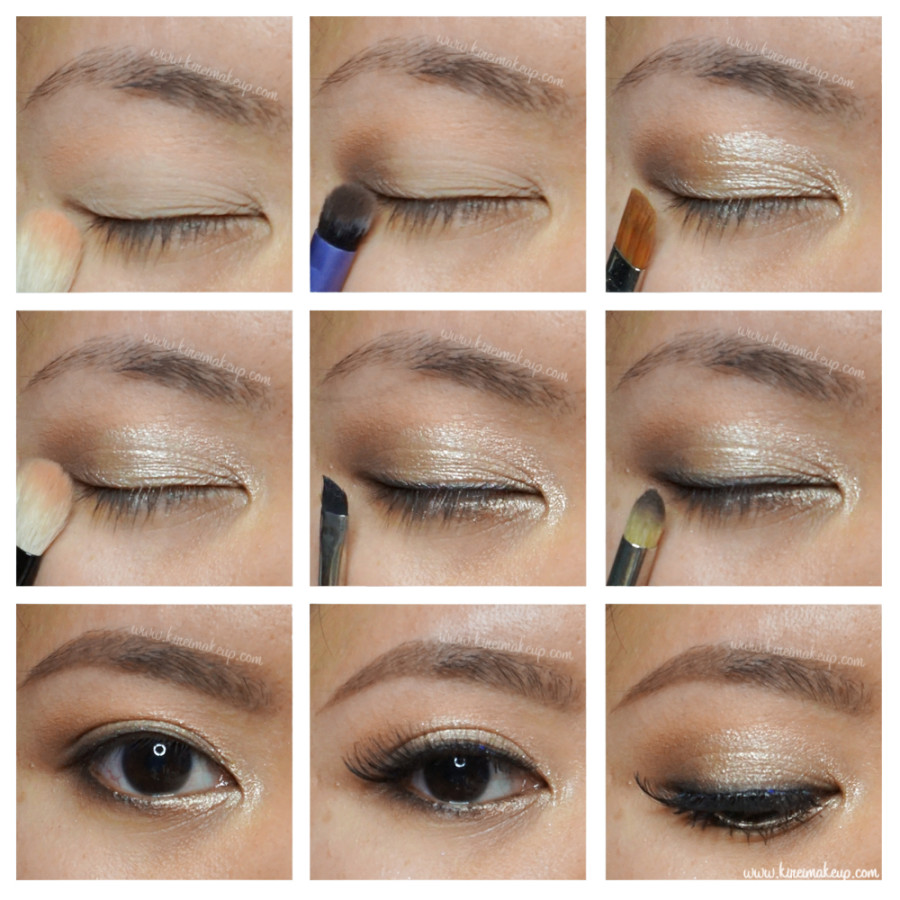
Anyways, I paired UD Naked Smoky with this berry lips. I went with a winged liner, and bronze on the lids. Nothing too dark on the crease since I want the focus to be on the winged liner itself. This look is quite heavy on both eyes and lips, but I don’t quite mind it. I think this will look nice for a party. For a day look, I probably will leave the eyes bare, just mascara and groomed brows, leaving the lips to be the focus of the attention.

I have done a smoky eye look using UD Naked Smoky in my previous tutorial, please check it out!

ud naked smoky tutorial

Products used

Eyes

  • Primer – Urban Decay Primer Potion “Original”
  • Transition – UD Naked Smoky “Combust”
  • Crease/outer lid – UD Naked Smoky “Whiskey”
  • Middle lid – UD Naked Smoky “Dirtysweet”
  • Inner corner – UD Naked Smoky “High”
  • Winged liner/outer corner of lower lid – Maybelline “Eye Studio Lasting Drama Gel Liner in Black”
  • Waterline – L’oreal “Voluminous Smoldering eyeliner”
  • Brows – Anastasia Brow Wiz “Taupe” and “Medium Brown”
  • Falsies – Gwiyomi Boutique false lashes “no. 3”


MAC D for Danger

Face

Cheeks

  • Contour – Smashbox contour kit “contour” shade
  • Cheeks – NARS “Mata Hari” blush

Lips

  • Lipstick – MAC “D for Danger”

urban decay naked smoky look

Big Dolly Eye Makeup Tutorial

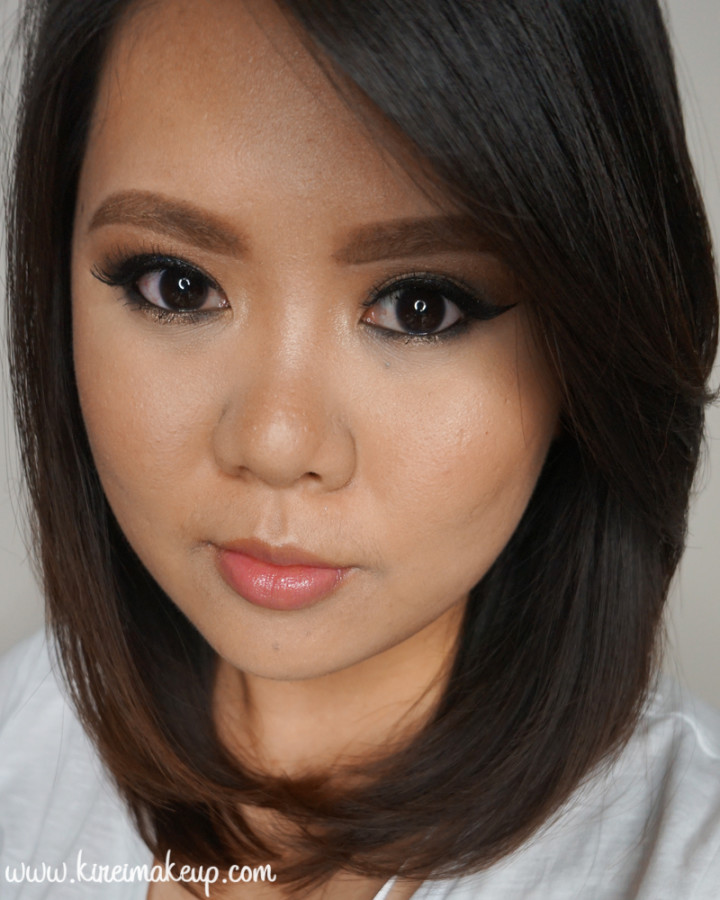
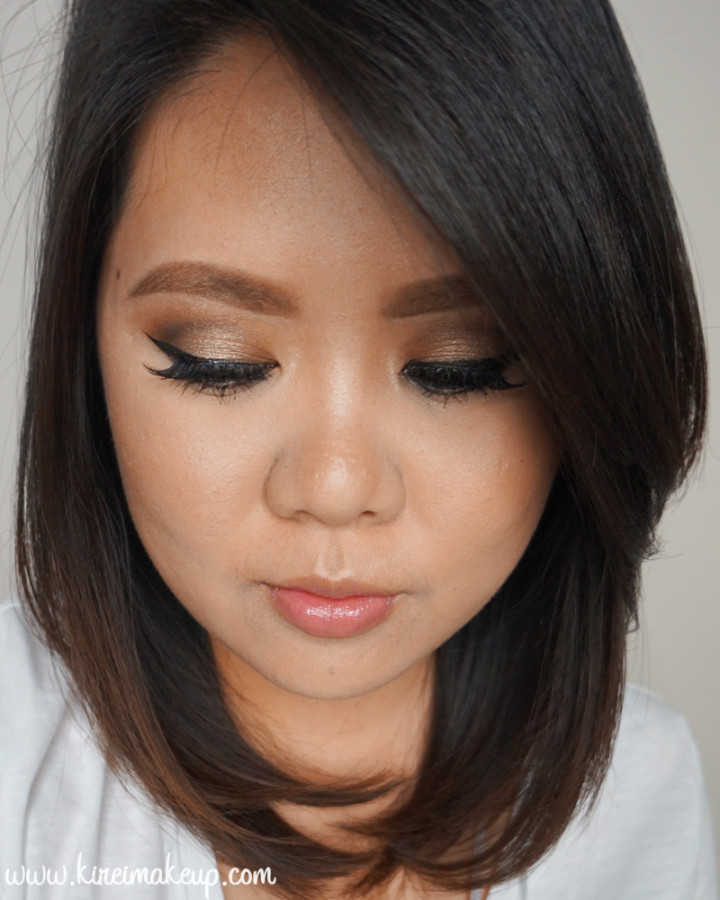
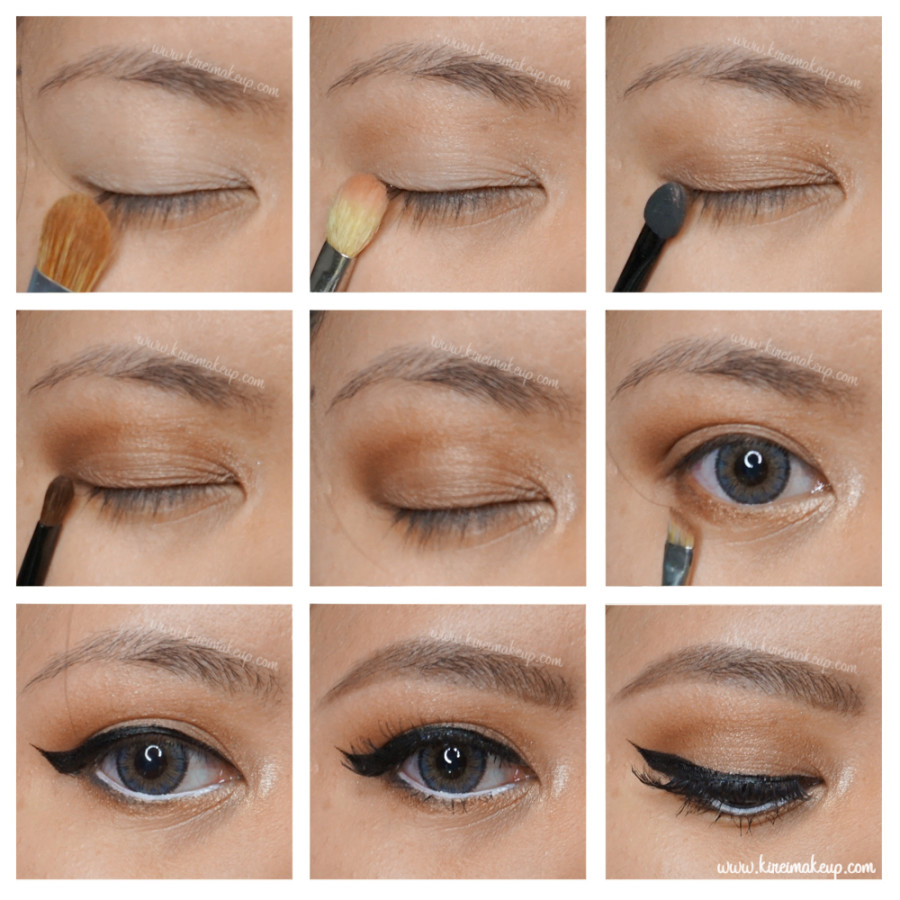
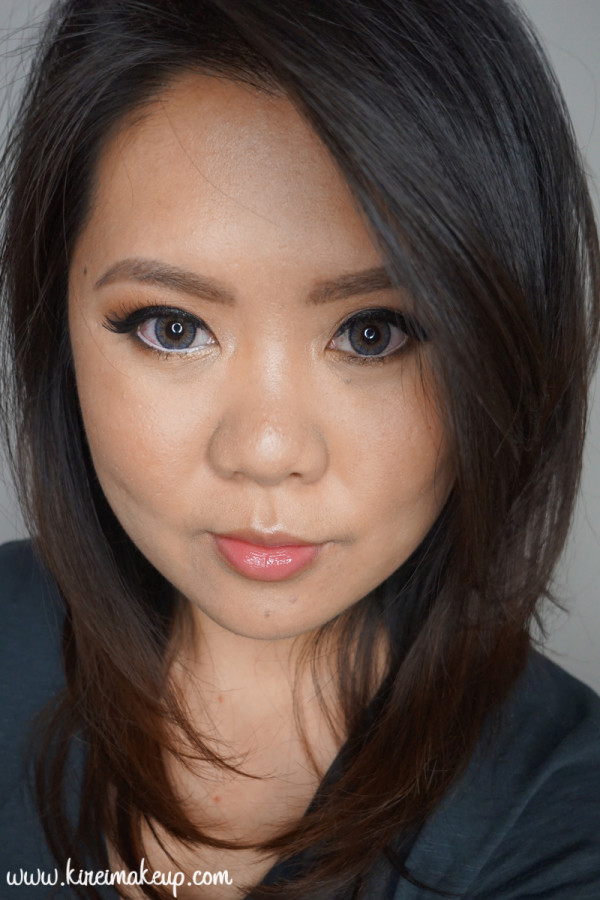
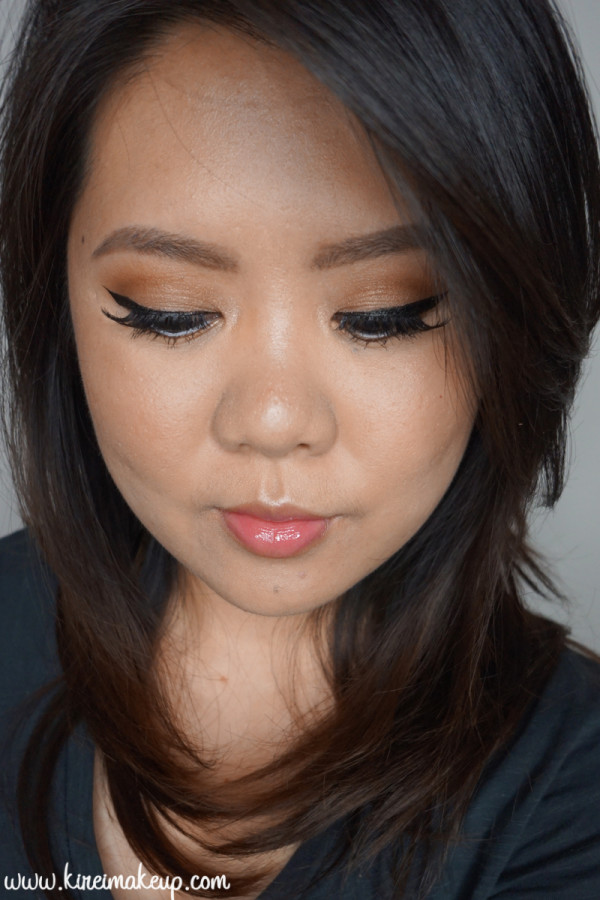
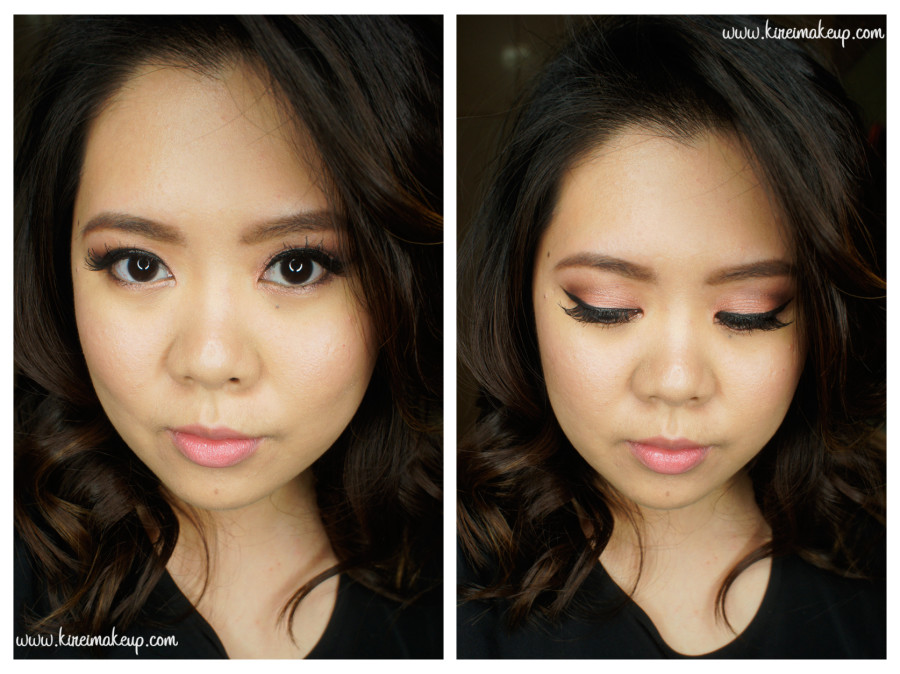
Today’s Big Dolly Eye Makeup tutorial is for those who’d like to make their eyes look enlarged and more doll-like! I think this type of makeup look is very popular in Asia, and I know personally in my home country, Indonesia, girls love this kind of look since it makes their eyes look bigger. For me, this look is already pretty heavy, and I would not wear this out for a day makeup. I’ll probably wear it if I go to party, but again, it’s up to your preference.

The key to this look is heavy eyeliner and lots of lashes. I could have done something a bit more extreme, and made it look even bigger, but I also wanted to make the look more wearable. If you want to make your eyes even bigger and more doll-like, feel free to substitute the black eyeliner on the waterline with a beige or white eyeliner. If you have monolids, you can use eyelid tape/glue/fiber to create a fold, it’ll help to open up the eyes more and make it look bigger.

Also, add more lashes, you can stack 2 lashes on the upper lashes and a bottom falsies. I don’t have bottom falsies, so I didn’t put any. The falsies I’m using is already thick and long, so I didn’t stack my falsies.

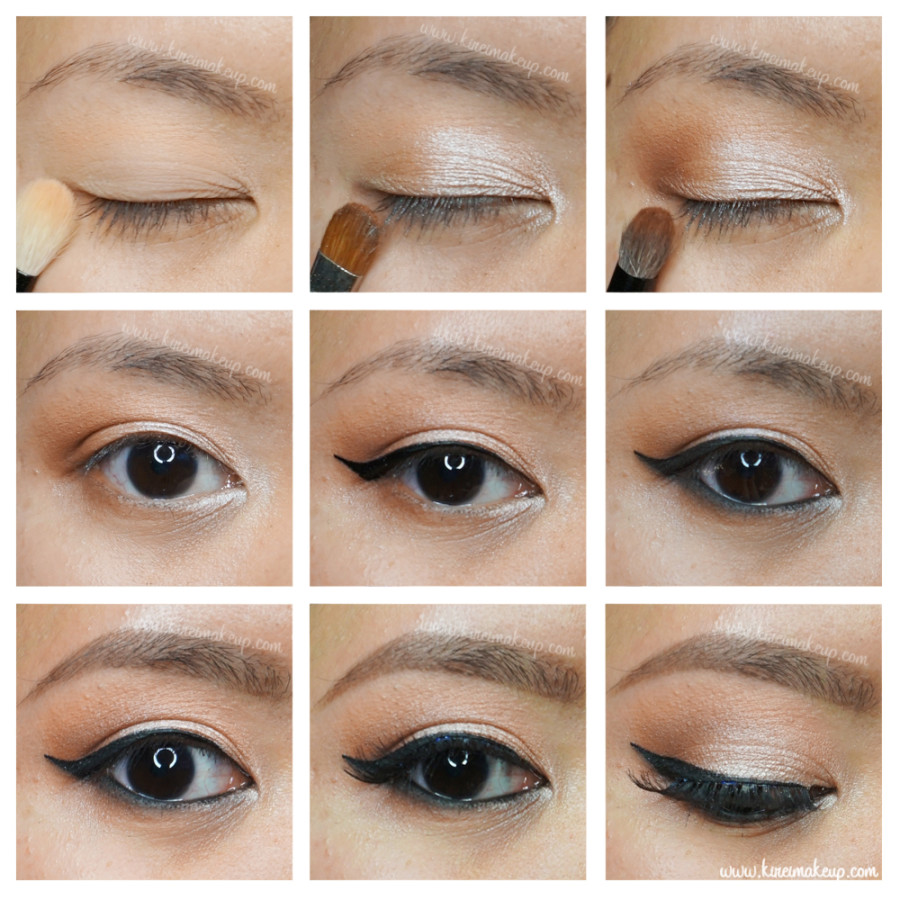
dior eye reviver tutorialI used my Dior Eye Reviver palette for this tutorial. I’ve used this palette on my other tutorial, so if you’d like to see the shades that correspond with the number I listed below, please check out my Summer Wedding Guest Makeup Tutorial post. I have a picture of the palette there with the shades’ numbers.

Products used

Eyes

  • Primer – Urban Decay Primer Potion “Original”
  • Base – Dior Eye Reviver palette “#1”
  • Transition – Dior Eye Reviver palette “#3”
  • Outer V/Crease – Dior Eye Reviver palette “#5”
  • Eyelid – Dior Eye Reviver palette “#2”
  • Outer half of lower lash line – Dior Eye Reviver palette “#5”; Kat Von D Eye Contour Shade + Light “Shax”
  • Inner half of lower lash line – Dior Eye Reviver palette “#4”
  • Winged liner – Kat Von D Tattoo Liner “Trooper”
  • Waterline (outer half only) – L’oreal Paris Voluminous Smoldering eyeliner
  • Falsies – Gwiyomi falsies “Putri”
  • Brows – Anastasia Brow Wiz Taupe; Kat Von D Tattoo Brown “Medium Brown”

ysl pop water glossy stain Eau de Corail

Face

Cheeks

  • Contour – Kat Von D Shade + Light “Shadowplay”
  • Blush – Chanel “Blush de Horizon”

Lips

  • Lipstain – YSL Pop Water Glossy Stain “203 (Eau de Corail)”

ysl pop water glossy stain 203

Summer Wedding Guest Makeup

Summer is the season for Wedding, and this Summer Wedding Guest Makeup look would be perfect for those beautiful outdoor wedding parties! It’s flirty and summery! I love coral lips for summer, it’s very youthful and less intimidating than red or orange lips. A fun look to wear! If you want to wear this as a daily makeup, just skip the falsies. This makeup is wearable and will look great on everyone.

The lip color for this look is the YSL Rouge Pur Couture 52, also known as Rosy Coral. This lipstick is popular in Asia, it was sold out everywhere in Indonesia! Apparently it was made popular by a Korean actress. Anyways, I can see why Asian women are obsessing over this lip color. You can wear it as a stain, or full on like me. The one thing with this lipstick I disliked is the fact that it’s quite drying on the lips. I have very dry lips, so I have to apply lip balm before and after I apply the lipstick.

Dior Eye Reviver palette

Also, I just grabbed the Dior Eye Reviver palette, and this is the first time I’m using it. I really like this palette, it has soft wearable shades. It’s so easy to blend and buttery. Not as heavily pigmented as some other brands, but gorgeous shades. It is too pretty to be passed on.

Dior Eye Reviver palette

Products used

Eyes

  • Primer – Urban Decay Primer Potion “Original”.
  • Base – Dior Eye Reviver Palette “1”.
  • Crease/Lower lid – Dior Eye Reviver Palette “4”.
  • Eyelid – Dior Eye Reviver Palette “3”.
  • Tear Duct – Dior Eye Reviver Palette “2”.
  • Outer V – Dior Eye Reviver Palette “5”.
  • Waterline – MAC Chromagraphic pencil liner “NC15/NW20”.
  • Winged liner/lower lash line – Dior Eye Reviver Palette “6”.
  • Brows – Anastasia Beverly Hills Brow Wiz “Taupe” + “Medium Brown”.
  • Mascara – Cover Girl “Lash Blast” mascara.
  • Falsies – Gwiyomi Boutique “no. 3” falsies

Dior Eye Reviver palette

Face

  • Primer – Kat Von D “Lock-it Featherweight Primer”.
  • Foundation – Bare Minerals “bareSkin Pure Brightening Serum”. (PS: don’t expect me to do a review on this foundation because I’ve returned it)
  • Under Eye Concealer – NARS Radiant Creamy concealer “Custard”.
  • Blemish Concealer – MAC Studio Finish concealer “NC30”.
  • Setting Powder – CoverFX translucent setting powder “Light”.

Cheeks

Lips

  • Lipstick – YSL Rouge Pur Couture “52 (Rosy Coral)”.

Summer wedding guest makeup

50s Inspired Makeup

This 50s inspired makeup is a modern take of the old Hollywood glam. It’s still pretty glamorous due to the falsies and eyeshadows, which make it suitable for wedding guests, and even brides! You can draw a thicker winged eyeliner if you have bigger eyes, but I kept mine pretty thin.

I wanted the focus to still be on the lips, since I think this Shu Uemura Diva Red lipstick is the perfect red lipstick for summer. It has an orange undertone, and it will look great especially on East Asian skintones.

I’ve done a more neutral eyes if you prefer non-winged liner look. Please take a look at my Kat Von D Shade + Light eye contour tutorial for a more neutral non-liner eyes.

natural eyes

Products used

Eyes

  • Primer – Urban Decay Primer Potion “Original”
  • Eyelid – Make Up For Ever Aqua Cream no. 13 “Warm Beige”
  • Transition – Makeup Geek Cosmetics “Peach Smoothie”
  • Crease/lower lid – L’oreal “La Palette Nude no. 6”
  • Winged liner – Kat Von D Tattoo Ink Eyeliner “Trooper”
  • Waterline – MAC Chromagraphic eyeliner “NC25”
  • Mascara – Maybelline Great Lash mascara
  • Falsies – Ardell false lashes #120 “Demi”
  • Eyebrows – Anastasia Beverly Hills Brow Wiz “Taupe” + “Medium Brown”

50s inspired makeup tutorial

Face

  • Foundation – MAC Pro Longwear Waterproof foundation “NC25”
  • Corrector – Bobbi Brown Corrector “Peach”
  • Concealer – MAC Pro Longwear Concealer “NC25”
  • Powder – MAC Mineralized Skinfinish “Medium Plus”

Cheeks

Lips

50s inspired makeup tutorial

L’oreal Sahara Treasure

When I went to buy the L’oreal La Palette Nude 1, my eyes caught the attention of the L’oreal Sahara Treasure infallible eyeshadow. I’ve quite a collection of the La Couleur Infallible eyeshadows, so this was a great addition to my collection! Absolutely love the color, it’s a beautiful old gold shade with a creamy texture. So easy to blend, and what a great pigment pay-off!

Anyways, I decided to do a warm “halo” smokey eyes with this look. It wasn’t a great day for me to do a tutorial, I made so many mistakes at first. I also, should have used my Anastasia Brow Wiz on the brows, but no, instead I tried to be all “experimental-y” and used the brow pomade. I’m still having difficulties using the brow pomade, thus brows not on fleek for this post. So upset!

Oh, how do you guys like my new hair cut? I posted it last week on Instagram! I went to get it cut at Studio136 in Locke St, Hamilton. My stylist is Amanda, and I think she did an amazing job! All I told her was to get rid of the bulky layers at the top, and chop it off to my collar bone. I’m still contemplating if I should color my hair this year or not. What do you think?

Loreal La Palette Nude

Products used

Eyes

  • Primer – Urban Decay Primer Potion “Original”
  • Base – MUFE Pro Finish “118”
  • Transition – L’oreal La Palette Nude 1 “#5”
  • Crease – L’oreal La Palette Nude 1 “#9”
  • Outer/Inner third (upper + lower) – L’oreal La Palette Nude “6”
  • Center lid (upper + lower) – L’oreal “Sahara Treasure” infallible eyeshadow
  • Outer crease/Lower lashline – Kat Von D Eye Contour Palette “Shax”
  • Winged liner – Kat Von D Tattoo Liner “Trooper”
  • Waterline – L’oreal Voluminous Smoldering eyeliner
  • Brows – Anastasia Beverly Hills Brow Pomade “Medium Brown”
  • Lashes – Gwiyomi Boutique falsies #3
  • Inner corner – The Balm Mary-Lou Manizer highlighter


smokey eyes for asian

Face

  • Primer – The Body Shop Drops of Youth “Wonderblur” Face primer
  • Foundation – MAC Pro Longwear foundation “NC25”
  • Concealer – MAC Pro Longwear concealer “NC25”
  • Under eyes Setting Powder – CoverFX translucent powder
  • Face setting powder – MUFE Pro Finish “118”

Cheeks

  • Contour powder – Smashbox “Contour” shade from the contour kit
  • Highlighter – The Balm “Mary-Lou Manizer”
  • Blush – Smashbox Halo Powder blush “In Bloom”

Lips

  • Lip color – L’oreal Color Riche Extraordinaire “Blushing Harmony”

loreal sahara treasure

L’oreal La Palette Nude 1 Tutorial #1

I was thrilled to see L’oreal La Palette Nude 1 in Wal-Mart near my home. I had known L’oreal released this palette from their Instagram account, but didn’t have the chance to get one earlier since I was busy. Last week, I was just browsing through the makeup department in Wal-Mart while I was running errand, and I was excited to see it on the shelf. There were only 3 palettes left, so I had to grab it before it was gone.

If you have followed me on Instagram, you’d have seen half of my nude palette collection I posted last week. My obsession with nude palettes begun when I was in makeup school, where I realized on almost every single makeup jobs I had to do or assist for, most clients asked for a neutral-based makeup look whether it’s simple clean makeup or smoky eyes.

The L’oreal La Palette Nude 1 is a pretty good palette, if you’re looking for an affordable nude palette. It has a great range of shades from your highlight, medium to contour shade. The only 1 thing that’s missing from this palette is a black eyeshadow. This palette reminds me a lot of the Urban Decay Naked 1 palette.

L'oreal La Palette Nude 1
L’oreal La Palette Nude 1

Since there’s no name of each individual shade, I’ve numbered them according to the way L’oreal numbered them. Please refer to the picture above as reference for the shades used in my pictorial below.

loreal la palette nude 1 look
L’oreal La Palette Nude 1 pictorial

Products used

Eyes

  • Primer – Urban Decay Primer Potion “Original”
  • Base – L’oreal La Palette Nude 1 “#1”
  • Transition – L’oreal La Palette Nude 1 “#3”
  • Eyelid – L’oreal La Palette Nude 1 “#4”
  • Crease/lower lid – L’oreal La Palette Nude 1 “#6”
  • Inner corner – L’oreal La Palette Nude 1 “#10”
  • Winged liner – Kat Von D Tattoo Ink Liner “Trooper”
  • Lower lash line – Kat Von D Shade + Light Eye Contour Palette “Shax”
  • Waterline – Annabelle Kohl Pencil liner “White”
  • Brows – Stila All Day Waterproof Brow “Medium”; Anastasia Brow Wiz “Medium Brown”; L’oreal Brow Stylist Plumper “Light to Medium”
  • Falsies – Gwiyomi Boutique no. 3 falsies
loreal nude palette 1
L’oreal La Palette Nude 1

Face

  • Primer – Body Shop Drops of Youth “Wonderblur” Face Primer
  • Foundation – L’oreal Infallible Pro Matte Foundation “#104”
  • Concealer – NARS Radiant Creamy concealer “Custard”
  • Setting Powder – Coverfx setting powder “Light”

Cheeks

  • Bronzer – MAC Mineralized Skinfinish “Medium Deep”
  • Blush – Smashbox Halo Powder Blush “In Bloom”

Lips

  • Lips – L’oreal Color Riche Extraordinaire “Blushing Harmony”
loreal la palette nude 1 tutorial
L’oreal La Palette Nude 1

2015 Prom Makeup Look

Happy Monday, everyone! Today I wanted to create a tutorial for 2015 Prom Makeup, and this look works for every eye colors, and dress colors! I think this color would look especially great for those with blue eyes. The warmth from Makeup Geek Cocoa Bear will bring out the blue even more.

This look would be great for any dress colors since I used neutral shades. Also, you can change this makeup according to what you like – if you prefer to make it less smoky, skip the eyeliner. If you want to wear it with a red lipstick, by all means pair it with a red lipstick. If you can’t create a winged liner yet, check out my winged liner tutorial, or skip it altogether and just create a basic eyeliner! Customize it according to what you prefer.

If you are in need of a makeup artist in Toronto or in Hamilton to do your prom makeup, I’m available! Please feel free to message me by filling out the contact form or email me at jilly@kireimakeup.com, or DM me on my Instagram page.

makeup geek foiled eyeshadow in the spotlight

Product used

Eyes


prom makeup tutorial

Face/cheeks

  • Primer – Kat Von D foundation primer
  • Foundation – Kat Von D Lock-it Tattoo foundation
  • Concealer – MAC Pro Longwear concealer “NC25”
  • Blush – L’oreal Visible Lift Blur bush “Soft Pink”
  • Setting powder – CoverFX translucent loose powder
  • Highlighter – The Balm “Mary-Lou Manizer”

Lips

  • Lip pencil – Urban Decay lip pencil “Naked 2”
  • Lip gloss – L’oreal Color Riche Extraordinaire “Blushing Harmony”

prom makeup 2015

Prom Makeup Tutorial

It seems that Prom season is around the corner, and I wanted to create a prom makeup tutorial for this post. Recently, I just purchased my first ELF product, which is the baked eyeshadow palette in NYC, and I’m pretty impressed with this palette. This palette cost around $15 at Winners in Canada (USD$10 on their website), so it’s pretty affordable for (graduating) students. The pigment pay-off is so-so when applied dry, but applied wet, the eyeshadows are quite pretty. The champagne shade in this palette is applied wet, and it has a beautiful shimmer.

Anyways, I didn’t have a full face picture from my camera since the battery went died, but I did take a picture using the iphone, which I posted on Instagram. The eyes are very shimmery and defined, but not too dark. I think it’s a very pretty look for prom!

elf baked eyeshadow palette

Products used

Eyes

  • Primer – Urban Decay Primer Potion “Original”
  • Transition shade – MAC “Orange” + Makeup Geek “Peach Smoothie”
  • Outer V (or C) – brown shade in ELF Baked Eyeshadow Studio palette “NYC” (applied dry)
  • Eyelid/Inner corner – champagne shade in ELF Baked Eyeshadow Studio palette “NYC” (applied wet)
  • Upper/lower lash line – black shade in ELF Baked Eyeshadow Studio palette “NYC” (appied dry)
  • Brows – Anastasia Beverly Hills Brow Wiz “Taupe” and “Brunette”
  • Falsies – Gwiyomi falsies #3

Face/Cheeks

  • Base – Kat Von D foundation primer
  • Foundation – Kat Von D Lock-it Tattoo foundation
  • Blush – MAC blush powder “Apricot”
  • Highlighter – Becca Shimmering Perfector in “Moonstone” and The Balm “Mary-Lou Manizer”
  • Powder – CoverFX translucent setting powder

Lips

  • Lip color – YSL Glossy Stain in Pêche Cerra-Cola

prom makeup look


Valentine’s Day Soft Makeup

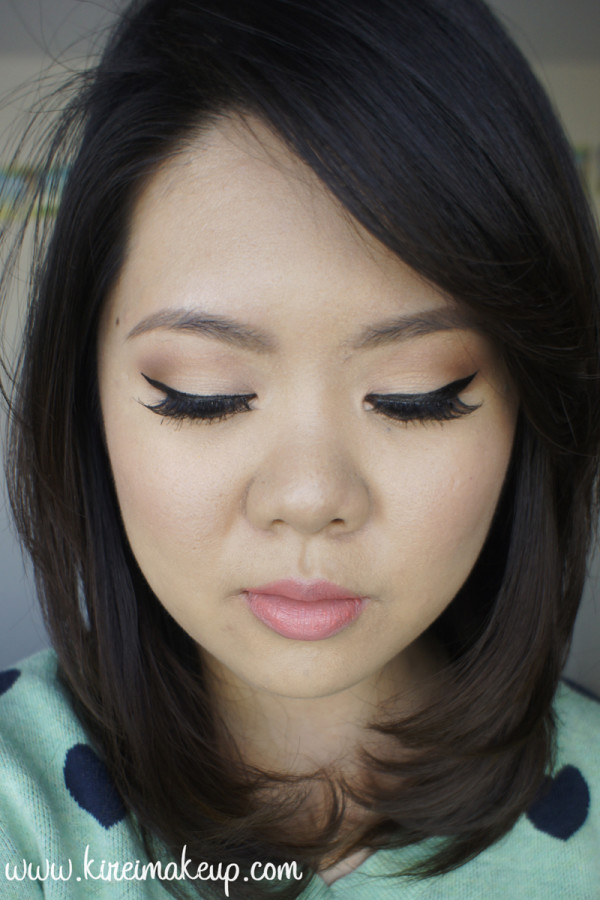
Valentine’s day is just around the corner, and here’s my Valentine’s Day Soft Makeup look! I used my brand new Smashbox Double Exposure Palette for this look, and couple other new products which I just recently bought. Don’t forget to check out my Instagram to see what else I got besides the palette!

Anyways, for this look, I wanted a soft subtle feminine makeup. The eyes are peachy plum, and defined using black liquid liner. I absolutely love how this turned out! I wore this look out for lunch, and I’m really happy with it. The look isn’t overdone at all, you still look like yourself but slightly better. There’s no bold colors, no overdrawn brows, just a nice pretty simple makeup.

Just FYI, I’m using daylight for my pictures since I don’t have my lights with me. Oh, you guys like my “heart” sweater? I thought I’d wore it for the tutorial since it’s a valentine’s day makeup post.

Check out my other Smashbox Full Exposure palette tutorials, and other Valentine’s day makeup posts!

valentine's day makeupAll products used are listed at the end of the page

How-to:

1. I prepped my eyelids using Urban Decay Primer potion.

2. I applied Fig on my crease using a blending brush (from Smashbox Full Exposure palette).

3. Using the flat eyeshadow brush from the Smashbox Double Exposure palette, I applied Quartz all over my eyelid.

4. I used the angled brush end from the Double Exposure palette, I applied Espresso on the outer V to deepen the crease.

5. I also applied Fig on the lower lash line using the angled brush. I applied Quartz on the inner half of the lower lid.

6. I lined the outer half of my waterline using L’oreal Voluminous Smoldering eyeliner. On my upper lash line, I created a winged liner using Kat Von D Trooper tattoo liner.

7. I curled my lashes, and applied Smashbox Full Exposure mascara on both upper and lower lashes.

8. I applied Gwiyomi False lashes no. 3 to open up my eyes.

9. I filled my brows using Anastasia Brow Wiz in Taupe.

10. On my face, I applied Becca Shimmering Perfector in Moonstone, then I applied Kat Von D Lock-It Tattoo foundation.

11. On my cheeks, I applied NARS Mata Hari blush.

12. I lined and filled my lips using MUFE Aqua lip pencil #18c.

smashbox double exposure palette tutorial

Products used

Eyes

  • Smashbox Double Exposure Palette (crease/lower lash line: Fig, lid/inner corner: Quartz, outer V: Espresso)
  • L’oreal Voluminous Smoldering eyeliner (waterliner)
  • Kat Von D Trooper tattoo liner (winged liner)
  • Smashbox Full Exposure mascara (upper and lower lashes)
  • Gwiyomi False lashes #3
  • Anastasia Beverly Hills Brow Wiz in Taupe

Face

  • Becca Shimmering Skin Perfector in Moonstone (base)
  • Kat Von D Lock-It Tattoo Foundation (foundation)

Cheeks

  • NARS Matahari

Lips

  • Make Up For Ever aqua lip pencil #18C

smashbox double exposure tutorial


Soft Romantic Makeup (Revisited)

I’ve done a lot of UD Naked 3 makeup tutorials, and though most of them are smoky eyes, I do have a few non-smoky eyes tutorials. I was looking back on those tutorials, and I’ve decided to revisit this Soft Romantic Makeup post. I actually liked how I did my makeup in that post, but I felt that I wanted to redo it, and added more intensity to the shadows. Which one do you prefer? This tutorial or the original one? Let me know on the comments below!

I’d also like to mention that I’ve changed the way I filled my brows for this tutorial – it’s thicker, and more natural looking. I think I prefer this brow, even though it might look “less polished” than the “carved out” brows (aka concealer on top and bottom of my brows), I do like how it looks more organic. What do you guys think?

I apologize if the photos are slightly too warm, I didn’t realize my camera’s white balance setting was on the “warming filter” option. I tried to neutralize it using photoshop, but this is all I can do for now (besides trying to neutralize the yellow shade, I did not do anything else – no airbrushing whatsoever). I’ll be more careful next time.

*Check out my other UD NAKED 3 TUTORIALS*

soft smokey eyes tutorial

How-to:

1. I applied MAC Perky paint pot all over my (mobile) eyelid using my ring finger.

2. Using a small blending brush, I applied UD Naked 3 Darkside on the outer V.

3. Using the blending brush that came with the palette, I applied Nooner on the crease. I used this shade to blend out the edge of Darkside.

4. I applied Trick on the eyelid, using the flat eyeshadow brush that came with the palette.

5. Using a small shader brush, I applied Burnout on the inner corner of the lower lid, and Darkside on the outer half.

6. I, very lightly, applied a teeeensy bit of Blackheart right on the roots of the lower lashes (just the outer half).

7. I lined my waterline using MAC Chromagraphic eyeliner in NW25/NC30. Along the upper lash line, I created a winged liner using L’oreal 24H Lacquer Liner and an angled eyeliner brush.

8. I filled my brows using Anastasia Brow Wiz in Taupe and Brunette.

9. Curled my lashes, and applied Gwiyomi False lashes no. 3.

ud naked 3 soft smoky tutorial

10. I applied Benefit Porefessional primer all over my face.

11. While letting the primer set, I applied Bobbi Brown Peach Corrector underneath my eyes (my dark circles are getting prominent lately!)

11. Then, I applied MUFE HD Foundation in 120 using Real Technique Expert Face brush.

12. I applied MAC Pro Longwear Concealer under my eyes, as well as on the bridge of my nose (just between the brows).

13. I also applied L’oreal Visible Lift blush in Rose Gold on my cheeks.

14. I set my face using NARS Setting Powder.

15. On my lips, I applied MAC Please Me lipstick and a few dabs of clear gloss.


Products used

Eyes – MAC Perky paint pot; Urban Decay Naked 3 palette (eyelid: Trick, outer V/lower lashline: Darkside, inner corner of lower lid: Burnout; roots of lashes: Blackheart); MAC Chromagraphic liner NW25/NC30; L’oreal 24H Lacquer Liner in Blackest Black; Anastasia Beverly Hills Brow Wiz in Taupe and Brunette; Gwiyomi False lashes no. 3

Face – Benefit Porefessional primer; MUFE HD Foundation in 120; Bobbi Brown Peach Corrector; MAC Pro Longwear concealer; NARS Setting Powder.

Cheeks – L’oreal Visible Lift Blush in Rose Gold.

Lips – MAC Please Me lipstick; L’occitane clear lip balm.